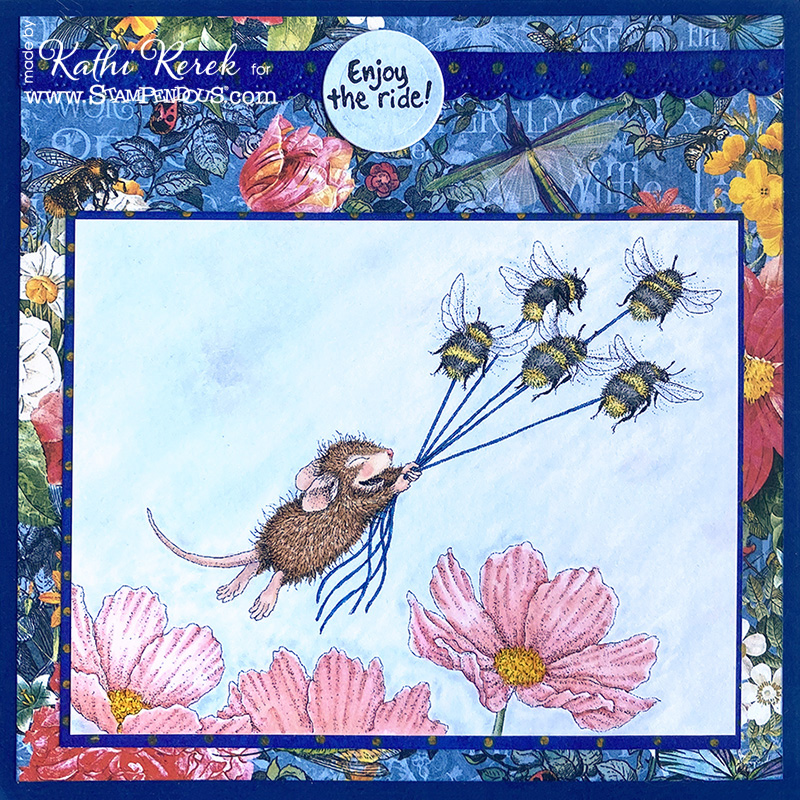
Hi there! It's 81° today and incredibly windy, so I figured that I should share a card with spring flowers. I thought that the wind might be assisting the bee in this card featuring Stampendous!' Bumble Bee Fun House-Mouse Designs® Rubber Stamp.
Stampendous!® Products Used:
Bumble Bee Fun House-Mouse Designs® Rubber Stamp
Bumble Bee Fun House-Mouse Designs® Rubber Stamp
Other Products Used:
Copic® Markers:
Mouse Skin: BV0000, BV000, E50, E51, R000, R01, R20
Mouse Fur: E31, E33, E35, E44
Mouse Nose: R21, R22
Bee Bodies: N1, N2, Ne, N4, Y11, Y13, Y26
Bee Wings: B60, C0
Flowers: R0000, R30, R32, RV000, RV10, Y04, Y19, Y35, Y38
12 x 12 Blue Cardstock
Flutter 8x8 Patterned Paper Pad by Graphic 45®
Blueberry Very Vintage Double Dot Designs by BoBunny Press®
Jewel Tones Pearlescent Chalks by Pebbles Inc.
Instructions:
- Cut a piece of blue cardstock in half. Score one piece at 6" and fold to form a 6" square card.
- Use Tuxedo Black Memento ink to stamp the image onto Mixed Media White paper.
- Color with Copic markers.
- When you're sure that you're done using markers, add the sky background using chalks. Do NOT go back and touch up the image. The chalks will contaminate your markers.
- Trim the image panel and mat with Blueberry Very Vintage Double Dot paper cut .25" larger than the image panel. Edge a dark marker to get rid of those unsightly white edges.
- Trim the floral patterned paper from the Flutter pad to 5.75" square and edge with the same marker to create the card front.
- Apply the same blue chalk to a small piece of white cardstock.
- Use Onyx Black VersaFine ink to stamp the sentiment.
- Use a circle die to cut the sentiment.
- Use a border die from the Spring Borders Die Cutting Set to cut Blueberry Very Vintage Double Dot paper. Edge with the same marker from steps #6 and #7.
- Adhere the image panel, the border, and the sentiment to the card front.
- Adhere the card front to the blue 6" square card.
Thanks for visiting today!
No comments:
Post a Comment