Showing posts with label Paper Artsy. Show all posts

Wednesday, March 19, 2025

Walk This Way

Greetings! "Anything Goes" is our theme this week at Topflight Stamps. I took my inspiration from two of the kooky birds and the "Walk this way" sentiment from the Kate Crane 009 Rubber Cling Rubber Stamp Set by PaperArtsy, which made think of the song by Run DMC/Aerosmith and the Ministry of Silly Walks Skit by Monty Python.

Here's my slimline card.


Topflight Stamps Products Used:

Other Products Used:
Solar White Classic Crest Cardstock by Neenah Papers
Raven (Black) Textured Cardstock by Bazzill Basics
Copic Markers: 
 Birds' Plumage and Crowns: Y38,Y18,Y17, Y15, V09, V06, BG49 BG45, R35
 Birds' Beaks: V95, V91, BG96, BG93
 Outlines: V50, N2, N1
Tranquil, Twilight, and Pebble Dye Inkpads by Catherine Pooler Designs
White Gelly Roll Gel Pen by Sakura
Anti-Static Pouch
VersaMark Ink by Imagine Crafts/Tsukineko
White Detail Embossing Powder by Stampendous
Flag Dies: Source Unknown
Low-tack Tape
Repositionable Sticker Paper by Avery
STAY-tion by Wendy Vecchi for Ranger Ink
Glassboard by Glassboard Studios
Large Stamping Platform

Instructions:
  1. Cut a piece of black cardstock to 8.5" x 7", score at 3.5", and fold to form a slimline card. Set aside.
  2. Use magnets to secure a 9" x 4" panel of white cardstock to the base of a large stamping platform. 
  3. Place the crowned walking bird stamp from the Kate Crane 009 Rubber Cling Rubber Stamp Set facedown on the platform so that  his outstetched foot is at the 8.5" mark on the platform and his grounded foot is about .5" from the base of the platform. 
  4. Ink the stamp with Tuxedo Black Memento Ink and stamp. 
  5. Keeping the cardstock flush against the base of the platform, slide the panel ~2.125" to the right and secure the panel in place with magnets. 
  6. Ink the stamp again with Tuxedo Black Memento Ink and stamp. 
  7. Repeat Steps 5 and 6. Stamp the bird a third time. 
  8. Remove the panel from the stamping platform.
  9. Stamp the bird another three times onto repositionable sticker paper, fussy-cut the birds, and set them aside.
  10. Use Copic Markers to color the three birds. 
  11. Use a B60 Copic marker to add outlines around the top part of the birds.
  12. Use N2 and N1 Copic markers to outline the birds feet and add shadows.
  13. Use a white gel pen to add highlights to the birds' eyes.
  14. Place the fussy-cut sticker paper birds atop their counterparts as masks. 
  15. Add a piece of repositionable tape across the bottom of the image panel. 
  16. Sponge or brush light Tranquil dye ink over the masked images and tape to add a background color to the image panel. 
  17. Move the repositionable tape so that its bottom edge is on the blue line and the tape is covering the bottom part of the image panel. 
  18. Sponge or brush Twilight dye ink over the tape onto the masked images to ground the image.
  19. Sponge or brush the lighter Pebble dye ink over the darker grey until the bottom part of the panel is covered.
  20. "Do as I write, not as I did" and keep the masks over the images. 
  21. Using Tranquil dye ink, randomly stamp notes from the Music Notes Small Clear Polymer Stamp Set onto the image panel until you're happy(ish).
  22. Lift the masks and trim the image panel to 8.25" x 3.25". 
  23. Use Tranquil dye ink to edge the panel.
  24. Pounce an anti-static pouch onto black cardstock. 
  25. Use embossing ink to stamp the "walk this way" sentiment two times onto black cardstock. 
  26. Add white detail embossing powder, dump the excess back into the container, and heat set the sentiments. 
  27. Use small rectangle or flag dies to cut the sentiment. Trim the sentiment die-cuts to remove the flags.
  28. Adhere the image panel to a slimline black card. 
  29. Adhere the sentiment die-cuts to finish the card. 
Thank you for visiting today!

Tuesday, October 10, 2023

creepy, kooky, mysterious, and spooky mixed media tag

It's Tuesday which means it's time to share a project created for Topflight Stamps. This week my teammates and I are showcasing Fresco Finish Chalk Acrylic Paints by PaperArtsy. If you're not familiar with these paints, I urge you to try them as they are fabulous. There is a wide variety of colors, that blend beautifully, and the chalk finish gives you a great surface for stamping! Since it's Halloween season and since I live in the town next to where Charles Addams lived, I had to have the Eclectica ENB19 Cling Rubber Stamp Set by Nicci Battilana since it features characters from the Addams Family and have used it to create this mixed media tag.


Topflight Stamps Products Used:

Other Products Used:
Solar White Classic Crest Cardstock by Neenah Papers
Bristol Paper by Strathmore
Vellum by Strathmore
Medium Etcetera Tag by Tim Holtz for Stampers Anonymous
Gesso
Cut 'n' Dry Foam Inkssentials by Ranger Ink
Spiky Paint Brush
Tuxedo Black Memento Ink by Imagine Crafts/Tsukineko
Jet Black StazOn Ink by Imagine Crafts/Tsukineko
Circles Nestabilities Die Set by Spellbinders
Copic Markers:
Skin: B000, E40, E21, E11, E00, R000
Lips: E04, RV42
Eyes: E71, E74, E77
Hair: BV23, BV25, BV29, N4, N5, N6
Scar: R02, R17
Bats: E70, E71, E74, E7y, RV42, RV91, RV92, Y35
Dress: Shoes, Hose: V15, V17, BV08, C2, C4, C6, C8
Black Multi-Liner Pen by Copic
Grass Green and Black Chalk Pencils by General's
Colored Pencils by Prismacolor
Pearlescent White Pan Pastels
Halloween Remmant Rubs by Tim Holtz Idea-ology by Advantus
Occasions Small Talk Stickers by Tim Holtz Idea-ology by Advantus
Black Star Mini Brads: Source Unknown
Sookwang Double Sided Tape
Low Tack Tape
Stamping Platform

Instructions:
  1. Apply a coat of gesso to the tag. 
  2. Make  a mask from low tack tape and use it to cover the bottom part of the tag*. 
  3. Add drops of Baltic BluePea CoatChinaLavender, and Amethyst  Fresco Finish Chalk Acrylic Paints , all of which are opaque, to a piece of Cut 'n' Dry foam. 
  4. Smoosh the paint onto a craft mat to blend the drops, then apply the paint the top part of the tag. 
  5. When the paint is dry*, add drops of BlueberryEggplant, and Southern Skies Fresco Finish Chalk Acrylic Paints, which are translucent or semi-opaque,  to another piece of Cut 'n' Dry foam, 
  6. Smoosh the paint onto the craft mat to blend the drops, then apply to add more variegated blues and purples to the night sky.
  7. Create another mask from low tack tape to cover the night sky.*
  8. Add drops of Lawn and Gumboots Fresco Finish Chalk Acrylic Paints to another piece of foam, smoosh it onto the craft mat, then apply the paint over the mask to create a lawn.
  9. Use a spiky paint brush and Gumboots Fresco Finish Chalk Acrylic Paint to add depth and detail to the lawn.
  10. Add drops of ChalkBuff, and Stone  Fresco Finish Chalk Acrylic Paints  to another piece of foam, smoosh the paint onto the craft mat, then apply it to a piece of Bristol paper. 
  11. Secure the piece of painted paper to the base of a stamping platform.
  12. Position the tombstone from  Eclectica ENB02 Cling Rubber Stamp Set by Nicci Battilana  facedown on the painted paper. 
  13. Press the back of the platform's lid onto the stamp, lift, ink the stap with Nocturne VersaFine Clair Ink by Imagine Crafts/Tsukineko, and stamp onto the painted paper.
  14. Flip the painted paper so that the plain side is showing. 
  15. Ink the stamp and stamp the back of the painted paper twice. 
  16. Fussy-cut the tombstone stamped onto the painted paper.
  17. Fussy-cut the other two tombstones with rounded tops.
  18. Edge all three tombstones with a black pen. 
  19. Add details, such as cracks and shading to the tombstones.
  20. Add "RIP" and the dearly departeds' names onto the tombstones using Remnant Rubs.
  21. Use Sookwang tape to back a strip of vellum.
  22. Use Jet Black Staz-On Ink to stamp the ghosts from the Eclectica ENB02 Cling Rubber Stamp Set by Nicci Battilana onto the vellum.
  23. Fussy-cut the ghosts.
  24. Use Morning Mist VersaFine Clair Ink to stamp the moon from the Eclectica Scrapcosy 24 Cling Rubber Stamp Set by ScrapCos onto white cardstock.
  25. Cut the moon with a circle cutting die and edge with Morning Mist VersaFine Clair Ink.
  26. Use Tuxedo Black Memento Ink to stamp Wednesday, Thing, the dress, arms, hands, and the bat from the Eclectica ENB19 Cling Rubber Stamp Set by Nicci Battilana onto white cardstock. 
  27. Fussy-cut all the elements.
  28. Color all elements with Copic markers, then edge them with a black pen. 
  29. Use a stabby-tool to poke holes where indicated on the paper doll's parts. 
  30. Use one of the masks from the Acetate Circles Mask Set as a guide to add a halo of white pearlescent Pan Pastel to the night sky. Spread it outwards with your fingers.
  31. Adhere the moon over the pearlescent white halo.
  32. Adhere the bats as shown.
  33. Adhere vellum ghosts, the tombstones, and Thing were adhered to the tag. 
  34. Assemble Wednesday using tiny star brads then adhere her body, leaving her arms free from adhesive so that they can be moved.
  35. Use green and black chalk pencils to ground the elements on the lawn and to add detail as well. 
  36. Adhere the sentiment sticker to complete the tag.

Notes:
  • You usually don't have to use gesso with the Fresco Finish Chalk Acrylic Paints, but I didn't want to risk ruining the tag.
  • Fresco Finish Chalk Acrylic Paints dry really quickly so there's no need to heat set. Unless you're neurotic. Like me.
  • Fresco Finish Chalk Acrylic Paints' labels tell you whether the paint is opaque, semi-opaque, or translucent. The different opacities allow you to layer and build color.
  • Overlap strips of low-tack tape onto a cutting mat. Use an exacto knife to cut a curved top, then adhere the strips of tape as a mask, wrapping the ends around the tag.
Thanks for visiting today!


Friday, February 24, 2023

Quote Wall Hanging Tutorial

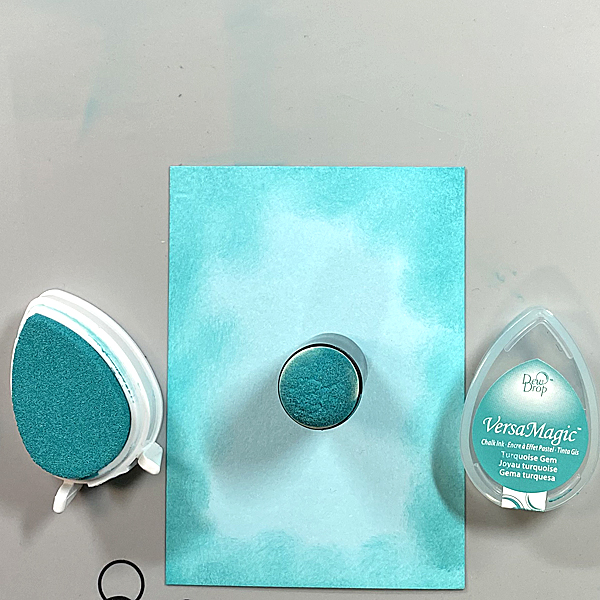
I've created an inspiration quote wall hanging for Imagine Crafts. with Nocturne VersaFine Clair Ink, Golden Glitz Delicata Ink, Sea Breeze, Turquoise Gem VersaMagic Ink, and the quote from the Ink and the Dog Mini 109 Cling Rubber Stamp by PaperArtsy. This quote really resonates with me and having it hanging in my craft room will serve as a daily reminder of the things that truly matter.

Here it is:


Imagine Crafts Products Used:

Other Products Used:
Black Chipboard
White Mixed Media Cardstock by Strathmore
Bigz Tags Crea-Nest-Lies XXL 6 Die Set by Crealies
Stitched Slimline Die Set by Creekbank Creations
Small Stitched Envelope Die Set by Lawn Fawn
Celestial Navigation Clear Stamp 398 by Olga Heldwein for AALL and Create
Alchemy Symbols Stencil by Stamperia
Harvest Moon Clear Stamp Set by Pink Ink Designs
Mini Stars Clear Stamps by Lavinia Stamp
Removable Scotch Tape by 3M
Post-It Notes by 3M
Ribbon from my stash
Eyelets, Eyelet Setter by Making Memories
Big Shot by Sizzix
Stamping Platform by Tonic Studios
Heat Tool by EK Success

Instructions:


Step 1:

Use a Stitched Slimline Die and a Big Tags cutting dies to cut black cardstock for the panels.


Step 2:

Position the moon and sun from the Alchemy Mixed Media Stencil on the top of the large rectangular die-cut. Use removable Scotch Tape to secure the stencil to the back of stencil. Cover the openings around the sun and moon with Post-It Notes. Use a Sponge Dauber to apply Golden Glitz Delicata Ink over the stencil onto the die-cut. Heat set.


Step 3:

Use magnets to secure the image panel horizontally along the base of a stamping platform. Position the clock from the ATC Coins Clear Stamp Set 6 facedown on the the panel, so that 12:00 is centered and facing the top of the panel.


Step 4:

Ink the clock with Golden Glitz Delicata ink and stamp the clock along the bottom of the tag. Heat set to bring out the lustre.


Step 5: 

Position the compass from the Small Elements Stamp Set 2 facedown inside the circular opening of the clock with the “N” of North at 12:00.


Step 6:

Use Nocturne VersaFine Clair ink to stamp the small compass into the center of the clock image. Cover the stamped image with Clear MBoss embossing powder and melt the powder with a heat tool. Oops! I forgot to take a photo of the embossing powder covered stamped compass.


Step 7:

Use Turquoise Gem VersaMagic ink to stamp the swirls and stars from the Harvest Moon Clear Stamp Set and the stars from the Mini Stars Clear Stamp Set around the perimeter of the die-cut. Repeat using Sea Breeze VersaMagic ink. Heat set.


Step 8:

Edge the panel with Golden Glitz Delicata ink by sliding each edge of the piece along the side of the ink pad which creates a strong golden edge. Heat set.


Step 9:

Use repositionable adhesive to secure the black tag die-cut to a piece of scrap paper, then use magnets to secure them to the base of the stamping platform.


Position the Celestial Navigation Clear Stamp 398 and stamp with Nocturne VersaFine Clair.


Step 10:

Cover the stamped image with MBoss. Melt the powder with the heat tool.


Step 11:

Use Golden Glitz Delicata Ink to edge the tag.


Step 12: 

Using an Ink Sweeper, apply Sea Breeze VersaMagic to a piece of mixed media paper.


Step 13:

Use a Sponge Dauber to apply Turquoise Gem VersaMagic around the edges of the paper, then blend using the Ink Sweeper and Sea Breeze VersaMagic. Heat set.


Step 14:

Secure the inked panel to the base of the stamping platform. Position the Ink and the Dog Mini Cling Stamp 109 stamp and stamp with with Nocturne VersaFine Clair. Heat set.


Step 15: 

Use the shaped die from the Small Stitched Envelope die set to cut the sentiment panel.


Step 16:

Cut a piece of black chipboard to 3.5" x 9". Punch holes in the top, insert eyelets, and thread ribbon.


Step 17:

Use Tear It! Tape to adhere the rectangular panel to the chipboard.


Step 18:

Use Tear It! Tape to adhere the stamped and embossed tag.


Step 19: 

Use Tear It! Tape to adhere the quote die-cut.


Please Note: Topflight Stamps carries VersaFine Clair inks, plus the stamps and stencils I used on this project.


Thank you for visiting today!