Tuesday, December 29, 2020

Happy New Year!

 It's Tuesday, which means it's time to share a project created for Topflight Stamps. I don't know about you, but I'm very excited to see 2020 in hindsight. The idea for this card came to me all of a sudden. It's such an obvious idea that I don't know if I've seen this idea before, but if I did, thank you to whoever created the card. I hope I put my own spin on it though. 

Here's my card.


Topflight Stamps Products Used:
Classic Sentiments Clear Stamp Set by Heffy Doodle
Distressed Brick 6x6 Stencil by Paper Rose
Onyx Black VersaFine™ Ink by Tsukineko®
Red Chili Prism Ink by Hunkydory Crafts

Other Products Used:
Solar White Classic Crest® Cardstock by Neenah Papers
White Speckled Navy Cardstock: Source Unknown
Grey, Teal-ish, and White Cardstock by Bazzill Basics Paper®
Tuxedo Black Memento™ Ink by Tsukineko®
Fired Brick, Rusty Hinge, and Black Soot Distress® Inks by Tim Holtz® for Ranger Ink
Black Prismacolor Premier® Colored Pencil
Citrus Cleaner
Yellow, Orange, and Black Multi Pastel® Chalk Pencil by General's®
Copic® Markers:
   Robot: T1, T2, T3, T4, T5, T7, T8, Y21, Y23, Y26, Y28, B000, BG10, BG72, BG75, C0, C1, YR15, YR18, Y13, Y19
   Garbage Bin: C0, C1, C2, C3, C4, C6
Clear Glaze® 3D Glossy Gel Pen by Sakura® of America
Flame Dies: Source unknown (oops)
Alphanumeric Thinlits™ Tim Holtz® Alterations by Sizzix®
Stamping Platform
STAY-tion by Wendy Vecchi for Ranger Ink

Instructions:
  1. Use Tuxedo Black Memento ink to stamp the Garbage Can and one of the robots from Robots 1 Unmounted Red Rubber Set onto white cardstock. 
  2. Fussy-cut the robot and the trash bin. 
  3. Fussy-cut the the lid from the trash bin to create an open receptacle.
  4. Color the images with Copic markers and edge with dark marker. 
  5. Apply several layers of clear Glaze pento the light bulbs, the goggle's visor, and the rivets on the robot. 
  6. Set aside the trash bin and robot while the background is being created.
  7. Place the  Distressed Brick 6x6 Stencil over grey cardstock and secure with magnets to the STAY-tion.
  8. Brush Fired Brick Distress Inks over the stencil onto the grey cardstock. 
  9. Brush Rusty Hinge Distress Ink over the grey cardstock.
  10. Lift the stencil and remove the panel from the STAY-tion. Or not.
  11. Use black pencil to loosely outline the bricks and to add detail to the mortar, then blend with a stump dipped into Citrus cleaner.
  12. Use black chalk pencil to add more detail to the mortar and to dirty the bricks some more.
  13. Use the black chalk pencil to add the sidewalk to the base of the image panel. 
  14. Adhere a strip of plain grey cardstock to the top of the brick to finish the wall.
  15. Use Onyx Black VersaFine Ink to stamp the same robot onto the stenciled brick.
  16. Use the yellow and orange Chalk pencils around the robot's lightbulbs on the stenciled brick.
  17. Adhere the brick wall to navy cardstock, trim to 4.75" x 6.75", and edge with Black Soot Distress ink.
  18. Use the Alphanumeric dies to cut teal-ish cardstock and lightly brush them with Black Soot Distress ink.
  19. Brush white cardstock with Canary Yellow, Red Chili, and Fire Coral Prism Inks then cut with four different flame dies. Lightly brush Black Soot Distress ink over the flames.
  20. Adhere the numbers behind the top of the trash bin.
  21. Adhere the flames behind the numbers on the top of the trash can,
  22. Adhere the flaming trash bin to the image panel. 
  23. Adhere the robot was adhered over the his counterpart on the brick background.
  24. Use Onyx Black VersaFine ink to stamp "Happy New Year" from my beloved Classic Sentiments Clear Stamp Set
  25. Cut the sentiment with a flag cutting die and adhere the sentiment as shown.
  26. Adhere the image panel to a white card.
Thanks for visiting today!

Monday, December 28, 2020

A Gift For You!

Here's another Gift Card Wallet Card using Stampendous!' Gift Card Wallet Die Set and the Winged Cup Perfectly Clear Stamp® Set to decorate the wallet!


Stampendous!® Products Used:

Other Products Used:
Blue and pink cardstock by Bazzill Basics Paper®
Copic® Markers:B21, B23, B28, R81, E81, E42, E44, YG03, YG05
Summer Sky Memento™ Ink by Tsukineko®
Gingham-Linen Petite Prints Patterned Paper 6x6 Pad by Doodlebug Designs, Inc.™


Instructions:
  1. Use the Gift Card Die to cut the blue cardstock.
  2. Fold the Gift Card along the score lines and temporarily adhere the back (not the flap side) to a larger piece of scrap paper.
  3. Use Tuxedo Black Memento ink to stamp the birds onto Mixed Media paper.
  4. Use the small rounded rectangle die to cut the image panel.
  5. Color the image and the background with Copic markers. 
  6. Cut a piece of white cardstock slightly larger than the image panel and use to mat the image panel.
  7. Adhere the matted image panel to the front of the gift card envelope.
  8.  Cut the pink gingham patterned paper using the rounded rectangle and the wavy gift card holder dies.
  9. Use the notches die to cut the wavy gift card holder gingham die-cut.
  10. Use the sentiment die to cut blue cardstock.
  11. Adhere the sentiment to the rounded rectangle gingham die cut, then adhere to top flap on the inside of the gift card wallet.
  12. Carefully apply adhesive to the center of the die-cut panel and on the edges WITHOUT the notches, then adhere to the inside of the gift card as shown.
Thanks for visiting today!


Tuesday, December 22, 2020

Believe in the Magic!

It's Tuesday, which means it's time to share a project created for Topflight Stamps. Since we have a few more days until the big holiday, this week my teammates and I are creating Christmas projects. Since it's such a magical time of the year,  I've made a card using the beautiful fairy from the  Make a Wish Clear Polymer Stamp Set by Pink Ink Designs with one line of Lavinia Stamps' Sacred Spells Clear Polymer Stamp

Here's my card:


Topflight Stamps Products Used:
A great alternative sentiment would have been:

PSA: There are lots of fantastic new products at Topflight Stamps, so you should definitely click on over there after reading my instructions! BTW, if you'd like to get 12% off your order at Topflight Stamps use THIS LINK!

Other Products Used:
Solar White Classic Crest® Cardstock by Neenah Papers
Tuxedo Black Memento™ Ink by Tsukineko®
Copic® Markers:
   Skin: BV0000, BV000, E50, E21, E11, E000, E00, R000, R00, R20
   Hair: <B41, B41, B60, C1, C2
   Wings: B0000, B000, B60, RV0000, RV000, BV00, Y0000
   Holly Leaves: G43, G46, YG41, YG45
   Holly Berries: R35, R37, R59
   Mistletoe: G20, G40, G82
   Background: Same colors as the Wings
Red, Green, Clear Stardust® Glitter Pens by Sakura® of America
White Gelly Roll® Gel Pen by Sakura® of America
Clear Glaze® 3D Glossy Gel Pen by Sakura® of America
"B" side of Kewpie Christmas from the Christmas Magic 8x8 Patterned Paper Pad by Graphic 45®
Green cardstock by Bazzill Basics®
Stamp Platform
Post-It™ Notes by 3M
Corner Rounder PaperShaper® Punch by EK Success
  
Instructions:
  1. Create a 5" x 7" card from green cardstock.
  2. Cut patterned paper to 4.75" x 6.75", edge with green ink, and adhere to the card.
  3. Use Tuxedo Black Memento ink to stamp the fairy from the Make a Wish Clear Polymer Stamp Set onto white cardstock. 
  4. Color the image and the background with Copic markers. 
  5. Use Stardust Glitter pens to add a touch of glitter to the snowflakes, the swirls, and some of the small dots. 
  6. Use a white Gelly Roll Gel pen o add highlights to the holly berries.
  7. Add several layers of clear Glaze pen to the berries, letting the gel ink dry between layers. The multiple layers add dimension and shine.
  8. Use a stamping platform to position the Sacred Spells verse as desired on the bottom of the stamped image.
  9. Use a Post-It Note to cover all but the first line of the verse then ink the stamp with Onyx Black VersaFine Ink.
  10. Stamp the sentiment and remove the image panel from the platform.
  11. BTW, the Fairy Merry Christmas Clear Polymer Stamp, also by Lavinia Stamps would have worked really well. Alas, I don't have it in my stash. Yet!
  12. A corner rounder punch was used on the top right hand corner. 
  13. White Gold Premium Metallic Cardstock from the Neenah Creative Collection was sponged with Rainforest Green Prism Ink by Hunkydory Crafts to create shimmery green cardstock.*
  14. The image panel was matted with the sponged shimmery cardstock. 
  15. The matted image panel was adhered to the card.
*You can create your own shimmery cardstock by sponging dye inks onto white metallic cardstock!

Thanks for visiting today!

Monday, December 21, 2020

Felt Like Wishing You a Merry ChrisMouse!

Here's another little scenic card using the super-cute new Felt Mice Perfectly Clear Stamp Set!


Stampendous!® Products Used:
Felt Mice Perfectly Clear Stamp Set
Fitted Frames B Cutting Dies Set
Tuxedo Black Memento™ Ink by Tsukineko®
Mixed Media White Paper
Cotton Ball White Fun Flock

Other Products Used:
Copic® Markers:
    Mouse Fur: BV0000, BV000, C00, C0, C1, C2, R81
    Sweaters: G00, G02, G19, B21, B34
    Tree:  G19, G29, E21, E25
    Ornament: R30, R32
    Bear: E31, E33
    Star: Y11, Y23
    Background: B0000, B41, B60
Eskimo Kisses 6x6 Patterned Paper Pad by Basic Grey®
Brights Mat Stack™ by DCWV™
Pale Red cardstock
Clear Glaze® Glossy Gel Pen by Sakura
White Gelly Roll® Gel Pen by Sakura
Quickie™ Glue by Sakura
Stamping Platform

Instructions: 

  1. Cut a piece of 8.5" x 11" cardstock in half.
  2. Score one of the pieces at 4.25" and fold to form an A2 card.
  3. Cut plaid patterned paper to 5.25" x 4", edge with R30 marker, and adhere to the card front.
  4. Use magnets to secure a piece of white paper to the base of a stamping platform.
  5. Position stamps face down on the white paper. Press the platform's lid onto the back of the stamps. Lift lid.
  6. Ink the stamps with Tuxedo Black Memento ink and stamp images. Repeat if necessary.
  7. Remove the white paper from the Platform and color with Copic markers.
  8. Use Quickie Glue to add glue to the pom-pom. Quickly add Fun Flock, press lightly, and let the glue dry. Tap off excess.
  9. Double mat the image panel with two coordinating colors from the Brights Mat stack and adhere to the card as shown.
  10. Use Memento ink to stamp the sentiment.
  11. Die-cut the sentiment.
  12. Use the next largest die to cut red cardstock.
  13. Mat the sentiment with the red cardstock die-cut and adhere to the card to finish it.
Thanks for visiting today!


Friday, December 18, 2020

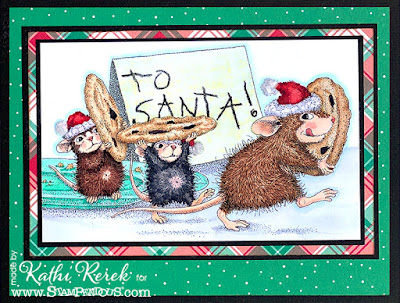
To Santa with Cookies!


Stampendous!® Products Used:
House-Mouse Designs® To Santa Rubber Stamp
Mixed Media White Paper
Tuxedo Black Memento™ Ink by Tsukineko®
Cotton Ball White Fun Flock

Other Products Used:
Copic® Markers:
    Mice:
    Skin: BV0000, BV000, E50, E51, R00, R01, R20, R21, R22
    Tongue: E04, RV42
    Fur Left to Right: E21, E23, E25, E27, E44;  T1, T3, T5;  E31, E33, E35 E44
    Hats: R14, R17, R29
    Pom-Poms and Brims: BV0000, C1, B0000, B60, R0000, Y0000
    Cookies: E30, E53, E55, YR30, YR31
    Chips in Cookies: E77, E79
    Plate: BG11, BG13, BG32
    Sign: G20, B0000, C1
    Floor: G1 C2
Snow Day Remix 6x6 and Perfectly Plaid Christmas Petite Paper Pads by Lawn Fawn®
Ground Espresso Distress® Ink by Tim Holtz® for Ranger Industries
Bitter Chocolate Cardstock by Bazzill Basics Paper®
Quickie™ Glue by Sakura

Instructions:
  1. Cut a piece of 12 x 12 Brown cardstock in to 6.25" x 9".
  2. Score at 4.5" and fold to form a card.
  3. Cut green dotted paper to 6" x 4.25", edge with Distress ink, and adhere to the brown card.
  4. Stamp the image with Memento ink onto white cardstock 
  5. Color with Copic markers.
  6. Add Quickie Glue to the pompoms.
  7. Sprinkle Fun Flock onto the wet glue and press lightly. Let it dry thoroughly and tap off excess.
  8. Trim image panel and mat with brown cardstock.
  9. Cut plaid paper .5" larger than the brown cardstock and edge with Distress ink.
  10. Adhere the matted image panel to the plaid paper.
  11. Mat plaid paper with brown cardstock.
  12. Adhere the triple matted image panel to the card as shown.

Tuesday, December 15, 2020

Merry Christmas Steampunk Style

It's Tuesday, which means it's time to share a project created for Topflight Stamps. It's getting closer to Christmas, but there's still time to get a few more cards done and in the mail, so I decided to create a Christmas Steampunk card using the adorable owls from the Steampunk Darlings Accessories Set 1 Clear Stamp Set by Kelly Horton for That's Crafty. Plus, I couldn't resist using the wreath from my new Festive Industrial Chic Die Set, which was a gift from my lovely daughter. 

Here's the card.


Topflight Stamps Products Used:

PSA: There are lots of fantastic new products at Topflight Stamps, so you should definitely click on over there after reading my instructions! BTW, if you'd like to get 12% off your order at Topflight Stamps use THIS LINK!

Other Products Used:
Solar White Classic Crest® Cardstock by Neenah Papers
Patch Cardstock by Bazzill Basics Paper®
Tuxedo Black Memento™ Ink by Tsukineko®
Copic Markers:
   Owl Feathers: W1, W2, W3, W4, Ws6, W7
   Owl Beaks and Talons: Y000, Y21, Y23, Y26, Y28
   Hats: YG61, YG63, YG57, G29
   Hat Band, Bow, and Sentiment Banner: R24, R29, R59
Festive - Industrial Chic - Wreath Die Set by Creative Expressions
Banner Die: Source Unknown
Holly and Mistletoe Patterned paper from the Christmas Time 8x8 Pad by Graphic 45®
Black Foam Adhesive Squares by Scrapbook Adhesives® by 3L

Instructions:
  1. Create an A2 card from green cardstock.
  2. Cut a piece of patterned paper to 4" x 5.25" and edge with a dark marker. 
  3. Adhere the patterned paper to the front of the green card.
  4. Using Tuxedo Black Memento ink, stamp the owl from the Steampunk Darlings Accessories Set two times. 
  5. Stamp just the owl's talons two more times with Memento ink.
  6. Fussy-cut both owls, the extra sets of talons, color them with Copic markers, and edge all pieces with a black marker.
  7. Use the wreath die from the Festive - Industrial Chic die set to cut gold metallic cardstock.
  8. Use the bow die from from the same set and a banner die to cut white cardstock.
  9. Color the bow and the banner die-cuts with the same red Copic markers used previously.
  10. Use Onyx Black VersaFine ink to stamp the sentiment onto the banner.
  11. Adhere the two owls to the gold Steampunk wreath, then adhere the owls' talons onto the front of the wreath as shown above.
  12. Adhere the bow to the wreath as shown.
  13. Use dimensional foam adhesive squares to adhere the wreath/owl/bow combination to the to card front.
  14. Use dimensional foam adhesive to adhere the sentiment banner to the card front as shown.
Thanks for visiting today!

Friday, December 11, 2020

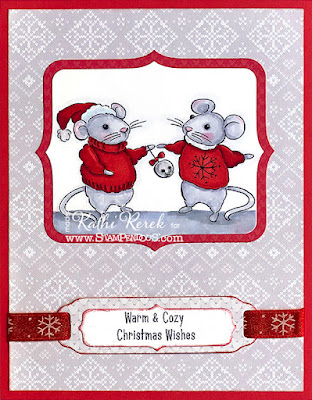
Warm & Cozy!

Have you seen Stampendous!' new Felt Mice Perfectly Clear Set? It's a fabulous set with six adorable Felt Mice, three sentiments, and a bunch of small supporting stamps (gifts, baubles, a star, and a bell). 

Here's a card.


Stampendous!® Products Used:
Felt Mice Perfectly Clear Set
Fitted Frames A Cutting Dies Set
Fitted Frames B Cutting Dies Set
Tuxedo Black Memento™ Ink by Tsukineko®
Mixed Media White Paper
Cotton Ball White Fun Flock

Other Products Used:
Copic® Markers:
   Mice: BV0000, BV000, C00, C0, C1, C2, R81
   Mice Sweaters: R14, R17, R29
   Bell: T0, T1
Red Cardstock
Knit Picky 6x6 Patterned Paper Pad by Lawn Fawn®
Ribbon Slide Die by Spellbinders®
Clear Glaze® 3D Glossy Gel Pen by Sakura
Candied Apple Distress® Ink by Tim Holtz® for Ranger Industries
Quickie™ Glue by Sakura
Red Ribbon from the stash

Instructions:
  1. Cut a piece of 8.5 x 11 red cardstock in half. 
  2. Score one piece at 4.25" and fold to form an A2 card.
  3. Use Tuxedo Black Memento ink to stamp mice onto white paper.
  4. Color Mice with Copic markers.
  5. Use one of the dies from the Fitted Frames A Cutting Dies set to die-cut the image panel.
  6. Use the next largest die from the Fitted Frames A Cutting Dies set to die-cut the reserved red cardstock.
  7. Mat the image panel onto the larger die-cut.
  8. Use Quickie Glue to add glue to the pom-pom on the Santa hat. While the glue is wet, add Fun Flock, and gently press. Let the glue set, then tap off the excess.
  9. Stamp the sentiment onto white paper. 
  10. Die-cut the white paper with one of the dies from the Fitted Frames B set.
  11. Edge the die-cut with Candied Apple Distress ink.
  12. Cut the patterned paper to 4" x 5.25" and edge with Candied Apple Distress Ink to form the card front.
  13. Use the Ribbon Slide die to cut a piece of coordinating patterned paper.
  14. Edge the die-cut with Candied Apple Distress ink.
  15. Adhere the sentiment die-cut to the Ribbon Slide die-cut.
  16. Thread ribbon through the Ribbon Slide die-cut, position it as shown, and secure the ribbon to the back of the card front.
  17. Adhere the card front to the red card.
  18. Adhere the image panel to complete the card.
Thanks for visiting today!
Tuesday, December 8, 2020

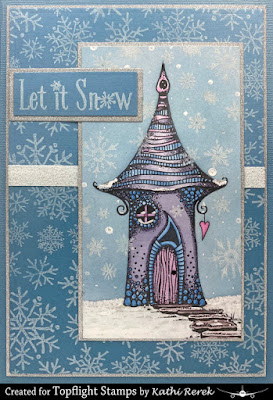
(Please Don't) Let It Snow!

It's Tuesday, which means it's time to share a project created for Topflight Stamps. This week my teammates and I are creating Snowy projects, which I suppose is okay since it is December and almost winter. However, I don't much like snow unless it falls at night after we're all home for the evening and is gone by morning. 

Here's my card which was created with Freya's House and 


Topflight Stamps Products Used:
Freya's House Clear Polymer Stamp by Lavinia Stamps

PSA: There are lots of fantastic new products at Topflight Stamps, so you should definitely click on over there after reading my instructions! BTW, if you'd like to get 12% off  your order at Topflight Stamps use THIS LINK!

Other Products Used:
Solar White Classic Crest® Cardstock by Neenah Papers
Blue Cardstock by Bazzill Basics
Glitter Paper from the Glitter Stack by DCWV®
Tuxedo Black Memento™ Ink by Tsukineko®
Weathered Wood, Storm Sky, and Tumbled Glass Distress® Inks by Tim Holtz® for Ranger Ink
Unicorn Dye Ink by Hero Arts 
New Canvas Palette™ Hybrid Ink by Stewart Superior
White Shimmer Delicata® Ink by Tsukineko®
Copic® Markers: 
   House: RV52, RV55, RV63; V20, V22, V25; B41, B45
   Pathway: NO, N2, N3,; RV91, RV93, RV95, V91, V93, V95
White Gelly Roll® Pen by Sakura® of America
Clear Stardust® Glitter Pen by Sakura® of America
Black Glaze® 3D Glossy Gel Pen by Sakura® of America
Stamping Platform
STAY-tion by Wendy Vecchi for Ranger Ink
Removable Label Paper by Avery®
5 x 7 Card Creator Die Set by Spellbinders®
Small Rectangles Dies by Spellbinders®

Instructions:
  1. Create a 5" x 7" card from blue cardstock. Set aside.
  2. Use Tuxedo Black Memento ink to stamp Freya's House onto white cardstock and onto masking paper. 
  3. Fussy-cut the label paper version to create a mask and adher it onto its counterpart on the image panel. 
  4. Use Tuxedo Black Memento ink to stamp the Fairy Path Clear below Freya's house as shown. 
  5. Tear a piece of recycled printer paper and secure it over the base of the image, coloring the Fairy Path. 
  6. Used Black Blending Brushes to brush the blue Distress inks over the masked images. Heat set.
  7. Lift the mask from the house and set aside.
  8.  Color the images with Copic markers. 
  9. Replace the house mask onto Freya's House.
  10. Secure the image panel onto the stamping platform.
  11. Position the snowflake stamps as desired face-down onto the image panel. Press the lid into the back of the stamps, lift, ink the stamps with the white Hybrid ink, and stamp.
  12. Re-ink the stamps with the Unicorn ink and stamp.
  13. Re-ink the stamps a third time with the White Shimmer Delicata ink, and stamp.
  14. Heat set the image panel.
  15. Clean and dry the snowflake stamps.
  16. Move the snowflake stamps into different positions and repeat steps #11 through #14.
  17. Clean and dry the snowflake stamps again.
  18. Lift the mask over the house and place some of the snowflake stamps onto Freya's House.
  19. Repeat steps #11 through #14.
  20. I had used a new-to-me brush-tipped white pigment pen to add snow to the ground, the pathway, and the house. While adding drops to the "sky" area, a big blob dropped onto the image panel.
  21. Believing that perfection is overrated, I used my regular white Gelly Roll gel pen to add a few big white blobs around the sky area of the image panel.
  22. Add clear Stardust Glitter pen to add shimmer to some of the snowy areas. Those areas are showing up grey on the photo. Alas.
  23. Several layers of Clear Glaze pen were used to add dimension and shine to the doorknob and the hanging heart.
  24. The image panel was matted onto white glittery cardstock.
  25. A piece of blue cardstock was secured to the base of the stamping platform with magnets. 
  26. The Snowflakes Background Cling Rubber Stamp was positioned face-down onto the blue cardstock, the platform lid was pressed onto the back of the stamp, lifted, the stamp was inked with White Hybrid ink, and the image was stamped.
  27. The stamp was re-inked with the Unicorn ink and stamped.
  28. This was repeated again with the White Shimmer Delicata ink.
  29. The blue panel was heat set.
  30. Steps  #25 - #29 were repeated on a second blue cardstock panel.
  31. One of the dies from the Card Creator die set was used to cut both white stamped panels and an additional panel of blue cardstock.
  32. The white stamped blue die-cuts were trimmed lengthwise, then adhered to the third panel. 
  33. White Glitter tape was used to cover the seam between the two pieces.
  34. This panel was adhered to a piece of white glittery cardstock cut to 4.75" x 6.75"
  35. The sentiment from the Winter's Snowflakes Clear Polymer Stamp Set was inked with the white ink used previously, heat set, cut with a rectangle cutting die, and matted onto white glittery cardstock that had been cut with a slightly larger rectangle die.
  36. The image panel was adhered to the card, then the sentiment was adhered to finish the card.
Thanks for visiting today!

Friday, December 4, 2020

Coffee Cup Gift Card Wallet

It's the time of the year for gift giving. If you're like me, a lot of your family just wants gift cards so they can choose what they want. Stampendous!' Gift Card Wallet Die Set and stamps make it ever-so-easy!

Here's one that uses the Winged Cup Perfectly Clear Stamp® Set to decorate the wallet!


Stampendous!® Products Used:

Other Products Used:
Desert Storm Smooth Cardstock from the Environment® Papers Collection by Neenah Papers
Copic® Markers:BG45, BG49, YR04, YR12, C4, C6, W1
Canvas Palette™ Hybrid Ink by Stewart Superior
White Prismacolor® Premier Colored Pencil by Newell Office Brands
Stamping Platform
STAY-tion by Wendy Vecchi for Ranger Ink
Removable Label Paper by Avery®

Instructions:
  1. Use the Gift Card Die to cut the Desert Storm Cardstock.
  2. Fold the Gift Card along the score lines and temporarily adhere the back (not the flap side) to a larger piece of scrap paper.
  3. Use magnets to secure the scrap paper/Folded Gift Card Die-cut to the base of stamping platform.
  4. Position the Cling Spring Garden 6x6 stamp face down onto the gift card. Press the stamping platform lid onto the cling part of the stamp.
  5. Lift the lid, ink the stamp with white hybrid ink, and stamp. 
  6. Repeat inking and stamping if necessary to achieve a good stamped impression.
  7. Use white hybrid ink ink to edge all sides of the Gift card. Heat set.
  8. Secure another piece of Desert Storm Cardstock to the stamping platform and repeat steps #4 to #6. Heat Set.
  9. Use the small rounded rectangle dies to cut Desert Storm cardstock two times. Edge both pieces with white hybrid ink.
  10. Place the wavy gift card holder die-cut panel onto your cutting machine. Center the die with the two notches onto the panel and run through your machine. 
  11. Edge this piece with white hybrid ink.
  12. Use Tuxedo Black Memento ink to stamp the coffee cup and the butterfly from the Winged Cup Perfectly Clear Stamp Set onto white cardstock.
  13. Color with Copic markers, fussy-cut the coffee cup, edge with a dark marker, and adhere it to the center of one of the white stamped rounded rectangles (from step #9).
  14. Adhere this piece to the front of the gift tag as shown.
  15. Secure the other white stamped rectangle to the stamping platform with magnets.
  16. Place the sentiment face down onto the rectangle, press the platform lid onto the stamp, and lift.
  17. Ink the sentiment stamp with Onyx Black VersaFine ink and stamp. Repeat if necessary for a good impression.
  18. Adhere the sentiment rectangle to the inside flap of the gift card wallet.
  19. Use Tuxedo Black Memento ink to stamp the flower and bee on the inside of the gift card wallet.
  20. Use Copic markers to color the bee and the center of the flowers.
  21. Use a white Prismacolor pencil to color the flowers.
  22. Carefully apply adhesive to the center of the die-cut panel and on the edges WITHOUT the notches, then adhere to the inside of the gift card as shown.
Thanks for visiting today!


Tuesday, December 1, 2020

Steampunk Alchemist

 It's Tuesday, which means it's time to share a project created for Topflight Stamps. If you've visited before, you know I love, Love, LOVE Steampunk! So when I saw AALL and Create's Steampunk Alchemist Clear Stamp Set #387, I knew that it would be added to my collection! For some reason, I love to create Steampunk themed Mixed Media artwork, especially canvases, so that's just what I did!


Here it is!


Topflight Stamps Products Used:
Silver Metallic Cardstock from the Neenah Creative Collection

PSA: There are lots of fantastic new products at Topflight Stamps, so you should definitely click on over there after reading my instructions! BTW, if you'd like to get 12% off your order at Topflight Stamps use THIS LINK!

Other Products Used:
Solar White Classic Crest® Cardstock by Neenah Papers
Tuxedo Black Memento™ Ink by Tsukineko®
8x10 Canvas Panel by Artist's Lofts® Necessities™
Media® Texture Sand Paste by DecoArt®
Little Black Dress and Concrete Fresco Chalk Paint by PaperArtsy
Laboratory Thinlits Dies from the Tim Holtz® Alterations Collection by Sizzix®
Frames Dies - Source Unknown. Oops.
Chain Die by Elizabeth Crafts
Delicate Chain Die by Poppy Stamps
Copic® Markers:
   Alchemist's Skin: BV000, E50, E21, E11, E00
   Alchemist's Hair and Beard: E07, E18
   Alchemist's Suit and Hat: B37, B39
   Alchemist's Cravat and Hat Band: R56, R59, R89
   Alchemist's Shirt: E81, E84
   Alchemist's Monacle: Y21, Y23, Y26, Y28, BG93, BG96
   Buttons: C8, C10
   Bottles and Can: E81, E84, B37, B39, B41, BG000, BG10, BG11, R01, R11, R56, G43, G46, C0, C1, C3
   Bulb Base: B41, C1, C2, C4,; BG90, BG93, T1, T3, T4; Y21, Y23, Y26, Y28
   Bulbs: Y02, Y04, Y06, Y13, Y15, Y17, &19, Y35, Y38, YR18, R14
Design Tape by Tim Holtz® Idea-ology® by Advantus
White Gelly Roll® Gel Pen by Sakura® of America
3D White and Black Foam Adhesive Squares by Scrapbook Adhesives® by 3L

Instructions:
  1. Texture Sand Paste was spread over an 8x10 canvas panel so the canvas texture would be disappear. 
  2. While the paste was drying, I stamped the Steampunk Alchemist, the bottles and can, and the three lights from the Steampunk Alchemist Clear Stamp Set #387 and fussy-cut them.
  3. By the time I was done fussy-cutting, the paste was dry, but I blasted it with my heat gun to make sure it was dry so I could paint the background.
  4. Stone Fresco Chalk Paint was mixed with Concrete and Little Black Dress Fresco paints and painted onto the canvas. 
  5. The same paints were mixed into the remaining Sand Paste in the jar so I could spread it over the Distressed Brick 6x6 Stencil by Paper Rose. Alas, I diluted it a little too much, so I just smooshed the sand paste onto the canvas to create a textured background.
  6. The piece was blasted with my heat gun to dry it, which caused some bubbling, which just added to the texture. 
  7. I had left the lid off of the sand paste and was delighted to see that it had thickened enough to apply over the Distressed Brick 6x6 Stencil. This time it worked-ish -- or at least enough to create a subtle brick pattern on the canvas.
  8. The stenciled bricks were left to air dry while I used my Copic markers to color all of the elements that I had fussy-cut earlier. When I was done coloring them, they were all edged with a dark marker so that there would be no unslightly white edges.
  9. The periodic table and the diagram from the Steampunk Alchemist Clear Stamp Set #387 were stamped with Onyx Black VersaFine Ink because they were so very detailed and I wasn't planning to color them with Copics or any other medium, though I should have. Oh well. Hindsight, don'tchaknow?
  10.  The shelf die from the Laboratory Thinlits set was used to cut brown cardstock several times. These were layered.
  11. A square and rectangle frame die were used to cut brown cardstock to add frames to the table and diagram. 
  12. Silver metallic cardstock from the Neenah Creative Collection was die-cut with two different chain dies.
  13. At this point the canvas was mostly dry, so I blasted it with my heat gun, edged the canvas with black Fresco Chalk paint, and dry-brushed the black paint over the canvas to bring out some of the details of the brick and such.
  14. Wood patterned paper was adhered to chipboard, which was layered onto the base of the canvas. 
  15. Washi tape was adhered to the bottom of the canvas.
  16. "Steampunk" and pointing hand from the Steampunk Mixed Media Transfers were applied as shown.
  17. All the elements of the scene were adhered using tape runner, double-sided tape, and foam adhesives.
Thanks for visiting today!

I forgot to add that I'll be entering this canvas in SanDee and amelie's Steampunk November/December Challenge!