Tuesday, February 28, 2017

Let the Good Times Roll!

It's Mardi Gras! Let the good times roll!

Here's my card with Masquerade, Rick St. Dennis digital stamps available at I Brake for Stamps.


Masquerade was resized in PhotoElements, printed out onto Copic-friendly cardstock with my laser printer, then colored with my Copic markers. The image was die-cut with one of the dies from the the Sunray Venus Layering Basics die set (Tonic Studios).

Ancient patterned paper from the Fusion collection (Basic Grey) was die-cut with one of the dies from the Fishtail Flags dieset (Die-namics) and a circle from the Circle Nestabilities die set (Spellbinders). The patterned paper flag was edged with Dusty Concord Distress ink (Ranger), then layered onto a flag die-cut from solid cardstock.

Another sheet from the Fusion set was cut size, edged with Dusty Concord Distress ink. The matted fishtail die-cut was adhered over the patterned paper, then the image panel was added.

The sentiment was added to the patterned paper circle with Simply Sweet rub-ons (Doodlebug). The circle was matted with a slightly larger circle die-cut from solid cardstock, then added to the card front. Purple cardstock was die-cut with a Masquerade Masks die (Poppy Stamps) and patterned paper was die-cut with one of the butterflies from the Butterfly die set (Impression Obsession. The butterfly and the mask were adhered to the sentiment circle to finish the card.

I  Brake for Stamps has a great collection of digital stamps plus a huge and varied collection of rubber stamps that you ought to check out right now. Click on my badge below to be whisked over to I Brake for Stamps to check out all of the goodies! Best of all, if you buy something, you can get a 10% discount off of your purchase if you use this code: SAVE10KATHI!


Thanks for visiting today!

Friday, February 24, 2017

ART-EXchange ATCs -- The Sequel!

I finally had a chance to take part in ART-EXchange, which is a Facebook group that swaps hand made projects. This month's EXchange was called a Stash Challenge, where each member of the swap received an envelope of goodies and was to make two ATCs from them.

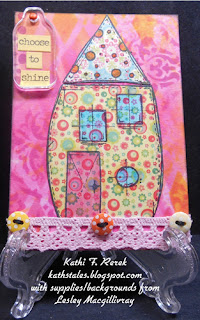
Here's my second set of ATCs, using some of the supplies and backgrounds furnished by Lesley Macgillivray. 


The only thing I used from my stash was Distress inks, needle and thread (Yes, I actually sewed. Even more miraculously, no blood was shed.), a brad, some Copics to make the patterned paper work a bit better with the supplied backgrounds, and some Clear Gelly Glaze pen to add to the windows of the Lesley-stamped Stampotique's Home Sweet Home (France Papillon)  images. (Now I need to add that house to my collection).

Thanks for visiting today!

Thursday, February 23, 2017

ART-EXchange ATCs

I finally had a chance to take part in ART-EXchange, which is a Facebook group that swaps hand made projects. This month's EXchange was called a Stash Challenge, where each member of the swap received an envelope of goodies and was to make two ATCs from them.

Today's post features two ATCs using stash items that I received from Sharon Rogers. As per the rules, I did take photos of the stash when it arrived, then I had a total dunderhead moment and formatted my camera card, thinking that I had saved the images of the goodies to my computer. What a maroon. I hadn't. So I apologize to Sharon and to you. Sharon sent me an altered doily, beautiful gold, white, and blue gelli prints, fibers, ribbons, vintage images, bingo cards, clip art, paint swatches, ephemera, and some lovely black die-cuts. Basically, she sent enough stuff to make three ATCs and a card!

Here are my two ATCs.


Thanks for visiting today!

Wednesday, February 22, 2017

Seeing Red!

It's the second week the "Seeing Red" Challenge at Stampotique Designer's Challenges (#267). Here's the blurb about the challenge!
"This particular challenge, some of our team interpreted the "seeing red" as shades of the color red and some interpreted it as being mad or angry.
We think you should do what you want with this challenge. All we ask is there is some color red in your creation."
If you'd like the chance to win your choice of $30 worth of Stampotique stamps, you should play along with this challenge. Visit Stampotique Designers Challenge blog and be sure to read the rules so that you'll have the chance to win that great prize!!! Remember to check to see the deadline for all of this month's Stampotique Designers Challenges!

Here's my tag using the Jester (Kate Crane)


Jester was stamped with Tuxedo Black Memento ink, then die-cut with one of the dies from the Large Rectangles Nestabilities die set (Spellbinders). The Jester and the background were colored with shades of red Copic markers. The Jester was outlined with a touch of Cool Grey Copic marker to make him pop a bit from the background.

Barn Door Distress ink (Ranger) was sponged over the hearts on the Punchinella Quintet stencil (Joggles) in three places. Care was taken to avoid sponging over the Jester, who had quite enough red.

The top portion of the image panelwas covered and Fired Brick Distress ink was sponged under the Jester's shoes to ground him, then Aged Mahagony Distress ink was sponged over the circles from the same stencil.

Since apparently I'm confused between Jesters and Jokers, I found a card suit black and white patterned paper in an old 6x6 pad. I sponged it with Barn Door, Fired Brick, and Aged Mahagony Distress inks to make it red and matchy-matchy. 

Then in a really dopey move, I decided that I wanted the newly-red patterned paper to be a bit smaller, so I lopped off the top and forgot to edge it with darker ink, which I realized after I had securely adhered it to the black tag and was blinded by the glaringly white edge. Fortunately, some thin musical note-patterned Washi tape came to the rescue! 

The tag was finished with a black and red reversible satin ribbon.

Thanks for visiting today!

I shall enter my tag into the following challenges:
Try It on Tuesday Challenges: Let's Get Messy (and I did!)
• Tuesday Throwdown Challenges: Favorite Embellishment (Washi Tape is one of mine!)
The Artistic Stamper Challenges: Love & Hearts

Tuesday, February 21, 2017

Tea Time!

It's time for tea with this fabulous rubber stamp sheet (MS78) from Merry Stamper, available at I Brake for Stamps! The tea set has four tea gorgeous tea pots with four matching tea cups, two sentiments, and a tiny little tea pot, which will be perfect for making backgrounds!


The sun, moon, and stars tea pot and the matching tea cup were stamped with Tuxedo Black Memento ink (Imagine Crafts), colored with Copic markers, fussy-cut, and edged with a black marker. The stamped, colored images were then smooshed into a VersaMark pad (Imagine Crafts) and heat embossed with clear embossing powder. This process was repeated a second time to make the images a bit more shiny and dimensional.

Two pieces of polka-dotted cardstock from the Vintage Double-Dot 6x6 pad (Bo-Bunny) were layered, then edged with Wild Honey Distress ink (Ranger). The Rays Layering stencil was placed over the paper, then Wild Honey Distress ink was sponged over it. Rusty Hinge Distress ink was used to edge the patterned paper.

The embossed tea pot and tea cup were adhered to to the card front, which was then adhered to a card front.

I Brake for Stamps has a huge and varied collection of rubber stamps that you ought to check out right now. Click on my badge below to be whisked over to I Brake for Stamps to check out all of the goodies! Best of all, if you buy something, you can get a 10% discount off of your purchase if you use this code: SAVE10KATHI!


Thanks for visiting today!

Sunday, February 19, 2017

Make Magic!

Stampotique's Facebook Group has started "Word-Up Weekends" where we share projects created with Stampotique's many Words, Phrases, Letters, and Numbers.

Here's my entry for the week featuring Stampotique Original's Unicorn (Magda Polakow),  Make magic wherever you go (Amy Wilson-Wellenstein), and Pffftt from the Phrase Cube (Terri Richardson).


The Unicorn was stamped with Tuxedo Black Memento ink (Imagine Crafts), colored with Copic markers, fussy-cut, and edged with black marker. I should mention that the Unicorn's tail was cut separately so that it could be positioned differently than the image. Clear Stardust Glitter pen (Sakura) was used to add glitter to the Unicorn's horn. Gold Spica Glitter pen (Copic) was used to add golden glitter to his mane and tail. The Unicorn was set aside while I created a background for him.

Eclipse Mask Tape (Judikins) was die-cut with the End of the Rainbow die set (Die-namics) and positioned on white cardstock, which was then airbrushed with B21 and RV00 Copic markers. The masks were lifted and a rainbow was added with Copic markers, which were also used to add the grass. Pffftt was stamped on the rainbow with Jet Black Archival ink (Ranger) using a stamp positioner.

White cardstock was cut to 6.75" x 4.75" then die-cut with one of the dies from the 5x7 Card Creator Nestabilities die set (Spellbinders) to create a frame. Gold Leafing pen (Krylon) was used to edge the inside and outside edges of the frame. 

Make magic wherever you go was stamped onto shimmery white vellum using Jet Black StazOn ink (Imagine Crafts), then adhered over the sky portion of the scene.

The Unicorn's tail was adhered over the rainbow on the stamped scene, then the Unicorn was adhered. The frame was adhered over the image panel, then the framed image panel was adhered to a card front. Gold foil corner pieces were added to finish the card.

Thanks for visiting today!

I shall enter this card into the following challenges:
Cut It Up Challenges: Bendy or Scene Cards

Tuesday, February 14, 2017

Whoooo Loves Ya?

Here's a Steampunky Valentine's Day card using Wise Owl, from the Wise Owl rubber stamp setone of the stamp sets from the Mech-Animals stamp collection. It also uses Steampunk Heart, but not the wings, from the Large Steampunk Heart with Wings set, which is part of the the New Montage II set. Both the Wise Owl and the Steampunk Heart sets are by Carmen Medlin Designs and are available at I Brake for Stamps.


The Wise Owl and the Steampunk Heart were stamped with Tuxedo Black Memento ink (ImagineCrafts), colored with Copic markers, fussy-cut, and edged with a black marker. Wise Owl's beak, talons, armor grommets, and compass were coated with several layers of Clear Gelly Glaze pen (Sakura) as were the screws on the Steampunk Heart.

Blue cardstock took a ride inside the Clockworks embossing folder (Cuttlebug/ProvoCraft). The raised bits were brushed with Pewter and Renaissance Treasure Gold (PaperArtsy), then buffed with a cloth to give a lustrous metallic shine.

Bronze and silver metallic cardstock were die-cut with the Gearhead Thinlits Alterations (Sizzix) dies, the Steampunk Corner die (La-La Land), the Mini Gears die (Memory Box), the Nuts and Bolts Punch die (Marianne Designs), and one of the corners from the Corners 1 die set (Elizabeth Craft Designs). The corner die-cut from the Gearheads set was adhered to the lower left hand corner of the embossed gilded card front, additional gears, plus the Steampunk Corner die-cut were adhered over the gears, and the Steampunk Heart was adhered with two addition gear die-cuts to hold it. Wise Owl was perched upon the Steampunk Heart, the card front was adhered to a matching blue card, and I called it done.

I contemplated adding "Whoooo Loves Ya?" as a sentiment, but decided against it since my husband is away from home for Valentine's Day. However, he is a very smart man and my Valentine's Day flowers arrived on Monday!

I Brake for Stamps has a huge and varied collection of rubber stamps that you ought to check out right now. Click on my badge below to be whisked over to I Brake for Stamps to check out all of the goodies! Best of all, if you buy something, you can get a 10% discount off of your purchase if you use this code: SAVE10KATHI!


Thanks for visiting today!
I'm entering this card into the following challenges:
• SanDee and amelie's Steampunk Challenges: "New Stash/Forgotten Stash" -- I haven't used Treasure Gold in forever, then watched it demoed at CHA and had an "aha" moment.
Allsorts Challenges: Hearts and/or Flowers


Saturday, February 11, 2017

Word Up Weekend!

Stampotique's Facebook Group has started "Word-Up Weekends" where we share projects created with Stampotique's many Words, Phrases, Letters, and Numbers.

Here's my entry for the week featuring Stampotique Original's Communitree (Jill Penney) and Comfort Zone (France Papillon).


Communitree, one of Stampotique's new February dies, was stamped with Tuxedo Black Memento ink (Imagine Crafts). I used a Post-It Note to cover the words "There's a whole world outside your" on the Comfort Zone stamp, inked the stamp, removed the Post-It Note, and stamped the words "Comfort Zone" under the image with the help of my trusty Stampa-Ma-Jig stamp positioner (EK Success). 

The image was colored with Copic markers. The image panel was die-cut with one of the the dies from the Mega Rectangles Nestabilities die set (Spellbinders). It was kept in the die while I marked the edges of the inside of the die with markers since I wanted to leave a white border around the image panel. Copic markers were used to create a dotty background around CommunitreeSky Blue Stardust Glitter pen (Sakura) was used to add a touch of sparkle to the three dots on her head.

I found a large scrap of map patterned paper that worked with the colors used to color Communitree. The patterned paper was edged with Gathered Twigs Distress ink (Ranger), then matted onto a brown cardstock tag. A scrap of the same brown cardstock was die-cut with Page Corner die-cuts (BossKut) and a small circle die (QuicKutz). The brown cardstock was slightly darkened with a VersaMarker marker (Imagine Crafts)

A piece of matching ribbon was threaded through the top hole to finish the tag!

I shall enter this tag into the following challenges:
A Vintage Journey Challenges: Words that are special

Wednesday, February 8, 2017

Swing Along with a Love Bug Challenge!

It's the second week the "Love Bug" Challenge at Stampotique Designer's Challenges (#266). Here's the blurb about the challenge!
"Your project must be love themed and have a few bugs on it as well!"
If you'd like the chance to win your choice of $30 worth of Stampotique stamps, you should play along with this challenge. Visit Stampotique Designers Challenge blog and be sure to read the rules so that you'll have the chance to win that great prize!!! Remember to check to see the deadline for all of this month's Stampotique Designers Challenges!

Here's my card with the new Swing (Arwen McCullen) and Dance (Linda Peterson).


Swing (Arwen McCullen) and Dance were stamped with Tuxedo Black Memento ink (Imagine Crafts), colored with Copic markers, fussy-cut, and edged with a black marker. Dance girl's legs were severed from the image, but thankfully she's a paper girl, so it didn't hurt her (I hope). They were set aside while I created a background for them.

140 lb. Mixed Media cardstock was painted with a wash of Cerulean Blue and Primary Magenta Media Fluid Acrylic (MFA) paints (DecoArt). Translucent White MFA paint was swiped across the background, then wiped back. The background was heat set, then sealed with a layer of Media Matte Medium (DecoArt), which was also used to adhere Swing Dance, and Dance girl's legs.

Cardstock was punched with a miniscule Dragonfly punch. The dragonflies were colored with copic markers and their bodies were enhanced with a touch of Clear Stardust Glitter pen (Sakura) to add a bit of glitter. The dragonflies were adhered to the scene to add that buggy touch required by the "Love Bug" challenge. The "Love" part of the challenge is open to your interpretation!


The image panel was die-cut with one of the dies from the 5x7 Card Creator die set (Spellbinders), lightly edged with Black Shimmer Delicata ink (Imagine Crafts) for additional sparkle, then matted with black cardstock. The card front was then added to a blue 5x7 card.

Thanks for visiting today!

I shall enter this card into the following challenges:

Tuesday, February 7, 2017

Air Mail!

Here's the parakeet from the Special Delivery rubber stamp setone of the stamps in the Mech-Animals stamp collectionby Carmen Medlin Designs, available at I Brake for Stamps.


The parakeet from the Special Delivery set was stamped with Tuxedo Black Memento ink (Imagine Crafts, colored with Copic markers, fussy-cut, and edged with black marker.

Kraft cardstock was die-cut with the Postage Frames Alterations die (Sizzix). The die-cut was sponged with Pumice Stone and Black Soot Distress ink (Ranger). The rest of the kraft cardstock was used to make a card base.

Map patterned paper from the Maritime 8x8 pad was cut to be used for the card front. Its edges were sponged with Pumice Stone Distress ink.

The map paper was adhered to the card, then the Postage Frame die-cut was adhered. A rub-on was used to add the sentiment to the Postage Frame and the parakeet from the Special Delivery set was adhered as shown.

I Brake for Stamps has a huge and varied collection of rubber stamps that you ought to check out right now. Click on my badge below to be whisked over to I Brake for Stamps to check out all of the goodies! Best of all, if you buy something, you can get a 10% discount off of your purchase if you use this code: SAVE10KATHI!


Thanks for visiting today!

I'm entering this card into the following challenges:
SanDee and amelie's Steampunk Challenges: "New Stash/Forgotten Stash" -- (The patterned paper is old. I also forgot that I had purchased the Postage Frame die, which is a scary sign.

Wednesday, February 1, 2017

Love Bug Tag!

The theme of this week's Stampotique Designer's Challenges (#266) is "Love Bugs". Here's the blurb about the challenge!
"Your project must be love themed and have a few bugs on it as well!"
If you'd like the chance to win your choice of $30 worth of Stampotique stamps, you should play along with this challenge. Visit Stampotique Designers Challenge blog and be sure to read the rules so that you'll have the chance to win that great prize!!! Remember to check to see the deadline for all of this month's Stampotique Designers Challenges!

Have you heard the news? Stampotique Originals has decided to release six new stamps every month! Here's the link to February's new stamp release! Which is YOUR favorite? I love 'em all!

So, back to my tag for this week's challenge that features Terra Cotta Bunny (Terri Richardson) and Daniel's Hearts (Daniel Torrente)


Isn't Terra Cotta Bunny the cutest? I think it will be extremely versatile for birthday, Valentine's Day, and Easter cards!

Terra Cotta Bunny was stamped with Tuxedo Black Memento ink (Imagine Crafts), colored with Copic markers, fussy-cut, and edged with a black marker. Terra Cotta Bunny's terra cotta pot was coated with a layer of Distress Crazing Collage Medium (Ranger) and allowed to dry.

Daniel's Hearts was stamped onto green patterned paper from the Dot-Grid-Daisy-Linen Rainbow Petite Print 6x6 pad (Doodlebug Designs) using Champagne Dazzle VersaMark ink (Imagine Crafts), then heat embossed with Clear Detail embossing powder (Ranger). 

Here's a close-up photo so you can see the lovely crazed texture on the pot and the clear heat-embossed background!


Simply Sweet rub-ons (Doodlebug Designs) were used to add the terribly punny sentiment to a smaller piece of the same linen patterned cardstock.

I decided to use both sides of the patterned paper because they played together so well! I did rough up all the edges to differentiate the layers.

I had my hearts, my love-themed punny sentiment, but I needed some bugs. Now I ordinarily don't consider butterflies (or dragonflies) to be bugs since they're so pretty and I think most bugs are kind of ugly (sometimes cool in an ugly way). But since the only bugs that I had were metallic charms or too big, I decided to go with some butterfly punches and die-cuts. The dark orange butterflies were punched with a small Butterfly Paper Shaper punch (EK Success). The lighter orange butterflies were die-cut with dies from the Butterfly die set (Impression Obsession). Anyway, I added black glitter to the butterflies' bodies and antennae. Mostly because I could.

The tag was put together and a hole was punched in the center of the top part. Green and white gingham ribbon was colored with a YG03 Copic marker, then threaded through the tag's hole to finish the tag!

Thanks for visiting today!

I shall enter this tag into the following challenges:
Use Your Stuff Challenges: Animal Theme
Cards Und More Challenges: Pets and Other Furry Things
Simon Says Stamp Wednesday Challenge: The Color of Love