Tuesday, December 26, 2023

2024 Calendar Card - Year of the Dragon

It's Tuesday so I'm sharing a project created for Topflight Stamps. It's an Anything Goes week, so I decided to make another calendar card. 2024 is the Year of the Dragon, but I don't have an Asian Dragon Stamp so I decided to use the Gentle Dragon Unmounted Rubber Stamp by Crafty Individuals.

But before I get to my project, I wanted to remind you that there's a sale going on right now at Topflight Sale so since you were very nice this year, you should treat yourself to some fabulous new goodies!


Here's my calendar!


Other Products Used:
Solar White Classic Crest Cardstock by Neenah Papers
Black Cardstock by Bazzill Basics
Copic Markers: B60, B63, B66, B69, NH23, BG32, H90, RV0000, RV000, V10, RV91, RV93, Y00000, Y0000, Y21, T0, T1, T2, T3, E93
2024 Calendar from an Etsy Shop
STAY-tion by Wendy Vecchi for Ranger Ink
Stamping Platform

Instructions:
  1. Score a piece of 11" x 8.5" black cardstock at 5.5" and fold to form a 5.5" x 8.5" card. Set aside.
  2. Use Tuxedo Black Memento Ink to stamp the Gentle Dragon onto white cardstock. 
  3. Color the image panel with Copic markers. 
  4. Cut a piece of white cardstock to 5.25" x 8.25" to create a background panel. 
  5. Use magnets to secure the white cardstock panel to the STAY-tion.
  6. Sponge or brush the entire background panel with Mermaid Elements Ink.
  7. Use magnets to secure the Glory Stencil over the inked background. 
  8. Brush or sponge both Mermaid and Dark Denim Elements Inks over the stencil onto the background panel. 
  9. Edge the background panel with the same inks.
  10. Adhere both the dragon panel and the calendar as shown, then adhere to the reserved black card.
Thank you for visiting today!

Wednesday, December 20, 2023

Winter Wishes Card

Here’s my second card inspired by the Unity Stamps Instagram video I mentioned last week. This time I used shimmery Delicata Inks to stamp the sparkly snowflakes. 


Imagine Crafts Supplies:

Ruby Red, Emerald Green, and Sapphire Blue Delicata Inks

Sponge Daubers

Tear It! Tape

Craft Mat


Other Supplies:

Kraft Cardstock by Bazzill Basics

Snowflakes Clear Polymer Stamp Set by Lavinia Stamps *
Snowflakes Large Clear Polymer Stamp Set by Lavinia Stamps *
Snowflakes Small Clear Polymer Stamp Set by Lavinia Stamps *

Sentiment Stamp (Retired) by Unity Stamps

Rectangles Nestabilities by Spellbinders

Low-tack Tape

Heat Gun by EK Success

Misti Stamping Platform by My Pretty Petunia

Big Shot


Please Note: Topflight Stamps carries stamps, stencils, and other products by Lavinia Stamps.

*The Snowflakes Small Clear Polymer Stamp set is comprised of smaller versions of the snowflakes included in the Snowflakes Large Clear Polymer Stamp set.

Instructions:

Step 1:

Use magnets to secure a 4” x 5.25” piece of Kraft cardstock onto the base of a stamping platform. 


Position two snowflakes from the Snowflakes Large Clear Polymer Stamp Set so that one is facedown at the top left of the image panel and the other one is at the bottom right of the image panel. Ink the snowflake stamps with Emerald Green and Ruby Red Delicata Ink and stamp. Re-ink and stamp again if necessary to create good images. Clean and dry both stamps.


Step 2:

Position the third snowflake stamp from the Snowflakes Large Clear Polymer Stamp Set facedown between the stamped snowflakes on the image panel. Ink the stamp with Sapphire Blue Delicata Ink and stamp. Re-ink and stamp again if necessary to create a good impression. Clean and dry the stamp. Reposition the same stamp facedown on the other side of the image. Ink the stamp with Sapphire Blue Delicata Ink. Clean and dry the stamp.


Step 3:

Position one of the snowflake stamps from the Snowflakes Small Clear Polymer Stamp Set facedown in the center top of the image panel. ink the stamp with Sapphire Blue Delicata Ink and stamp. Re-ink and stamp again if necessary to create a good impression. Clean and dry the stamp. 


Continue the process of stamping snowflakes from the Snowflakes Small and the Snowflakes Clear Stamp sets with all three colors of Delicata Inks, taking care to clean and dry the stamps between colors. 


Remove the image panel from the stamping platform. Heat set the image panel. Whereas you don't have to heat set Delicata ink, the shimmer is enhanced by heat setting. Or I could be delusional.


Step 4:

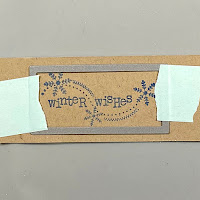
Ink the sentiment stamp with Sapphire Blue Delicata ink and stamp onto a piece of Kraft cardstock. Remove the panel from the stamping platform and trim excess cardstock. Heat set the stamped cardstock.


Step 5:

Use low-tack tape to secure a rectangle die to the sentiment strip. Run the sentiment strip through a die-cutting machine. Use a slightly larger rectangle die to cut a Kraft cardstock.


Step 6:

Use a sponge dauber to apply Emerald Green Delicata Ink to the plain rectangular die-cut. Heat set.


Step 7:

Use a Sponge Dauber to edge the snowflake stamped image panel. Heat set.


Step 8: 

Use Tear It! Tape to adhere the image panel to a Kraft A2 Card. Use Tear-It Tape to adhere the sentiment to finish the card.


Thank you for visiting today!


Tuesday, December 19, 2023

Happy New Year

It's Tuesday, my day to share a project created for Topflight Stamps. This week my teammates and I are showcasing Katzelkraft's wonderful stamps AND celebrating New Year's. This week my teammates and I are showcasing Katzelkraft's wonderful stamps AND celebrating New Year's. I've made a rather large New Year's shaker calendar card with Katzelkraft'Snakes KTZ315 and the Holiday Quotes KTZ207 Unmounted Stamps Sets.

Here's the card!


Here's a close-up of the shaker element!


Topflight Stamps Products Used:

Other Products Used:
Solar White Classic Crest Cardstock by Neenah Paper
Black Cardstock by Bazzill Basics
140 lb. Mixed Media Paper by Strathmore
Pink Champagne Ink by Catherine Pooler Designs
Curved Tip Kraft Scissors by Fiskar's
Finger-tip Detail Craft Knife by Fiskar's
Copic Markers: B00, B02, B04, B18, BG32, BG34, BG49, BG57,  04, Y16, Y38, R000, R02, R12, R14, C00, C0
Ancient Alphabet/Numbers Chipboard by Basic Grey
Grass Green and Bice Green Chalk Pencils by General's 
Cloud Dies: Source Unknown
Black Foam Tape: Source Unknown
3mm Gold, Silver, and Mixed Colors Star Sequins by Kat Scrappiness
Other Star Sequins: Source Unknown
2024 Calendar: Etsy
Clear Acetate from packaging
Low-tack Tape
STAY-tion by Wendy Vecchi for Ranger Ink
Stamping Platform

Instructions:
  1. Score a piece of 8.5" x 11" black cardstock at 5.5" and fold to form a 5.5" x 8.5" card. Set aside.
  2. Use Tuxedo Black Memento Ink to stamp the curled up snake and the slithering snake from the Snakes KTZ315 Unmounted Stamp Set onto white cardstock.
  3. Use a kraft knife and scissors to fussy-cut both snakes. 
  4. Color the snakes with Copic markers and edge them with a black marker. 
  5. Set aside the slithering snake.
  6. Trace the slithering snake onto a scrap of white cardstock. 
  7. Fussy-cut the traced snake and paint the cardstock with Banana Fresco Finish Acrylic Paint.
  8. Adhere clear acetate to the back of the curled up snake covering the center aperture.
  9. Place black foam tape around the aperture to create a well. 
  10. Add sequins to the well.
  11. Use the painted cardstock to seal the well, then set aside the curled up snake shaker element.*
  12. Paint the ancient chipboard numbers with ChinaLawn,and Bora Bora Fresco Finish Acrylic Paints and set aside. **
  13. Place low-tack tape horizontally across a piece of 8.25" x 5.25" mixed media cardstock. 
  14. Sponge Della Blue and Blue Atoll Elements Inks over the tape onto the top part of the cardstock to create a sky. 
  15. Remove the tape then sponge Pine and Lime Punch Elements Inks by Lavinia Stamps  across the bottom part of the panel to create a grassy background. 
  16. Use chalk pencils to add shading to the grass.
  17. Stamp the slithering snake towards the bottom left of the background panel.
  18. Use different sized clouds dies to cut white cardstock.
  19. Add detail with Copic markers.
  20. Adhere the clouds to the top of the image panel.
  21. Adhere the painted numbers, shaker snake, the slithering snake, and the calendar to the image panel.
  22. Use Warm BreezeBlue Belle, and Green Oasis VersaFine Clair Inks  to stamp the "Happy New Year" sentiment from the Holiday Quotes KTZ207 Unmounted Stamp Set and heat set. 
  23. Cut the sentiments apart, trim them, then adhere them to the image panel as shown. 
  24. Add star sequins to embellish the sentiment.
  25. Adhere the image panel to the reserved 5.5" x 8.5" black card.
Notes:
  • I find that a Finger-tip Detail Craft Knife used with a glass craft mat works really well for cutting out finely details, such as the interior of the curled up snake. 
  • Retrospectively, I think that I should have planned the background earlier then used a piece of cardstock sponged with Della Blue and Blue Atoll Elements  Inks to seal the shaker's well. I'm not thrilled with the yellow. Alas.
  •  Fresco Finish Acrylic Paints are wonderful for painting chipboard because their opacity and chalk finish work to cover the grey without gesso!
Thanks for visiting today!