Thursday, May 16, 2024

Create a Password Book with Imagine Crafts Inks!

Do you have passwords that continually need to be updated AND have problems remembering them? Do you write those letter-number-symbols somewhere, then end up with an overwritten mess? 


Get an inexpensive memo book and use your Imagine Crafts Inks with your stamps, stencils, and dies to decorate it! 

Here it is!


Imagine Crafts Supplies:

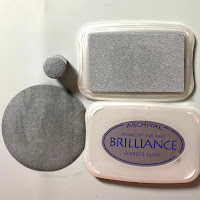
Starlite Silver, Starlite Black, Lighting Black, and Cosmic Copper Brilliance Inkpads

Tuxedo Black Memento Ink by Imagine Crafts/Tsukineko *
Sponge Daubers
Fantastix
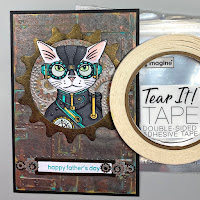
Tear It! Tape
On Point Glue
Craft Mat

Other Supplies:

Memo Pad 

140 lb. Mixed Media Paper by Strathmore

140 lb. Black Mixed Media Paper by Strathmore

Snowflake Fresco Finish Chalk Acrylic Paint by PaperArtsy *

Keyhole Stencil - Source Unknown

Lock and Key Die Die-namics Set by My Favorite Things

Humanoids KTZ223 Red Rubber Unmounted Stamp Set by Katzelkraft *

Copic Markers

Metallic Markers by Spectrum Noir

Skull Skeleton Key Masonite Cut Outs by Coffee Break Designs/Retro Cafe Art

Red Gemstone: Source Unknown

Heat Gun

Stamping Platform by Tonic Studios


Please Note:  Products marked with asterisks (*) can be purchased at Topflight Stamps!


Instructions:


Step 1:

Use a paintbrush and Snowflake Fresco Finish Chalk Acrylic Paint to paint the front and back covers of the memo pad. You don’t have to be neat as brush strokes will only add texture to the project. You might need a second coat to cover the print on the back cover. Let dry, though this paint dries really quickly!


Step 2:

Use a Sponge Dauber to apply Starlite Silver Brilliance ink to both the covers. Heat set.


Step 3:

Use a Fantastix to apply Starlite Silver Brilliance ink around the binding rings of the pad.


Step 4:

Use copper or steel wool pads to pounce Cosmic Copper Brilliance Ink spots and marks to both covers the pad. Heat set.


Step 5:

Place a magnet sheet under a piece of paper and set the pad’s front cover onto the paper. Place the Keyhole stencil over the notebook. Secure with magnets and/or low-tack tape. Use a Sponge Dauber to apply Starlite Black Brilliance Ink over the stencil onto the pad’s cover. Let sit for a few minutes and repeat the Ink stenciling. Remove the stencil and heat set the pad’s cover.


Step 6:

Use a Sponge Dauber to apply Starlite Silver Brilliance Ink to a small piece of black cardstock. Heat Set. Use the Keyhole Cutting Die to cut the inked cardstock. Sorry that there’s no photo.


Steps 7A and 7B:

Use Starlite Black Brilliance Ink (7A) to add depth to the silver keyhole. Repeat with Lightning Black Brilliance Ink (7B).


Step 8:

Use Tuxedo Black Memento Ink to stamp the Big Head/Big Eye image from the Humanoids Stamp Unmounted Rubber Stamp Set onto white cardstock.


Step 9:

Color the image panel with Copic markers. Sorry that there’s no photo!


Step 10:

Use Tear It! Tape to adhere the colored image panel behind the opening in the keyhole. Add tiny screw-top brads to the each corner, then mat the keyhole rectangular image panel with black cardstock, cut slightly larger than the keyhole panel.


Step 11:

Use Snowflake Fresco Finish Chalk Acrylic Paint to paint the Skull Skeleton masonite key. Let dry, then use a Sponge Dauber to apply Starlite Silver Brilliance Ink to the key. Heat set.


Step 12:

Use On Point Glue to adhere the key to the front of the keyhole image panel.


Step 13:

Use Tear-It Tape to adhere the keyhole image panel to the front of the Password memo pad.


Here's a photo of the Password Notebook.


Thanks for visiting today!

Tuesday, May 14, 2024

Happy Birthday!

Greetings! It's Tuesday so it's time to share a project created for Topflight Stamps. This week my teammates and I are showcasing  Hobby Art Ltd..'s wonderful stamps. 

Here's my card created with the super-cute Get Your Goat Clear Polymer Stamp Set by Hobby Art Ltd.


Topflight Stamps Products Used:

Other Products Used:
Solar White Classic Crest Cardstock by Neenah Papers
Thunder Grey Cardstock by Bazzll Basics
Cloud Edger Stencil by A Colorful Life Designs
Summer Sky, Bamboo Leaves, and New Sprout Memento Ink by Imagine Crafts/Tsukineko
Copic Markers:
 Goats Fur: BV20, BV23, BV25, N0, N1, N2, N3, N4, N5, N6, N7, C00, C0
 Goats'  Horns/Hooves: YR30, Y431, W0, W1, W2
 Goats'  Noses, Ears: RV91, R30
 Goats' Eyes: BG23, BG53
 Rock Pile: BG70, BG72, BG90, BG93, DE42, DE70, T0, T2
 Butterflies: Y35, Y38, N7
 Grass: YG03
Repositionable Sticker Paper by Avery
STAY-tion by Wendy Vecchi for Ranger Ink
Stamping Platform

Instructions:
  1. Create an A6 card from grey cardstock. Set aside.
  2. Use a stamping platform and Tuxedo Black Memento Ink to stamp one of the goats-on-the-rocks and two kids from the Get Your Goat Clear Polymer Stamp Set twice — once onto white cardstock and once onto repositionable sticker paper.
  3. Fussy-cut the sticker paper versions and place them over their counterparts on the image panel as masks. 
  4. Position the rockpile stamp from the Get Your Goat Clear Polymer Stamp Set facedown under the large goat as shown.
  5. Press the platform's lid onto the back of the stamp, lift, ink the rock pile stamp with Tuxedo Black Memento Ink, and stamp it twice — once onto the image panel and once onto repositionable sticker paper.
  6. Fussy-cut the sticker paper version and place it over its counterpart on the image panel as a mask.
  7. Place the image panel onto the STAY-tion and secure with magnets or low-tack tape.
  8. Place one of the hills masks from the Mini Hills Mask Set about 2" from the bottom of the image panel to protect it. Secure the mask over the image panel with magnets.
  9. Position the Cloud Edger Stencil towards the top of the image panel. 
  10. Sponge or brush Summer Sky Memento ink over the top of the stencil onto the image panel to start to create a cloudy sky.
  11. Shift the Cloud Edger Stencil downwards and rotate it. 
  12. Continue to brush or sponge Summer Sky Memento ink over the top of the stencil and the masked goats onto the image panel.
  13. Repeat Steps #11 and #12 under the cloudy sky is complete. 
  14. Remove the Cloud Edger Stencil from the image panel and the STAY-TION.
  15. Move the Mini Hills mask a bit downward and brush or sponge Bamboo Leaves Memento Ink over the top of the mask, the masked kids, and the masked rocks to create the top part of the lawn. 
  16. Remove the Mini Hills Mask.
  17. Take the flattish hills mask from the Acetate Hills Masks  Set and place it a bit below the top of the hill.
  18. Brush or sponge Bamboo Leaves Memento Ink over the top of the mask and the masked images onto the image panel. 
  19. Shift the flattish hills mask downwards and a bit to the side. 
  20. Brush or sponge Bamboo Leaves Memento Ink over the top of the mask and the masked images onto the image panel. 
  21. Repeat Steps #19 and #20 until there are several mid-green curves on the bottom of the image panel.
  22. Remove the mask.
  23. Brush New Sprout Memento Ink over the masked images onto the image panel to fill in the lawn area.
  24. Remove the masks from the images.
  25. Color the goat, kids, and the rock pile with Copic markers. 
  26. Use a YG03 Copic marker to add some grassy detail and shading to the lawn area. 
  27. Place the image panel back onto the stamping platform. 
  28. Position the butterfly from the Get Your Goat Clear Polymer Stamp Set facedown on the image panel.
  29. Press the platform's lid onto the back of the butterfly stamp, lift the lid, ink the stamp with Tuxedo Black Memento Ink, and stamp.
  30. Clean and dry the stamp. 
  31. Position the butterfly from the Get Your Goat Clear Polymer Stamp Set facedown on the left of the goat image on the image panel.
  32. Press the platform's lid onto the back of the stamp, lift, ink the stamp with Tuxedo Black Memento Ink, and stamp.
  33. Clean and dry the stamp. 
  34. Position the butterfly from the Get Your Goat Clear Polymer Stamp Set facedown above and to the right of the goat image on the image panel.
  35. Press the platform's lid onto the back of the butterfly stamp, lift the lid, ink the stamp with Tuxedo Black Memento Ink, and stamp.
  36. Clean and dry the stamp. 
  37. Position the butterfly from the Get Your Goat Clear Polymer Stamp Set facedown on the right of the goat image on the image panel.
  38. Press the platform's lid onto the back of the butterfly stamp, lift the lid, ink the stamp with Tuxedo Black Memento Ink, and stamp.
  39. Clean and dry the stamp. 
  40. Use Copic markers to color the butterflies.
  41. Use the largest die from Card Passe Partout Essential Rectangles Die Set to cut the image panel.
  42. Place the image panel back onto the base of the stamping platform. Secure with magnets.
  43. Position the three sentiments from the Get Your Goat Clear Polymer Stamp Set facedown on the image panel.
  44. Press the platform's lid onto the back of the sentiment stamps, lift the lid, ink the stamp with Nocturne VersaFine Clair Ink , and stamp. 
  45. Re-ink the stamps and stamp again if necessary to attain good impressions.
  46. Adhere the image panel to the reserved card.
Thanks for vistiting today!

Tuesday, May 7, 2024

Best Fishes!

It's Tuesday, my day to share a project created for Topflight Stamps. This week is an "Anything Goes" theme for the TFS team. Since it's Mer-May, I decided to make a Best Fishes card featuring the Be a Mermaid Clear Stamp Set 852, the Mermaid Clear Stamp Set 853, and the Plenty of Fish Clear Stamp Set 858, all of which are by Janet Klein for AALL and Create.


Topflight Stamps Products Used:
Tuxedo Black Memento Ink by Imagine Crafts/Tsukineko
Nocturne VersaFine Clair Ink by Imagine Crafts/Tsukineko

Other Products Used:
Solar White Classic Crest Cardstock by Neenah Papers
Desert Storm Cardstock by Neenah Papers
Desert Memento, Bamboo Leaves, and Cottage Ivy Inks by Imagine Crafts/Tsukineko
Curvy Ruler
Mermaid Lagoon, Cracked Pistachio, Peacock Feathers, and Salvaged Patina Distress Inks by Tim Holtz for Ranger Ink
91% Isopropyl Alcohol in a Mister
Copic Markers:
 Skin BV000, BV0000, E50, E21, E11, E00
 Cheeks: R20
 Lips: E04, R32, R35
 Hair: Y26, Y23, Y21, Y11
 Jellyfish: B63, B66, B69
 Tails:B63, BG53, BG57, YG23, YG25;  YG23, YG23, BV02, BV04, RV52, RV55
 Plants: YG02, YG03, YG05, YG91; G07 , G09, G19, G85, G94; G93, G99, G24
 Coral: E93, E95, E97,  E89, YR14, RV55
 Shells: BV00, BV01, B02, BV20, BV23, Y0000, YR00, YR01, R30, R32, Y00
 Fish: BG57, YG21, YG23, YG25, YG45, Y11, Y21, Y23; YG25, YG45, B63, B66, BG53, YR04; BV02,  BV04, RV52, RV55, Y000, Y11, YR02; YR00, YR02, YR04, R30, R32, BV00, B02, YG23, YG25
White Gelly Roll Gel Pen by Sakura
Best Fishes Sentiment by justjohanna/Odd Bird Planet
Flag Die: Source Unknown
Repositionable Sticker Paper by Avery
Low Tack Tape
STAY-tion by Wendy Vecchi for Ranger Ink
Stamping Platform

Instructions:
  1. Create a 7" x 5" card from Desert Storm Cardstock and set aside.
  2. Use magnets to secure a 7" x 5" piece of white cardstock onto the base of a stamping platform.
  3. Position both mermaids from the Be a Mermaid Clear Stamp Set 852 and the Mermaid Clear Stamp Set 853 where desired.
  4. Use Tuxedo Black Memento Ink to stamp the mermaids twice – once onto the image panel and once onto repositionable sticker paper.
  5. Fussy-cut the sticker paper versions and place them over their counterparts on the image panel.
  6. Position the fish stamps from Plenty of Fish Clear Stamp Set 858 and the jellyfish stamp from the Be a Mermaid Clear Stamp Set 852 on the scene.
  7. Use Tuxedo Black Memento Ink to stamp the fish and the jellyfish twice – once onto the scene and once onto repositionable sticker paper.
  8. Fussy-cut the sticker paper versions and place them over their counterparts on the image panel.
  9. Move the image panel up so that there's room at the bottom of the stamping platform.
  10. Position the shell from the Mermaid Clear Stamp Set 853 on the bottom left the image panel.
  11. Use Tuxedo Black Memento Ink to stamp the shell onto the image panel and onto repositionable sticker paper. 
  12. Stamp the shell onto repositionable sticker paper five times. 
  13. Fussy-cut all the sticerk paper versions of the shells.
  14. Place one of the fussy-cut shells over the one stamped on the left of the image panel.
  15. Clean and dry the shell stamp.
  16. Rotate the shell and position it in the center bottom of the image panel.
  17. Position the shell from the Mermaid Clear Stamp Set 853 on the bottom left the image panel.
  18. Use Tuxedo Black Memento Ink to stamp the shell onto the image panel.
  19. Place another fussy-cut shell over the newly stamped shell on the image panel.
  20. Repeat Steps #16 through 19, until you have five stamped and masked shells.
  21. Remove the image panel from the stamping platform.
  22. Place the image panel onto the STAY-tion and secure with magnets.
  23. Use the curvy ruler and a craft knife to cut a piece of low-tack tape.
  24. Place the curvy low-tack tape horizontally towards the bottom of the image panel.
  25. Sponge or brush Desert Sand Memento ink over the tape towards the bottom of the image panel.
  26. Tear a piece of cardstock, place the torn edge onto the image panel, then sponge or brush Desert Sand Memento ink over the torn edge onto the image panel.
  27. Move the torn edge downwards and repeat until the bottom part is covered.
  28. Remove the tape.
  29. Place the other side of the tape at the top of the sandy area.
  30. Brush or sponge Peacock Feathers Distress Ink over the top of the tape and the masked images onto the image panel.
  31. Take the curvy ruler and place it horizontally across the image panel.
  32. Sponge or brush Peackock Feathers Distres Ink over the top of the ruler onto the image panel.
  33. Move the curvy ruler upwards and sponge or brush Peacock Feathers Distress ink over the ruler.
  34. Repeat Step #31 until there are several rows of curvy inked horizontal lines over the masked images.
  35. Sponge or brush Mermaid Lagoon, Cracked Pistachio, and Salvaged Patina Distress Inks to fill in the sea part of the scene.
  36. Mist the image panel with 91% Isopropyl Alcohol to add splotches and further blend the ink.
  37. Allow the image panel to dry for a few minutes.
  38. Place the image panel back onto the stamping platform.
  39. Position the ferny looking stamp from the. Be a Mermaid Clear Stamp Set 852 along the right side of the image panel. 
  40. Ink the stamp with Bamboo Leaves Memento Ink and stamp.
  41. Clean and dry the stamp.
  42. Reposition the stamp, ink it with Bamboo Leaves Memento Ink, and stamp.
  43. Repeat Steps #41 and #42 until you have a row of leaves along the right side of the image panel.
  44. Clean and dry the stamp but keep it out! You'll be using it again.
  45. Position the other plant from the Be a Mermaid Clear Stamp Set 852 to the left of the ferny plants.
  46. Ink the stamp with Cottage Ivy Memento Ink and stamp.
  47. Clean and dry the stamp.
  48. Reposition the stamp, move it to the center bottom of the image panel, ink it with Cottage Ivy Memento Ink, and stamp.
  49. Clean and dry the stamp.
  50. Reposition the stamp, move it to the bottom left of the image panel, ink it with Cottage Ivy Memento Ink, and stamp.
  51. Clean the stamp and put it away!
  52. Take the ferny stamp from the Be a Mermaid Clear Stamp Set 852 and position it along the left edge of the image panel. 
  53. Ink the stamp with Bamboo Leaves Memento Ink and stamp.
  54. Clean and dry the stamp.
  55. Reposition the stamp so that it's above the previous impression, ink it with Bamboo Leaves Memento Ink, and stamp.
  56. Repeat Steps #54 and 55.
  57. Clean the stamp and put it away!
  58. Take the foliage/coral combo stamp from the Mermaid Clear Stamp Set 853 and position it so that it's to the right of the shell.
  59. Ink the stamp with Cottage Ivy Memento Ink and stamp.
  60. Clean and dry the stamp.
  61. Move the stamp to the right,  ink it with Cottage Ivy Memento Ink, and stamp.
  62. Repeat Steps #60 and #61 twice more until there are four of the plant/coral images.
  63. Remove all of the masks.
  64. Color all images with Copic markers.
  65. Use white Gelly Roll gel pen to add white highlights where desired.
  66. Trim the image panel to 6.75" x 4.75".
  67. Run the wedge tip of a black Copic marker along all four edges of the trimmed image panel.
  68. Use  Nocturne VersaFine Clair Ink by Imagine Crafts/Tsukineko to stamp the "Best Fishes" sentiment onto a scrap of the Desert Storm cardstock.
  69. Use a cutting die to cut the sentiment.
  70. Adhere the image panel to the reserved kraft card.
  71. Adhere the sentiment die-cut to finish the card.
Thanks for visiting today!