Monday, January 28, 2019

Moon Song Calendar

Here's a useful calendar featuring House-Mouse Designs™ super-cute new Moon Song Rubber stamp. This stamp made me think of Sitting on the Dock of the Bay, the classic song by Otis Redding.


Supplies Used:
Stampendous Supplies Used:
House-Mouse Designs™ Moon Song Rubber Stamp
Decor Cling Music Stamp
Marcasite Sparkly Embossing Powder
Mixed Media White Paper
VersaMark™ Watermark Ink by Tsukineko
Memento™ Tuxedo Black Ink by Tsukineko

Other Supplies Used:
Copic Markers:
   Amanda's Skin: BV0000, E50, E51, E93
   Amanda's Nose: R21
   Amanda's Fur: E35, E47, E49, E53, E57
   Cats: C00, C0, C1, C2 C3, C4, E04, R20, R21, RV93
   Dock: E21, E23, E259, E29, W00, W0, W1
   Sky: B34, B37
Solar White Classic Crest® Cardstock by Neenah
Square Nestabilities® by Spellbinders®
Beauty Queen Font Dies by QuicKutz
Tim Holtz® Faded Jeans, Salty Ocean, Black Soot Distress® Oxide Inks by Ranger Industries
Tim Holtz® Black Soot Distress® Ink by Ranger Industries
Black Chipboard: Source Unknown
Stamping Platform

Instructions:
  1. Cut a piece of Mixed Media White paper to 8" square.
  2. Smoosh Faded Jeans and Salty Ocean Distress Oxide inks onto a craft mat, spritz with water, and drag the Mixed Media paper through the ink. Spritz with water. Heat set, and repeat the process until you're happy with the coverage.
  3. Lightly sponge some Black Soot Distress Oxide ink onto the paper, spritz with water, and heat set until completely dry, then heat set another time to be doubly sure.
  4. Secure the Oxided paper securely to the base of a stamping platform, position the Decor Music stamp as desired, apply ink to the stamp, then stamp. Repeat until you have a complete impression.
  5. Trim the stamped music paper to 7.75" square, sponge with Black Soot Distress ink, and adhere to an 8" square piece of black chipboard.
  6. Stamp Moon Song onto white cardstock and color with Copic markers. 
  7. Use the Square Nestabilities set to die-cut a frame for the image.
  8. Die-cut the numbers from heavy cardstock using the Beauty Queen font set or any other large alphabet die set.
  9. Smoosh the frame onto the VersaMark pad, add Marcasite Sparkly Embossing powder, dump off the excess, and heat set. Repeat to build up dimension and shimmer.
  10. Repeat step 9 with the die-cut numbers.
  11. Adhere the Moon Song image panel behind the frame.
  12. Adhere the calendar below the framed image panel.
  13. Adhere the numbers as shown to finish the calendar.
Thanks for visiting today.

Wednesday, January 23, 2019

Tweet Birdie Card


Today's card features the new super-cute Tweet Birdie Cling Rubber Stamp Set (there's a matching die set available too, though I opted not to use it) and one of the dies from the fabulous new Windowrama Cutting Die Set.


Supplies Used:
Stampendous Supplies Used:
Tweet Birdie Cling Rubber Set
Windowrama Cutting Die Set
Spring Borders Cutting Die Set
Fitted Frames A Cutting Die Set
Picasso Metal Shield/Stencil
Memento™ Tuxedo Black Ink by Tsukineko®

Other Supplies Used:
Copic Markers: E 49, E70, E71, E74, E77, E89, R32, YG03, YG05, YG63, YG67, C10
Tim Holtz® Stormy Sky and Spun Sugar Distress® Ink by Ranger
Brown Cardstock by Bazzill Basics
Solar White Classic Crest® Cardstock by Neenah papers

Instructions:
  1. Create an A2 card from brown cardstock and set aside.
  2. Using Memento Ink, stamp the bird onto white cardstock, then color with Copic markers.
  3. The Tweet Birdie Cutting Die Set is available, but I opted to fussy-cut the bird, then edged him with a black marker.
  4. Using the Window-Rama Cutting Die Set, die-cut the tree branch circle from white cardstock, then color with Copic markers. 
  5. Cut a piece of white cardstock to 4" x 5.25".
  6. Sponge Distress inks over the Picasso Shield to create a cloudy sky background. 
  7. Die-cut brown cardstock with one fo the dies from the Spring Borders Die Cutting Set.
  8. Stamp the sentiment onto white cardstock, and die-cut it using one of the dies from the Fitted Frames A Cutting Die Set.
  9. Assemble the card as shown.
Thanks for visiting today.

Thursday, January 17, 2019

Sparkly New Year!

I still have 2019 tear off mini-calendars in my stash and I want 2019 to be a sparkly magical year, so I used one of my new stamps to make this wall hanging for my craft room.


Supplies Used:
Oddball Sparkle Fairy by Stamping Bella
Tuxedo Black Memento™ Ink by Tsukineko
Blue Sky Memento™ Ink by Tsukineko
Angel Pink Memento™ Ink by Tsukineko
Lulu Lavender Memento™ Ink by Tsukineko
London Fog Memento™ Ink by Tsukineko
Jet Black StazOn® Ink by Tsukineko
Mini Cloud Edges Stencil by My Favorite Things
Cloud Stencil by My Favorite Things
Dark Hearts Stencil by Visible Image
Copic Markers:
   Skin: BV0000, BV20, E000, E11, E21, E50, R20
   Eyes: C1, G20, G82
   Hair: E07, E15, E17, E19
   Dress and Tights: B24, B26, B39, RV52, RV55, RV63, RV66
   Wings: V000, V01
   Shoes: C6, C8
Sky Star, Rose Star, Marine Star, Purple Star, and Green Star Stardust® Glitter Pens by Sakura
Clear Glaze™ Glossy Gel pen by Sakura
Clear Spectrum Noir™ Glitter Marker by Crafter's Companion
140 lb. Mixed Media Cardstock by Strathmore®
Vellum by Strrathmore®
Black Chipboard
Pink Rhinestones by KaiserCraft
Brads
Ribbon
Eclipse Tape by Judikins
Calendar by Taylored Expressions
Toothbrush style cosmetic brushes from Amazon
Die by Spellbinders
Sookwang Tape

Instructions: 

  1. Using Tuxedo Black Memento ink, stamp fairy onto mixed media cardstock and onto Eclipse Tape.
  2. Fussy-cut Eclipse Tape version and adhere over its counterpart on the mixed media cardstock.
  3. Stamp one set of "sparkle" horizontally to the right of the fairy's hand and another set vertically over her lower hand. Stamp two sets of sparkle onto Eclipse tape, fussy-cut the skulls, and adhere over their counterparts.
  4. Brush Blue Sky Memento ink over the Mini Cloud Edges and Cloud stencils onto the mixed media cardstock.
  5. Randomly Brush Angel Pink Memento ink over the stencil to add some pink touches to the cloudy sky.
  6. Brush London Fog and Lulu Lavender Memento ink over the Dark Hearts stencil over the cloudy sky stenciling on the mixed media cardstock.
  7. Lift and reserve the masks for another use.
  8. Color the fairy with Copic markers.
  9. Use the clear glitter marker to cover her wings.
  10. Color the stars and the dots with Stardust glitter pens.
  11. Add several layers of Clear Glaze pen over the skulls, letting the glossy ink dry between layers.
  12. Back a piece of vellum with Sookwang tape, then stamp the sentiment onto vellum with StazOn ink.
  13. Die-cut the sentiment and adhere as shown. Add rhinestones.
  14. Using a piercer, punch holes in the top of the black chipboard and add brads to the holes.
  15. Adhere the image panel to the chipboard.
  16. Adhere the calendar to the image panel.
  17. Thread ribbon through the brads.
Thanks for visiting today!


Wednesday, January 16, 2019

Succulent Gift Bag

One of the perks of being on Stampendous' Design Team is that we occasionally receive awesome supplies from Stampendous' partner companies. We recently received a variety of goodies from PaperMart and some Stylin™ Multi-Surface Acrylic Paint from DecoArt. I decided to pair products from both companies with Stampendous' fabulous new 6x6 Succulents Cling Rubber Stamp.

Here's my painted and stamped linen bag.


Supplies Used:
Stampendous Supplies Used:
6x6 Succulents Cling Rubber Stamps
Fitted Frames B Cutting Die Set
VersaFine™ Onyx Black Ink by Tsukineko®

Other Supplies Used:
StazOn™ Jet Black Ink by Tsukineko®
StazOn™ Azure Ink by Tsukneko®
Stylin™ Multi-Surface Blue, Yellow, Green, and White Acrylic Paint  by DecoArt®
Linen Bag by PaperMart®
E-Z Runner® Grand Repositionable Dot Runner by Scrapbook Adhesives®
Stamping Platform
Ribbon

Instructions:
  1. Remove the string from the canvas bag and discard.
  2. Mix the blue, yellow, green, and white Stylin paints and brush over the entire linen bag, taking care to get complete coverage, including the interior of the bag's opening. You can hasten the drying process with a heat gun.
  3. Brush blue, then green paint over the bag to get a variegated appearance.
  4. Heat set the bag to ensure that it is totally dry.
  5. Trim a piece of scrap paper to cover the front of the bag. Center a die from the Fitted Frames B Cutting Die Set on the paper, die cut, discard the die-cut, and retain the negative.
  6. Using temporary adhesive, adhere the die-cut piece of scrap paper to the linen bag.
  7. Secure the linen bag to the base of the stamping platform.
  8. Using Jet Black StazOn ink, stamp the succulent through the aperture in the scrap paper onto the linen bag. Re-ink the stamp and stamp until you get a good impression. This might take a few passes.
  9. Remove the bag from the stamping platform but keep the paper mask in place. Sponge Azure, then Jet Black around the perimeter of the die-cut aperture.
  10. Remove the paper mask.
  11. Attach a safety pin to the end of the ribbon and thread the ribbon through the opening at the top of the bag. Cut the ribbon, remove the safety pin, and tie the ends of the ribbon.
Thanks for visiting today!

Saturday, January 12, 2019

WindowRama Meadow Edger Tutorial...with a Flamingo!

Hey there! Earlier this year, I told you all about the fantabulous new WindowRama die set. Now I'm going to share a tutorial showing how to use it together with the new Meadow Edgers Die and the Meadow Edgers Perfectly Clear™ Stamp set. It's going to be a long slog, so go grab a cuppa and get comfy!


Supplies Used:
Stampendous Supplies Used:

Other Supplies Used:
Memento™ London Fog Ink by Tsukineko
Tim Holtz® Forest Moss Distress® Ink by Ranger
Green Cardstock by Bazzill Basics
Blue Cardstock by Bazzill Basics
Vellum by Neenah
Copic® Markers:
  Clouds: N0, N1, N2, C00,
  Grass and Trees: YG45, YG61, YG63, YG67
  Flamingo: R02, R12, R30, R32, R43, N4,N6, Y13, Y19
Repositionable (Blue Label) Tape by 3M
Bone Folder
Binder Clips
Liquid Adhesive
Double-sided White Tape such as Sookwang or ScorTape
Red-Liner Tape
Sizzix or other die-cut machine

Tutorial/Instructions: Now hold onto your socks and grab your cuppa leisure beverage, cause here we go...

1. Using the WindowRama base die, die cut two pieces of light blue cardstock, white mixed media paper, green cardstock, darker blue cardstock, and vellum.

2. The two pieces of light blue cardstock will become the back/base and front of your card. Fold along the inmost score lines. Use a bone folder to get a sharp fold. The front of the card will be a "mountain" fold. The back/base will be a "valley" fold.

3. Using repositionable Scotch Tape, tape the circle die from the WindowrRama set to the front of the card and run through your machine.


4. Reserve the die-cut circle for another use and put the light blue card back/base and the card front aside for now.

5. Grab the die-cut white paper and die-cut with the cloud border from the Meadow Edgers Die set.


6. Use London Fog Memento ink to stamp the cloud border from the Meadows Edge Perfectly Clear Stamp set. Get as close as you can to the die-cut borders, but don't worry if you're off as you will be adding color and depth with Copic markers.7


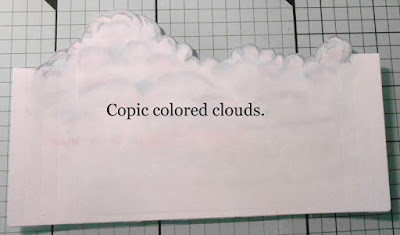
7. Use Copic markers listed above to color the clouds to your liking. Set aside.


8. Use London Fog Distress ink to stamp the tree line from the Meadows Edge Perfectly Clear stamp set. 


9.  Position the treeline die from the Meadow Edgers Die set as close as you can to the stamped image. Tape the die in place using Repositionable Scotch tape. Run through your die-cut machine.


10. Remove the treeline die and place the grass die under the treeline. Run the green cardstock through your machine again. Oops. There's no photo of this step.

11. Position the wavy line die from the Meadow Edgers die set atop the grass and run the green cardstock through your machine again. 


12.  Using scissors (or an Exacto if you're inclined) cut from the outside of the base die to the die-cut lines. 

13. Using Copic markers to add detail to the treeline and the grass edge.


14. Cut the top off of the dark blue die-cut cut earlier. Position the green treeline/grass edge die-cut atop blue cardstock, then adhere. This will become your second layer. Sadly, I neglected to take a photo of this step because I suck.

15. Oopsie. I missed some photos, so I've added a handy dandy chart thingy below. The x, xx, and xxx are where you should cut along the score lines.
a) Fold and crease the white and the blue/green layers along the innermost score lines.
b) For the backmost layer (in this case the cloud border), using the outermost score line as your guide, cut a 1/4" strip off both sides of the white paper. See the red line and x below.
c) For the middle layer (the blue/green and/or tree/grass/water), cut a 2-score wide strip (1/2") off both sides. See the blue xx and line below.
d) For the front-most level that is closest to the cardfront (the sentiment layer on my card) with the circular window, cut a 3-score wide strip (3/4" strip off of both sides). See the green xxx below.


16. Using liquid glue, adhere the cloud layer to the left edge of the card back/base, then adhere the middle layer (here the tree and lake) to the left edge of the card back/base.

17. Repeat step #16 for the right side. Clamp with binder clips to ensure a good bond.


18. Realize you forgot to use the vellum.

19. Using Onyx Black VersaFine ink, stamp the sentiment onto the vellum WindowRama base die-cut and tear off the top.

20. Cut along the second to last score line and add red-liner tape to the edges. Adhere to the edges of the base over the other layers. 


21. Add strong adhesive to the outside of the sides of the back/base of the card and adhesive to the inside sides of the card front. 


22. Position the card front over the back/base and adhere. The WindowRama card is almost complete.


22. Using Tuxedo Black Memento ink, stamp the Yoga Flamingo (aka Yogamingo) onto Neenah cardstock. Fussy-cut, color with Copic markers, and edge with a dark marker.

23.  Add white tape to vellum and die-cut three clouds using the single cloud die from the Windowrama die set.

24.  Using Onyx Black VersaFine ink, stamp "Namaste" on one of the three clouds.

25.  Adhere the Yogamingo and the clouds to the card as shown way far above.

Tadah. Done! If you've made it this far, congratulations. If you have any questions, please do not hesitate to contact me and I'll try to help you and not confuse your further.

Thanks for visiting today!

Friday, January 4, 2019

Have a Magical Day!

Have you seen Stampendous' newest release? Why not? Rush on over because there's a great new die set in town. It's called WindowRama and you can create dimensional shadow cards with it. Go check out Fran's fantastic video and learn more about it!

Here's my first  WindowRama card that also uses the new Dragon Wheel Cling SetMeadow Edge Perfectly Clear™ Stamp Set, the Meadow Edgers Die Set, and the Speech Bubble from the Froggie Balance Die Set


Supplies Used: 
Stampendous Supplies Used:
WindowRama Die Set
Dragon Wheel Cling Set
Meadow Edge Perfectly Clear™ Stamp Set
Meadow Edgers Die Set
Speech Bubble from the Froggie Balance Die Set
Memento™ Tuxedo Black Ink by Tsukineko®
VersaFine Clair™ Nocturne Ink by Tsukineko™

Other Supplies Used:
Copic® Markers:
   Rainbow R27, YR04, Y15, G07, B16, B69, V09
   Clouds: C00, C0, C1
   Dragon: V04, V09, VF2, B45, RV52, RV55, RV63, RV66, RV95, YG01, YG23, YG25
   Cone: E31, E33
   Ice Cream: BG41, BG45, E71, E74
Tim Holtz® Forest Moss Distress® Ink by Ranger
Tim Holtz® Forest Moss and Peeled Paint Distress® Markers by Ranger
Clear Sparkle Spectrum Noir™ Pen by Crafter's Companion
White Gelly Roll® Pen by Sakura of America
Solar White Classic Crest® Cardstock by Neenah
Blue and Green cardstock
Bone Folder
Road Patterned Washi Tape

Instructions:
  1. Using the WindowRama base die, die-cut blue cardstock twice, so that you have the top and bottom of the card base.
  2. Use the circle die to die-cut a window on one of the two blue die-cuts. This will become your card front.
  3. You will see score lines on the sides of both die-cuts. Pinch along the furthest score line from the edge on either side to start the fold. Use a bone folder to smooth along the score line to create a nice sharp crease. You will end up with a back die-cut with a fold on each side and the card front (with the window) with folds on either side.
  4. Stamp the rainbow from the Meadow Edge Perfectly Clear Stamp set onto white cardstock and use the corresponding die-cut from the Meadow Edgers Die set to die-cut it. Color the rainbow with Copic markers.
  5. Die-cut white cardstock with the cloud die from the Meadow Edgers Die set and color with Copic markers.
  6. Using Forest Moss Distress ink, stamp the Forest Scene from the Meadow Edge Clear Stamp set onto green cardstock. Die-cut it with the corresponding die from the matching set.
  7. Use the Distress markers to deepen the color and add detail.
  8. Die-cut a few other borders from green cardstock and use Distress markers to add detail and Distress ink to edge them.
  9. Adhere the grass and forest borders to the back of the blue WindowRama card.
  10. Using Memento ink, stamp the dragon onto white cardstock. Fussy-cut and color with Copic markers. Edge with a dark marker, then add shimmer to the dragon's wings using the Clear Sparkle Spectrum Noir pen.
  11. Use the White Gelly Roll pen to touch up the Dragon's teeth.
  12. Add the road-patterned washi tape to the base of the card front.
  13. Adhere the dragon as desired.
  14. Adhere the rainbow and clouds to the background scene above the grass.
  15. Stamp the sentiment with VersaFine Clair Nocturne ink. Die-cut it with a speech bubble.
  16. Adhere the speech bubble to the top left.
  17. Using a strong adhesive on the sides, adhere the card front to the back of the card. 
Thanks for visiting today!

Thursday, January 3, 2019

2019 Calendar with CATS!

Happy New Year! When I saw Stampendous's new Kitten Therapy Perfectly Clear™ Stamp Set, I knew I'd have to have it. After all, I am cat obsessed.

Here's a 2019 Calendar!


Supplies Used:
Stampendous Supplies Used:
Kitten Therapy Perfectly Clear™ Stamp Set
Clear Detail Embossing Powder
Memento™ Tuxedo Black Ink by Tsukineko
VersaMark™ Watermark Ink by Tsukineko

Other Supplies Used
Copic Markers: C00, C0, C1, C2, C3, C4, C6, C8, YR12, YR14, YR20, YR61, YR65, YR82, T0, T1, R81
Translucent White, Medium Grey Value 6 Media® Fluid Acrylic Paint by DecoArt®
Solar White Classic Crest® Cardstock by Neenah Papers
Floral-Graph-Rainbow Petite Prints 6x6 Paper Pad by Doodlebug Design Inc.™
Kitten Smitten 6x6 Paper Pad by Doodlebug Design Inc.™
3D Foam Squares by Scrapbook Adhesives™
Extreme Double-Sided Tape by Scrapbook Adhesives™
Chipboard from my stash
2019 Mini Calendar

Instructions:
  1. Stamp the cats and color them with Copic markers. Fussy cut them and edge with a black marker. Set them aside and let them play. They're kittens. They'll play, they'll snuggle, then they'll nap. They'll wake up eat, excrete, and start the process all over again, all the while providing endless entertainment.
  2. Paint the chipboard numbers with the Media Fluid Acrylic paint. Let dry. You can heat set if you're feeling impatient.
  3. Smoosh the numbers into the VersaMark pad and heat set with Clear Detail Embossing Powder. Repeat a few times so that the numbers are all glossy and dimensional.
  4. Adhere the paw print paper from the Kitten Smitten pad onto a piece of 6x6 chipboard.
  5. Cut two thin strips of Floral Paper and adhere to the top and bottom as shown.
  6. Adhere the numbers using a liquid adhesive.
  7. Adhere the kittens as shown using a combination of liquid adhesive and dimensional foam adhesive squares.
  8. Cut a piece of the floral paper slightly larger than the calendar. Back with cardstock, then adhere under the number.
  9. Use Extreme Double-Sided Tape (red liner tape) to adhere the calendar to the floral rectangle.
  10. Adhere the last two kittens to finish the calendar.
Thanks for visiting today!


Wednesday, January 2, 2019

Happy New Year!


Happy New Year wishes to you and yours. I hope your year is filled with health, happiness, joy, prosperity, laughter, and a touch of magic.

Supplies used:
Les Pabos, Sherlock Holmes Stamp Set by Katzelkraft
Tuxedo Black Memento™ Ink by Tsukineko
Summer Sky Memento™ Ink by Tsukineko
Solar White Classic Crest® Cardstock by Neenah Papers
Copic Markers:
  Skin: BV0000, BV00, R20, E000, E11, E21, E50
  Eyes**: R0000, R02, B32
  Cape and Tie: R24, R27, R59
  Suit and Hat: B41, B45
  Bunny: E21, E23, E25, E27, E39
Sunray Venus Layering Basics Die Set by Tonic Studios
Small Talk and Occasions Stickers by Tim Holtz® Idea-ology® by Advantus
Original 6x6 pad by Authentique
Red cardstock by Bazzill Basics
Red Rhinestones by Kaisercraft
Red Star Rhinestone by A Muse

Instructions:

  1. Create a 6.25" x 5" card from red cardstock.
  2. Stamp the magician from the Les Pabos set with Tuxedo Black Memento ink.
  3. Color with Copic markers
  4. Die-cut with one of the dies from the Sunday Venus Layering Basics Die set.
  5. Keep the image panel in the die and sponge Blue Sky Memento ink over the die onto the image panel.
  6. Remove from panel and set aside.
  7. Cut a strip of polka dotted patterned paper, edge with a Copic marker, and mat with red cardstock.
  8. Adhere the strip of matted polka-dot paper onto blue patterned paper that was cut to 4.75" x 6".
  9. Color the idea-ology stickers with blue marker.
  10. Adhere the image panel to the card front.
  11. Add the sentiment stickers.
  12. Adhere the card front to the red card.
  13. Add the star rhinestone to the magician's wand.
  14. Finish the card with red rhinestones.
Thanks for visiting today!