It's Earth Day and I felt like making an ATC.
Mother Earth is from The Enchanted Gallery's Nature Spirit and Domino Art set and the earth and sentiment are from the Recycle unmounted set.. Both Mother Earth and the Earth were colored with Copic markers.
The text paper is from a recycled Roget's Thesaurus, dating from my high school days. It was ruined by that bwitch Irene, but I kept it to use for art projects! I pulled the page containing the words "conserve" and "conservation". I crumpled it up, then inked it with Stormy Sky & Chipped Sapphire Distress inks, spritzed 'em with water, and heat set. The text paper was adhered with Ranger's Multi Medium, which worked like gangbusters!
The sentiment was stamped with Crimson Red VersaFine ink, then heat embossed with clear detail embossing powder. I colored the heart with Copic markers and touched up the sentiment with extra fine point Sharpie marker.
The Copics I used:
Skin: E50, YR000, YR0000, R11, BV23, BV0000
Hair: C1, C4, C6, C7, C8
Eyes: B12, B14
Roses: R22, R24, R27
Earth: B2, B4, B6 and G40, 43, 46
Background: custom less-than B21, B21, B23
Thanks for visiting today!
Showing posts with label Enchanted Gallery. Show all posts
Sunday, April 22, 2012
Wednesday, April 11, 2012
Take care of our home!
It's April, which means that spring is in full swing, the grass is green, the trees are abloom, and the birds are in breeding plumage. All these are Mother Nature's way of showing us Earth's beauty and to remind us to take care of our planet.
I decided to play along with a few challenges, such as One Sweet Challenge's April challenge to re-use, recycle, or up-cycle using a Sweet Pea Image.
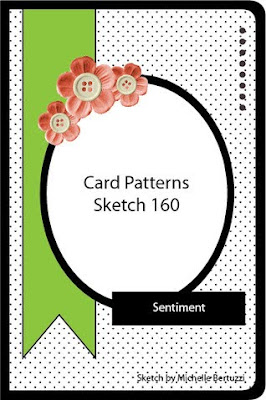
I opted to use this fabulous sketch from Card Patterns. Sketches are great because they take away some of the brain work and my brain can always use a break! :D
Card Patterns Sketch #160:

My recycled/upcycled item was a paperback Roget's Thesaurus that fell victim to Hurricane Irene. I was able to dry it out. I tried to find the word "recycling" in there. No such term!!! Check out that price too!

My card:

Close-up of the flowers:

Here are the details.
I colored ching-chou kuik's Fairy of the Night (on sale for $2.00 @ Sweet Pea Stamps) using Copic markers. A bit of Spica glitter pen was used on her necklace and facial tattoos. I stole an idea from myself and made the ball held by the fairy into the Earth. Since I diecut a rectangular image with an oval, I had to extend some of the dotted lines, which I did with my new Copic Multi-liner.
The patterned papers are from the Gertie 6x6 pad from the Stella & Rose collection by MME. Lately, I'm loving MME. Totally!!!
When Irene came a callin' last September, she flooded my basement. A very old paperback Roget's Thesaurus was among the injured. Fortunately, I was able to dry her out, but the spine was shot and the pages were badly yellowed. There's a photo above that shows just how old that copy was. It cost 95¢!!! Anyways, I kept her because I figured she'd work just fine for papercrafting!!! So, the flowers were punched from her pages, colored with Copics, sewed together with a button, and sprayed with Perfect Pearls Pearl mist for some shine.
The sentiment is from The Enchanted Gallery's Recycling unmounted sheet.
Thanks for visiting today!
I shall enter this card in the following challenges:
• One Sweet Challenge -- April "Recycling"
• Card Patterns #160 Sketch
• Outlawz Copic/Promarker Fridays "Inspired by Nature"
• Oozak "Anything Goes" challenge
I decided to play along with a few challenges, such as One Sweet Challenge's April challenge to re-use, recycle, or up-cycle using a Sweet Pea Image.
I opted to use this fabulous sketch from Card Patterns. Sketches are great because they take away some of the brain work and my brain can always use a break! :D
Card Patterns Sketch #160:

My recycled/upcycled item was a paperback Roget's Thesaurus that fell victim to Hurricane Irene. I was able to dry it out. I tried to find the word "recycling" in there. No such term!!! Check out that price too!

My card:

Close-up of the flowers:

Here are the details.
I colored ching-chou kuik's Fairy of the Night (on sale for $2.00 @ Sweet Pea Stamps) using Copic markers. A bit of Spica glitter pen was used on her necklace and facial tattoos. I stole an idea from myself and made the ball held by the fairy into the Earth. Since I diecut a rectangular image with an oval, I had to extend some of the dotted lines, which I did with my new Copic Multi-liner.
The patterned papers are from the Gertie 6x6 pad from the Stella & Rose collection by MME. Lately, I'm loving MME. Totally!!!
When Irene came a callin' last September, she flooded my basement. A very old paperback Roget's Thesaurus was among the injured. Fortunately, I was able to dry her out, but the spine was shot and the pages were badly yellowed. There's a photo above that shows just how old that copy was. It cost 95¢!!! Anyways, I kept her because I figured she'd work just fine for papercrafting!!! So, the flowers were punched from her pages, colored with Copics, sewed together with a button, and sprayed with Perfect Pearls Pearl mist for some shine.
The sentiment is from The Enchanted Gallery's Recycling unmounted sheet.
Thanks for visiting today!
I shall enter this card in the following challenges:
• One Sweet Challenge -- April "Recycling"
• Card Patterns #160 Sketch
• Outlawz Copic/Promarker Fridays "Inspired by Nature"
• Oozak "Anything Goes" challenge
Monday, March 19, 2012
Layer it up with Smudgy Antics
The challenge this week over at the Smudgy Antics Challenge Blog is to "Layer it up!" I decided to use Seriba again for this challenge.
Here it is:

The first thing I did was to color Seriba using mostly cool gray Copic markers with a touch of silver Metallic Pentel pens on her chains and Glaze pens on her wand.
Then I grabbed a piece of textured gray cardstock and my Chicken-wire and Punchinella stencil by The Crafter's Workshop. I sponged Black Soot and Worn Lipstick Distress ink over the large Chicken-wire stencil first. Then when that dried, I went back and layered the small chicken-wire pattern of the Punchinella stencil and sponged more ink on. I had one more go sponging ink over the star pattern of the Punchinella stencils to create a visual triangle. Then I gave the whole thing several spritzes with a Pearl Perfect Pearl mister, which blended the ink a bit and left a nice shimmery finish. I left it to flatten out under a stack of books.
Some silver accents were needed so I created a photo mat from pink and gray cardstock and added silver eyelets. I found some wonderful black and silver ribbon and threaded it through the eyelets and the sentiment (from The Fairy Fantasy unmounted rubber sheet by the Enchanted Garden) piece.
The sponged patterned glimmery gray cardstock was torn and silver mesh was layered over black cardstock between the two pieces. Then Seriba's panel and the sentiment panel were added.
A flower rhinestone and a trio of star rhinestones were added because the card needed some bling!
Thanks for visiting today!
I shall enter this in the following challenge(s):
• Simon Says Stamp & Show: "Create your own background"
Here it is:

The first thing I did was to color Seriba using mostly cool gray Copic markers with a touch of silver Metallic Pentel pens on her chains and Glaze pens on her wand.
Then I grabbed a piece of textured gray cardstock and my Chicken-wire and Punchinella stencil by The Crafter's Workshop. I sponged Black Soot and Worn Lipstick Distress ink over the large Chicken-wire stencil first. Then when that dried, I went back and layered the small chicken-wire pattern of the Punchinella stencil and sponged more ink on. I had one more go sponging ink over the star pattern of the Punchinella stencils to create a visual triangle. Then I gave the whole thing several spritzes with a Pearl Perfect Pearl mister, which blended the ink a bit and left a nice shimmery finish. I left it to flatten out under a stack of books.
Some silver accents were needed so I created a photo mat from pink and gray cardstock and added silver eyelets. I found some wonderful black and silver ribbon and threaded it through the eyelets and the sentiment (from The Fairy Fantasy unmounted rubber sheet by the Enchanted Garden) piece.
The sponged patterned glimmery gray cardstock was torn and silver mesh was layered over black cardstock between the two pieces. Then Seriba's panel and the sentiment panel were added.
A flower rhinestone and a trio of star rhinestones were added because the card needed some bling!
Thanks for visiting today!
I shall enter this in the following challenge(s):
• Simon Says Stamp & Show: "Create your own background"
Monday, February 27, 2012
Thanks friend!
While I was coloring the second "Madame Cat" card, I realized that I was not happy with the total pinkness of R81, so I made my own "less than R81" pink Copic marker by mixing one squeeze of R81 refill with a few pipettes full of Copic blending fluid.
The result is a paler pink which I used to color the dress of this super-sweet little girl from the same Cats unmounted sheet by The Enchanted Gallery.

I used E40 & R0000 for her skin; YR30, Y23, and & 26 for her hair; R81 & "less than R81" for her dress, and C1, C0, C00 for the kitten.
The patterned paper is from the Urban Prairie 6x6 pad by Basic Grey. The scalloped ovals and the bottom layer (with the paper lace trim) was popped up on dimensional adhesive. The pearls and button were airbrushed with R83 and the Copic airbrush system.
The edges of the patterned paper and the little sentiment-bearing tag (Mixed Messages by Paper Trey) were distressed to add a shabby feel to the card. Last of all, the card is a small one, measuring 3.5" x 5". Fun size!!!
Thanks for visiting today!
I shall be entering this card in the following challenges:
• Simon Says Stamp Challenge -- Layers of paper
• Outlawz Greeting Mondays: Pearls & Lace
The result is a paler pink which I used to color the dress of this super-sweet little girl from the same Cats unmounted sheet by The Enchanted Gallery.

I used E40 & R0000 for her skin; YR30, Y23, and & 26 for her hair; R81 & "less than R81" for her dress, and C1, C0, C00 for the kitten.
The patterned paper is from the Urban Prairie 6x6 pad by Basic Grey. The scalloped ovals and the bottom layer (with the paper lace trim) was popped up on dimensional adhesive. The pearls and button were airbrushed with R83 and the Copic airbrush system.
The edges of the patterned paper and the little sentiment-bearing tag (Mixed Messages by Paper Trey) were distressed to add a shabby feel to the card. Last of all, the card is a small one, measuring 3.5" x 5". Fun size!!!
Thanks for visiting today!
I shall be entering this card in the following challenges:
• Simon Says Stamp Challenge -- Layers of paper
• Outlawz Greeting Mondays: Pearls & Lace
Sunday, February 26, 2012
Encore -- Madame Chat
Madame Chat had an relaxing weekend at her home on La Cote d'Azur and is heading back north to her pied a terre in Paris.
After several spa treatments, she's feeling much better!
Here she is back at the train station in Paris:

Here's a close up!

Madame, from the Cats sheet by The Enchanted Gallery, was colored with Copic markers. Since she was more relaxed, I used cool greys for her fur (a la Russian Blue breed) and gave her a new coat, hat, and fur stole.
All layers of the patterned paper are from a Madison Avenue Lost & Found 6x6 pad by My Mind's Eye. The color scheme was perfect, there were sheets with words en français, and there even was a sheet with Le Tour Eiffel!
An Alterations die was used to create the banner. The sentiment was added with brown Doodlebug rub-ons. Both the sentiment and the focal image were popped up with dimensional foam adhesive squares. Distress inks were used to add a vintage touch and brown pearls were added to complete the card!
Thanks for visiting today!
I shall enter this card in the following challenges.
• The Outlawz Copic/Promarker Fridays "Anything Goes" challenge
• Simon Says Stamp and Show "New York, London, or Paris" challenge (I'll take Paris!)
• Simon Says Stamp Challenge -- Layers of paper
After several spa treatments, she's feeling much better!
Here she is back at the train station in Paris:

Here's a close up!

Madame, from the Cats sheet by The Enchanted Gallery, was colored with Copic markers. Since she was more relaxed, I used cool greys for her fur (a la Russian Blue breed) and gave her a new coat, hat, and fur stole.
All layers of the patterned paper are from a Madison Avenue Lost & Found 6x6 pad by My Mind's Eye. The color scheme was perfect, there were sheets with words en français, and there even was a sheet with Le Tour Eiffel!
An Alterations die was used to create the banner. The sentiment was added with brown Doodlebug rub-ons. Both the sentiment and the focal image were popped up with dimensional foam adhesive squares. Distress inks were used to add a vintage touch and brown pearls were added to complete the card!
Thanks for visiting today!
I shall enter this card in the following challenges.
• The Outlawz Copic/Promarker Fridays "Anything Goes" challenge
• Simon Says Stamp and Show "New York, London, or Paris" challenge (I'll take Paris!)
• Simon Says Stamp Challenge -- Layers of paper
Friday, February 24, 2012
The Traveling Cat
It's my last "official" card for my Outlawz Copic/Promarker Fridays Guest Design gig. I sure had fun playing along and am still gobsmacked and chuffed that they asked me!

Sometimes it's fun to make up back stories for my cards. I've decided that the Traveling Cat image from the Cats sheet by The Enchanted Gallery is leaving Paris after a torrid rendez-vous with Puss in Boots and this is their sad au revoir at Le Gare D'Austerlitz.
Anyways, she was colored with Copic markers. I used the "dirty rag" technique on her fur stole. The patterned papers are from the Boxer 6x6 pad and the Curtain Call 8x8 pad by Graphic 45. The sentiment is from the Tiny Wise Words set by Rubber Soul, which is a fabulous set of wonderful little sentiments that used to be a rub-on sheet too!
I'm not totally thrilled with this one, but done is done and done is good. I plan on making a lighter colored version using Madame Le Chat soon.
Thanks for visiting today!
I shall enter this card in the following challenges.
• The Outlawz Copic/Promarker Fridays "Anything Goes" challenge
• Simon Says Stamp and Show "New York, London, or Paris" challenge (I'll take Paris!)
• iCopic Lovers Weekly Challenge #70 -- Animals

Sometimes it's fun to make up back stories for my cards. I've decided that the Traveling Cat image from the Cats sheet by The Enchanted Gallery is leaving Paris after a torrid rendez-vous with Puss in Boots and this is their sad au revoir at Le Gare D'Austerlitz.
Anyways, she was colored with Copic markers. I used the "dirty rag" technique on her fur stole. The patterned papers are from the Boxer 6x6 pad and the Curtain Call 8x8 pad by Graphic 45. The sentiment is from the Tiny Wise Words set by Rubber Soul, which is a fabulous set of wonderful little sentiments that used to be a rub-on sheet too!
I'm not totally thrilled with this one, but done is done and done is good. I plan on making a lighter colored version using Madame Le Chat soon.
Thanks for visiting today!
I shall enter this card in the following challenges.
• The Outlawz Copic/Promarker Fridays "Anything Goes" challenge
• Simon Says Stamp and Show "New York, London, or Paris" challenge (I'll take Paris!)
• iCopic Lovers Weekly Challenge #70 -- Animals
Friday, February 3, 2012
Outlawz Guest DT Gig!
Woo-hoo! I was surprised and delighted to be asked to be a guest designer for the Friday Copic/Promarker Group at The Outlawz for the month of February.
Our first challenge was a color challenge! We were to use purple, green, and gold for Mardi Gras.
Here's my card!

I used ching-chou kuik's Masked Fairy in Green by Sweet Pea Stamps. She was colored with Copic markers. Gold and purple glitter pens were used to highlight her mask and her wings and a Sakura Glaze pen was used to add dimension and shine to her jewels and the wand's handle.
I die cut a Fleur De Lys Rectangle from Basic Grey paper. While it was still in the die, a Harlequin stencil from The Crafter's Workshop was put over the die. The seasonal purple Distress Ink was sponged over both the die and the stencil, then spritzed with Gold Perfect Mist.
The patterned papers are from Basic Grey's Kioshi 6x6 pad and 12x12 Origins paper (green).
The sentiment is from Fairy Fantasy Unmounted Sheet by The Enchanted Gallery and was stamped onto one of my beloved Spellbinders labels.
Little golden pearls by Recollections were used to add some regal touches to the upper left corner, the corners of the frame, and the sentiment. I wish they still made those since they are way nifty. :(
Thanks for visiting today!
Our first challenge was a color challenge! We were to use purple, green, and gold for Mardi Gras.
Here's my card!

I used ching-chou kuik's Masked Fairy in Green by Sweet Pea Stamps. She was colored with Copic markers. Gold and purple glitter pens were used to highlight her mask and her wings and a Sakura Glaze pen was used to add dimension and shine to her jewels and the wand's handle.
I die cut a Fleur De Lys Rectangle from Basic Grey paper. While it was still in the die, a Harlequin stencil from The Crafter's Workshop was put over the die. The seasonal purple Distress Ink was sponged over both the die and the stencil, then spritzed with Gold Perfect Mist.
The patterned papers are from Basic Grey's Kioshi 6x6 pad and 12x12 Origins paper (green).
The sentiment is from Fairy Fantasy Unmounted Sheet by The Enchanted Gallery and was stamped onto one of my beloved Spellbinders labels.
Little golden pearls by Recollections were used to add some regal touches to the upper left corner, the corners of the frame, and the sentiment. I wish they still made those since they are way nifty. :(
Thanks for visiting today!
Wednesday, January 4, 2012
Magical Birthday card
Once upon a time, a traveling wizard visited a castle owned by a lovely fairy and found a lonely little cat who spent all her time sitting in a window, watching the birds and the fairies, and wishing she could fly with them.
The wizard spent some time with the cat and was very taken with her gentleness. He decided to grant her wishes as a special birthday gift for his hostess.

Close up of magical kitty to show the sparkle on her wings!

The card features Third Coast's Sarus Suggests (FA-254-I), the Open Window (CH-755-G), Stone Bench, and Kitty Fairy (CH-681-G).
All elements of the scene were colored with Copic markers. The floor and the stone wall was drawn in with Copic markers as well. The kitty's wings were painted with a layer of Iridescent Purple Twinkling H2Os.
The sentiment is from the Fairy Fantasy Unmounted Sheet by The Enchanted Gallery and was embossed with Queen's Gold embossing powder by Ranger Industries.
Krylon Gold Leaf pen and German Dresden Foil Borders were added. You can find a lovely selection of Dresden Foil at Retro Cafe Art Gallery.
Thanks for visiting today!
I shall be entering this in the following challenges:
• Outlawz ProMarker/Copic Challenges "Anything Goes" Challenge
• Crafting For All Seasons #17 -- Fairies
• Flutterby Wednesdays: Challenge #184: "Open" challenge
The wizard spent some time with the cat and was very taken with her gentleness. He decided to grant her wishes as a special birthday gift for his hostess.

Close up of magical kitty to show the sparkle on her wings!

The card features Third Coast's Sarus Suggests (FA-254-I), the Open Window (CH-755-G), Stone Bench, and Kitty Fairy (CH-681-G).
All elements of the scene were colored with Copic markers. The floor and the stone wall was drawn in with Copic markers as well. The kitty's wings were painted with a layer of Iridescent Purple Twinkling H2Os.
The sentiment is from the Fairy Fantasy Unmounted Sheet by The Enchanted Gallery and was embossed with Queen's Gold embossing powder by Ranger Industries.
Krylon Gold Leaf pen and German Dresden Foil Borders were added. You can find a lovely selection of Dresden Foil at Retro Cafe Art Gallery.
Thanks for visiting today!
I shall be entering this in the following challenges:
• Outlawz ProMarker/Copic Challenges "Anything Goes" Challenge
• Crafting For All Seasons #17 -- Fairies
• Flutterby Wednesdays: Challenge #184: "Open" challenge
Saturday, May 28, 2011
Do you believe in Magic?
Now that I've typed that, I have that song in my head. It's a pleasant song, so it's okay for now!
Since I'm trying to mix things up a bit and since I've had this idea percolating in my head for a while and since I need to build up my stash of birthday cards, I decided to go a bit magical and mystical with this card.

I stamped Third Coast's Wizard (ES-201-F), colored him with Copic markers, masked him with Misket Friskit, then overstamped Third Coast's Large Birch Trunks (CM-055 P),. I peeled off the mask, colored the trees, and added a background -- all with Copic markers.
I diecut a scalloped oval from vellum, then stamped the sentiment, which is from the Fairy Fantasy Unmounted Sheet by The Enchanted Gallery.
Since I'm in a "use up the stash" mood, I used some old Making Memories pewter corners on a black cardstock mat, then on a black card base.
Thanks for visiting today!
Since I'm trying to mix things up a bit and since I've had this idea percolating in my head for a while and since I need to build up my stash of birthday cards, I decided to go a bit magical and mystical with this card.

I stamped Third Coast's Wizard (ES-201-F), colored him with Copic markers, masked him with Misket Friskit, then overstamped Third Coast's Large Birch Trunks (CM-055 P),. I peeled off the mask, colored the trees, and added a background -- all with Copic markers.
I diecut a scalloped oval from vellum, then stamped the sentiment, which is from the Fairy Fantasy Unmounted Sheet by The Enchanted Gallery.
Since I'm in a "use up the stash" mood, I used some old Making Memories pewter corners on a black cardstock mat, then on a black card base.
Thanks for visiting today!
Sunday, May 8, 2011
Happy Mother's Day!
Happy Mother's Day to all you mothers out there. :D
Here's the card that I actually sent to my mother! She got it on time and loves it!

The image is from Recy #006 unmounted sheet from The Enchanted Gallery and was colored with Copic markers in soft colors to match the patterned papers by The Memory Box. The sentiment is from a often-used Sentiments set by Purple Onion Designs.
I hope you all are having a lovely Mother's Day. I got what I wanted —— potholders to replace the torn, stained ones that I had set on fire (I'm talented like that). They're non-skid, heavy duty, and actually sized to fit my hands (the only "petite" thing about me, other than my lack-of-height). Plus I got champagne. Mmmmmmmm. Best of all, my husband is smoking some chicken wings and thighs for my special feast this evening! *big grin*
Thanks for visiting today!
Here's the card that I actually sent to my mother! She got it on time and loves it!

The image is from Recy #006 unmounted sheet from The Enchanted Gallery and was colored with Copic markers in soft colors to match the patterned papers by The Memory Box. The sentiment is from a often-used Sentiments set by Purple Onion Designs.
I hope you all are having a lovely Mother's Day. I got what I wanted —— potholders to replace the torn, stained ones that I had set on fire (I'm talented like that). They're non-skid, heavy duty, and actually sized to fit my hands (the only "petite" thing about me, other than my lack-of-height). Plus I got champagne. Mmmmmmmm. Best of all, my husband is smoking some chicken wings and thighs for my special feast this evening! *big grin*
Thanks for visiting today!
Sunday, April 10, 2011
Pink Fairy Card
Flowers are starting to bloom, so it was time to get this stamp inky! I decided to use SCS Sketch #327, but had to flip it, and move some elements around a bit to make it work with the stamp.
Here it is!

The flower fairy is from the Fairy Fantasy unmounted sheet by The Enchanted Gallery. I love all the images on this sheet.
The sentiment is from the Mixed Messages set by Paper Trey Ink. That's one seriously useful set, that I especially like because the sentiments are tiny!
I colored the image with Copic markers in shades of pink (for the iCopic dt audition). I added a layer of Iridescent Medium to her wings to make 'em translucently glimmery. The background was chalked with shimmery palette chalk by Pebbles. Finally, I used three buttons to finish it off!
Thanks for visiting today!
Here it is!

The flower fairy is from the Fairy Fantasy unmounted sheet by The Enchanted Gallery. I love all the images on this sheet.
The sentiment is from the Mixed Messages set by Paper Trey Ink. That's one seriously useful set, that I especially like because the sentiments are tiny!
I colored the image with Copic markers in shades of pink (for the iCopic dt audition). I added a layer of Iridescent Medium to her wings to make 'em translucently glimmery. The background was chalked with shimmery palette chalk by Pebbles. Finally, I used three buttons to finish it off!
Thanks for visiting today!
Tuesday, February 15, 2011
Valentine's Day -- Revisited!
Here's another Valentine's Day card.

This one uses a lovely fairy, a bee, and a sentiment from an unmounted sheet, Fairy Fantasy, by The Enchanted Gallery.
I stamped on a beglittered sheet from the Once Upon A Time pad and colored with a combination of Prismacolor pencils and Copic markers. The other patterned paper is by Basic Grey.
Thanks for visiting and excuse the time warp ;)!

This one uses a lovely fairy, a bee, and a sentiment from an unmounted sheet, Fairy Fantasy, by The Enchanted Gallery.
I stamped on a beglittered sheet from the Once Upon A Time pad and colored with a combination of Prismacolor pencils and Copic markers. The other patterned paper is by Basic Grey.
Thanks for visiting and excuse the time warp ;)!
Sunday, October 31, 2010
Happy Halloween!

The stamp is one from a unmounted set by The Enchanted Gallery. It was stamped with Memento inks and colored with Copic markers and glitter pen was added to her wingls. It was masked, then Distress inks were sponged on to create the background. The patterned papers are by Basic Grey (sky) and Graphic 45 (pumpkins). The sentiment is from the incredibly useful Mini Sentiment sheet by Purple Onion Designs.
Thanks for visiting!
Tuesday, August 17, 2010
Recycling!
Here are three hanging thingies I've been working on lately. They can be used on a card, as "decor", a keychain, or a necklace.
Inside photo:

Outside photo:

The "thingies" started life as scrapbooking embellishments by K&Company. They were metal with epoxy images in them with dangling charms. The images were nothing I'd ever use, but I kept the embellishments because I knew I wanted to do something with them eventually. I just didn't know what.
I decided to see if I could pry up the epoxy images. I inserted a scissor blade under the images and they popped right out leaving a recessed framed area. Yahoo!!!
Then I looked through my stamp collection for something that would work in such a small area (13/16" x 2.25"). I had a "Eureeka!" moment with the Nature Spirit Domino set by The Enchanted Gallery . I did have to trim the sides of the images, but enough was left to work for me. Note to self: take a second look at stamps and remember that parts can work as well as the whole!
I stamped the three images and the wood image onto white cardstock, colored them with Copic markers, then adhered them on the metal embellishments using Liquid Laminate by Beacon. I then coated them with another layer of Liquid Laminate and let it dry overnight. I swapped out the charms that had been on the original embellishments with ones that worked better with the images.
The photo washes out the color and shading a bit, so when it's sunnier and cooler, I'll take them outside and try again.
Thanks for visiting today!
Inside photo:

Outside photo:

The "thingies" started life as scrapbooking embellishments by K&Company. They were metal with epoxy images in them with dangling charms. The images were nothing I'd ever use, but I kept the embellishments because I knew I wanted to do something with them eventually. I just didn't know what.
I decided to see if I could pry up the epoxy images. I inserted a scissor blade under the images and they popped right out leaving a recessed framed area. Yahoo!!!
Then I looked through my stamp collection for something that would work in such a small area (13/16" x 2.25"). I had a "Eureeka!" moment with the Nature Spirit Domino set by The Enchanted Gallery . I did have to trim the sides of the images, but enough was left to work for me. Note to self: take a second look at stamps and remember that parts can work as well as the whole!
I stamped the three images and the wood image onto white cardstock, colored them with Copic markers, then adhered them on the metal embellishments using Liquid Laminate by Beacon. I then coated them with another layer of Liquid Laminate and let it dry overnight. I swapped out the charms that had been on the original embellishments with ones that worked better with the images.
The photo washes out the color and shading a bit, so when it's sunnier and cooler, I'll take them outside and try again.
Thanks for visiting today!
Subscribe to:
Posts (Atom)