Wednesday, March 25, 2009

Alcohol Ink Card Set Tutorial -- Part #2


Here I am, back with the card set tutorial -- part #2, as promised! Woo-hoo!

Supply List for the project
Clipper Ship stamp from "A Pirate's Life" set by Bombshell Stamps
Anchor & "Ahoy There!" sentiment stamps from "Ahoy Sailor" set by Bombshell Stamps
Compass & Anchor Chain stamps from "Homeward Bound" set by Bombshell Stamps
Bottle, Stream, Butterscotch, Cranberry, and Stonewashed Alcohol Inks
Black Archival Ink
Onyx VersaFine Ink
Black Soot Distress Ink
Galaxy Gold and Starlight Black Brilliance Inks
Tuxedo Black Memento Ink
Stream Adirondack Ink
Tarnished Gold Embossing Powder
Black Prismacolor Marker
Copic Markers
Spica Pen
Core'dinations Cardstock
Bazzill Cardstock (black, teal)
Neenah Cardstock (white)
Black Sparkly Vellum
Invitation envelopes
Cuttlebug Embossing Folder
QuicKutz Dies (banner & square/circle frame)
Nestabilities Dies (circles and spiky circles)
Pearl stickers
Magnets
Hemp twine stuff
Anchor charm from my stash
Glue dots
Dimensional foam adhesive sticker thingies
Sanding Block
Distressing Tool/Scissors
Stipple Brush
Stamp Positioner

Card Instructions:

1. Cut, score, and fold teal cardstock to form an A2 card.
2. Cut black cardstock to 4" x 5.25", distress edges, and mount on the card's front
3. Cut Core'Dinations paper to 3.75" x 5", emboss with Cuttlebug folder, and sand to reveal the interior color. Distress the edges and mount onto the black layer on the front of the card.
4. See Tutorial Part #1 for the instructions on how to make the alcohol ink circles.
5. Die cut the frame, mount the frame onto a slightly larger piece of teal cardstock, and then mount the alcohol inked stamped piece in the frame's circle. Color the pearls with Copic markers and the add them to each corner of the frame. Adhere the framed piece to the Cuttlebugged layer as desired.
6. Die cut the banner from a remaining piece of the Core'Dinations cardstock, stamp "Ahoy There" with VersaFine ink on the teal side, ink the edges with Black Soot Distress Ink, and mount the sentiment banner to the card using dimensional foam adhesives.

Envelopes:

1. Cut strips of white cardstock to 1.5" x 4 3/8".
2. Stamp Chain from "Homeward Bound" set using Starlight Black Brilliance ink, which is kind of pewtery looking.
3. Using a stamp positioner, stamp anchor from "Ahoy Sailor" set using Memento ink. Color as desired with Copic Markers. Use the Spica marker to add a bit of glitter to the stars.
4. Stipple Stream ink over the images and then edge the strip with Stream ink as well. Distress the edges of each piece, then edge with Black Distress Ink.
5. Mount onto the envelope ~ 1/4" from the left side.

Front of the Card Box:
1. Cut the card box from black cardstock, score, and fold. I have a .pdf file available if you'd like it. Email me or leave me a comment to let me know and I'll email it to you.
2. See Tutorial Part #1 for the instructions on how to make the alcohol ink circles and the front piece.
3. Cut a piece of teal cardstock to 4.75" x 6". Emboss it with the Cuttlebug Embossing folder. (You'll have to run it through twice to get the entire thing embossed. Line it up as best as you can, keeping in mind that most of it will be covered by the alcohol ink panel.) Distress the edges of the Cuttlebugged teal cardstock. Ink the raised/embossed design (swirls) with Black Soot Distress ink and also ink the edges.
4. Die cut a teal and a black spiky circle and mount the teal onto the black one so that the black spikes peek out from the teal ones. Mount the Clipper Ship scene onto the teal spiky circle.
5. Position the circle scene so it lines up with the beach/sea/sky of the rectangle alcohol inked piece. Use dimensional foam stickers and adhere in place.
6. Put the hemp/twine through the hole of the charm. Add glue dots to the charm, and adhere to the front of the card in the "sand". Run the hemp/twine up and adhere to the back of the teal cardstock.
7. Mount the teal cardstock to front of the box.
8. Assemble and glue the box together.

Back of the Card Box
1. Using Galaxy Gold Brilliance Ink, stamp the Compass onto white cardstock and emboss with Tarnished Gold embossing powder. Use a circle nestability to cut it out and then paint it as desired with Twinkling H20s. Color a large pearl with Copics and put it in the center of the Compass.
2. Die cut a black and a teal spiky circle that is slightly bigger than the Compass' circle. Mount the Compass circle onto the black spiky circle. Adhere the magnet between the teal and black spiky circle
3. Die cut an additional two black spiky circles. Adhere the magnet between the two black spiky circles and adhere to the box where the flap will cover it. Figure out where the other magnet needs to go and adhere the Compass/spiky circle/magnet to the outside of the flap, so that the magnet will keep the box closed.

I hope all the above made sense. If you have any questions, please let me know.

Thanks for visiting.

Alcohol Ink Card Set Tutorial -- Part #1


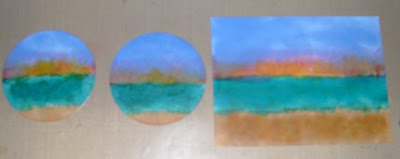
Did you ever have a project that took on a life of its own? I did and this is it. I had the idea to use alcohol inks with the silhouette of a clipper ship from Bombshell Stamps' A Pirate's Life stamp set. So, I set out making one little scene. I wasn't totally thrilled with it, but it didn't totally reek, so I made another. Then another. Then another. Until I had five little circles. Being me, I couldn't decide which one(s) I liked best, so I decided to make five cards. Then I decided to decorate matching envelopes. Then I decided that the cards & envelopes needed somewhere to live, so I decided to make a little box for them. Well that couldn't be plain, so I made another alcohol ink scene for the front of it and a magnetic closure for the back of it. Somewhere in there, I thought to myself, "Self, this would make a decent tutorial", so I started to take photos. Then to top it off, I tried to put the five cards and the envelopes into the little box I made and they wouldn't fit because the cards are layered and have dimensionals and pearls. But I finally decided that enough was enough and fit three card/envelopes into it and am calling it done. :D


Alcohol Ink Scene:

Supplies
Glossy paper
Alcohol Inks (I used Caramel, Latte, Stream, Bottle, Butterscotch, Cranberry, and Stonewashed)
Applicator/Felt
Blending Solution
Archival Black Ink
Little Clipper Ship Silhouette from A Pirate's Life set by Bombshell Stamps
Inksentials White Pen by Ranger
Stamp Positioner
Prismacolor Black marker
Removable Scotch Tape

1. Cut circles from glossy cardstock and cut one piece that is big enough to cover the front of your little card-box. My card-box measures 6" x 4.75" x 5/8".

2. Put tape horizontally across the circles and rectangle slightly above where you want the first line of color. For the cards, that would be the "sea". For the card-box's front panel, that would be the "sand". Photo #3

3. Add a few drops of each color alcohol ink to the felt on the applicator (Stream and Bottle for the "sea" and Caramel & Latte for the "sand".

4. Pounce the color on, being sure to twist the applicator, so the color is not uniform. Continue to pounce the color on to achieve some depth of color. You might need to add additional ink to the felt. When you're relatively happy with the result, add a bit of blending solution too the felt and pounce that on to blend and add a textural look.

5. Pull up the tape and throw away.

6. Pull the felt off the applicator and set it aside.

7. Add another horizontal line of tape for "sunset" or the "sea" and follow the directions above. The Sunset is Butterscotch and Cranberry alcohol ink applied separately.

8. When you're done with the "sea" and "sunset", add the "sky" by applying Stonewash to a clean felt and pouncing that to the top of the scene and a bit over the yellow and red of the sunset. Continue to add Stonewash and the other colors until you're happy with the result. You can lighten and/or blend with the blending solution. Photo #4

9. Give the piece a few minutes to dry.

10. Ink up your stamp with permanent black ink, use a stamp positioner, and stamp the ship over the sunset on the sea's surface. Photo #5

11. If the image is "spotty", go over the silhouette with the black Prismacolor marker to deepen the image.

12. Using the Inksentials pen, add whitecaps, seafoam, and waves to the sea.

This is getting long and it's getting late, so I'll do part 2 (the envelopes), card construction, and the little card-box tomorrow. Wait! It IS tomorrow.

Ha.

Anyways, thanks for visiting. I hope you come back for the rest of the tutorial.

Tuesday, March 17, 2009

Happy St. Patrick's Day!


Follow the Rainbow and just look what you found. I'm quite sure that Kelly's Gnome in a Teacup is a treasure in his own way. I made the teacup into a pot and made the gnome into a leprechaun.

Claire drank too much beer and is feeling a little green.

Both cards were colored with Copic markers. The rainbow card has a ton and a half of glitter on the cloud, the punched shamrocks, and in the holes in the border. I now have glitter all over my sweatshirt and my carpeting.

Claire's (Flamingo) card uses Basic Grey and Paper Salon Patterned paper and ribbon that I colored with Copic Markers. Believe it or not, the colors actually match in real life. *sigh*

Thanks for visiting today.

Monday, March 16, 2009

Feeling Lucky?!?


Here's another card for St. Patrick's Day. The lucky lady is from the A Pirate's Life set and the pot at the end of the rainbow is from the Holiday Accessories set by Bombshell Stamps.

I colored both images with Copic markers and then added Stickles Glitter for the treasure. The rainbow was drawn using a french curve and chalk pencils by General.The clover are foil confetti and the ginormous four leaf clover is from my stash.

Thanks for visiting today.

Saturday, March 7, 2009

Leap with the Leprechaun!


Friendly reminder to set your clocks ahead for Daylight Savings Time. What better way to leap than with a lucky leprechaun?

This lucky dude is from the Holiday Accessories set by Bombshell Stamps. I colored him and the Technique Tuesday frame with my Copic markers, then stamped additional clovers (from the same set) onto the frame. They looked kind of "blah", so I blinged 'em up with my Spica markers. Much better. I used very old Doodlebug patterned paper, some clover ribbon, added some jewels to the corner and called it done.

I have several other St. Patrick's Day cards in the works, since after all, everyone is Irish once a year!

Oh yes, if you join the Bombshell Stamps Group at Paper Craft Planet, you'll get a coupon for 20% off your purchase. There's also a St. Patrick's Day contest going on there. You can win a really great set of stamps, so go for it. OK?

Remember to set your clocks forward!

Thanks for visiting today!