Tuesday, February 28, 2023

Just For You

It's Tuesday which is my day to share a project created for Topflight Stamps. This week's theme over at the Topflight Stamps blog is "Anything Goes". I've made a slimline card using Three Birds and The Strings of Day and Night Cling Rubber Stamp Sets by Carabelle Studio. The sentiment is from the More Classic Sentiments Clear Stamp Set by Heffy Doodle. The background was watercolored using Della Blue Elements Ink by Lavinia Stamps.

Here's my card.


Topflight Stamps Products Used:
Three Birds Cling Rubber Stamp Set by Carabelle Studio
Gelly Roll Bold Line Stardust Clear Glittering Ink by Sakura

Other Products Used:
Bristol Paper by Strathmore
Raven Cardstock by Bazzill Basics
Black Glitter Paper by DCWV
Copic Markers: E70, E71, R30, R32, R35, RV42, RV91, RV93, BG10, BG53, BG57, BG70, BG72, BG90, BG93, Y11, Y21, Y23, Y26, Y28, Y35
Stitched Slimline Trio Heffy Cuts Die Set by Heffy Doodle
Small Rounded Rectangle Die by The Stamp Doctor
Ornamental Sentiment Die: Source Unknown
IPC1 Small Point Blend Brush by Dynasty Brush Company
White Gelly Roll Gel Pen by Sakura
Black Stardust Glitter Gel Pen by Sakura
1" Sookwang Double Sided Tape
Post-It Note by 3M
Stamping Platform
Paper Towel

Instructions:
  1. Cut a piece of Raven cardstock to 7" x 8.5", score at 3.5", and fold to form a slimline card.
  2. Use the largest die from the Stitched Slimline Trio Heffy Cuts Die Set to cut black glitter paper.
  3. Use a black marker to edge the die.
  4. Use two-sided strong adhesive tape to adhere the black glitter die-cut to the front of the slimline die.
  5. Cut a piece of Bristol paper to 4" x 9".
  6. Use magnets to secure the paper to the base of a stamping platform.
  7. Position the right facing bird stamp from The Birds Cling Rubber Stamp Set facedown about .75" from the top of the panel.
  8. Press the lid of the platform onto the back of the bird stamp , lift, ink the stamp with Nocturne VersaFine Clair Ink and stamp.
  9. Ink and stamp just the bird's face and beak onto a piece of masking paper or a Post-It Note.
  10. Fussy-cut the masking paper and place the mask over the bird's face.
  11. Remove the bird stamp from the stamping platform.
  12. Position the sun string stamp from The Strings of Day and Night Cling Rubber Stamp Sets facedown on the image panel so that the top charm is close to the bird's beak. 
  13. Press the platform onto the back of the stamp, lift, ink the stamp with Nocturne VersaFine Clair Ink, and stamp.
  14. Remove the mask covering the bird's face and heat set the panel. Be sure that it's absolutely dry to avoid contaminating your Copic markers.*
  15. Use Copic markers to color the images.
  16. Use a white gel pen to add accents to beads and the bird's eye. 
  17. Use Gelly Roll Bold Line Stardust Clear Glittering Ink by Sakura to add glittery touches to the charms on the The Strings of Day and Night.
  18. Use the second largest slimline die from the Stitched Slimline Trio Heffy Cuts Die Set to cut the image panel.
  19. Smoosh the Della Blue Elements Ink onto a craft mat. Spritz with water. 
  20. Using a paint brush, first wet a small area on the panel, then apply the blue ink.*
  21. Continue this process until the panel is covered.
  22. Dip the paint brush into clean water, add drops of water to the inked image panel, then immediately use a paper towel to lift the water. 
  23. When you're happy with your background, thoroughly heat set the panel.
  24. Use  Nocturne VersaFine Clair Ink to stamp the sentiment from the More Classic Sentiments Clear Stamp Se onto a scrap of white cardstock. Heat set. 
  25. Use a small rectangle die to cut the sentiment. 
  26. Mat the sentiment onto a die-cut cut from the glitter paper. 
  27. Adhere the sentiment to finish the card.
Notes:
  • It is safe to use VersaMark Clair ink with Copic markers. Just be sure to thoroughly heat set the image until it's bone dry. Otherwise you risk contaminating your markers.
  • You could always watercolor your images if you'd like. I might do that next time I use the bird stamps.
  • Elements Ink are very juicy and highly pigmented, so they're wonderful for watercoloring as you can alter the intensity of the color with water.
  • I applied the Della Blue Elements Ink more heavily closer to the image, then decided to switch things up. I ended up being very happy with the background.
Thanks for visiting today!


Friday, February 24, 2023

Quote Wall Hanging Tutorial

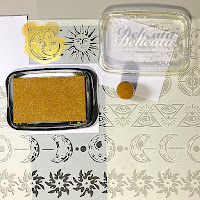
I've created an inspiration quote wall hanging for Imagine Crafts. with Nocturne VersaFine Clair Ink, Golden Glitz Delicata Ink, Sea Breeze, Turquoise Gem VersaMagic Ink, and the quote from the Ink and the Dog Mini 109 Cling Rubber Stamp by PaperArtsy. This quote really resonates with me and having it hanging in my craft room will serve as a daily reminder of the things that truly matter.

Here it is:


Imagine Crafts Products Used:

Other Products Used:
Black Chipboard
White Mixed Media Cardstock by Strathmore
Bigz Tags Crea-Nest-Lies XXL 6 Die Set by Crealies
Stitched Slimline Die Set by Creekbank Creations
Small Stitched Envelope Die Set by Lawn Fawn
Celestial Navigation Clear Stamp 398 by Olga Heldwein for AALL and Create
Alchemy Symbols Stencil by Stamperia
Harvest Moon Clear Stamp Set by Pink Ink Designs
Mini Stars Clear Stamps by Lavinia Stamp
Removable Scotch Tape by 3M
Post-It Notes by 3M
Ribbon from my stash
Eyelets, Eyelet Setter by Making Memories
Big Shot by Sizzix
Stamping Platform by Tonic Studios
Heat Tool by EK Success

Instructions:


Step 1:

Use a Stitched Slimline Die and a Big Tags cutting dies to cut black cardstock for the panels.


Step 2:

Position the moon and sun from the Alchemy Mixed Media Stencil on the top of the large rectangular die-cut. Use removable Scotch Tape to secure the stencil to the back of stencil. Cover the openings around the sun and moon with Post-It Notes. Use a Sponge Dauber to apply Golden Glitz Delicata Ink over the stencil onto the die-cut. Heat set.


Step 3:

Use magnets to secure the image panel horizontally along the base of a stamping platform. Position the clock from the ATC Coins Clear Stamp Set 6 facedown on the the panel, so that 12:00 is centered and facing the top of the panel.


Step 4:

Ink the clock with Golden Glitz Delicata ink and stamp the clock along the bottom of the tag. Heat set to bring out the lustre.


Step 5: 

Position the compass from the Small Elements Stamp Set 2 facedown inside the circular opening of the clock with the “N” of North at 12:00.


Step 6:

Use Nocturne VersaFine Clair ink to stamp the small compass into the center of the clock image. Cover the stamped image with Clear MBoss embossing powder and melt the powder with a heat tool. Oops! I forgot to take a photo of the embossing powder covered stamped compass.


Step 7:

Use Turquoise Gem VersaMagic ink to stamp the swirls and stars from the Harvest Moon Clear Stamp Set and the stars from the Mini Stars Clear Stamp Set around the perimeter of the die-cut. Repeat using Sea Breeze VersaMagic ink. Heat set.


Step 8:

Edge the panel with Golden Glitz Delicata ink by sliding each edge of the piece along the side of the ink pad which creates a strong golden edge. Heat set.


Step 9:

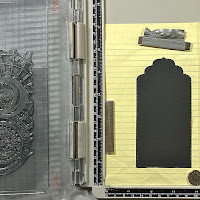
Use repositionable adhesive to secure the black tag die-cut to a piece of scrap paper, then use magnets to secure them to the base of the stamping platform.


Position the Celestial Navigation Clear Stamp 398 and stamp with Nocturne VersaFine Clair.


Step 10:

Cover the stamped image with MBoss. Melt the powder with the heat tool.


Step 11:

Use Golden Glitz Delicata Ink to edge the tag.


Step 12: 

Using an Ink Sweeper, apply Sea Breeze VersaMagic to a piece of mixed media paper.


Step 13:

Use a Sponge Dauber to apply Turquoise Gem VersaMagic around the edges of the paper, then blend using the Ink Sweeper and Sea Breeze VersaMagic. Heat set.


Step 14:

Secure the inked panel to the base of the stamping platform. Position the Ink and the Dog Mini Cling Stamp 109 stamp and stamp with with Nocturne VersaFine Clair. Heat set.


Step 15: 

Use the shaped die from the Small Stitched Envelope die set to cut the sentiment panel.


Step 16:

Cut a piece of black chipboard to 3.5" x 9". Punch holes in the top, insert eyelets, and thread ribbon.


Step 17:

Use Tear It! Tape to adhere the rectangular panel to the chipboard.


Step 18:

Use Tear It! Tape to adhere the stamped and embossed tag.


Step 19: 

Use Tear It! Tape to adhere the quote die-cut.


Please Note: Topflight Stamps carries VersaFine Clair inks, plus the stamps and stencils I used on this project.


Thank you for visiting today!