
Pink and Cardinal VersaColor Ink
Golden Glitz and Rose Gold Delicata Ink
Rich Cocoa Memento Ink
Hint of Pesto VersaMagic Ink
Acorn VersaFine Clair Ink
Other Products Used:
Gift Box
140 lb Mixed Media Cardstock by Strathmore
Scalloped Heart Nestabilities Die Set by Spellbinders
Plain Heart Nestabilities Die Set by Spellbinders
Big and Little Chains Square Die Set by Gina Marie Designs
Rose Die Set by QuicKutz
Elegant Script Background Cling Rubber Stamp by Darkroom Door
Jenine’s Mindful Collection - Inner Peace Slimline Baroque Stencil by Studio Light
Paper Blossoms Tool Kit by McGill Crafts
Martha Stewart Heat Gun by EK Success
Big Shot by Sizzix
Instructions:
Step 1:
We’re going to work on the box’s lid first. Use an Ink Sweeper to apply Pink VersaColor ink onto all sides of the lid. Heat set. Continue to apply ink around the edges of the box top. You don’t need to ink the entire top of the box because you will be covering it. Heat set thoroughly and set aside.

Step 2:
Use an Ink Sweeper to apply Pink VersaColor to a piece of Mixed Media cardstock. Heat Set.

Step 3:
Secure the inked cardstock to the base of a stamping platform. Position the Elegant Script Background Rubber Stamp facedown on the cardstock. Press the lid into the back of the stamp and lift.
Ink the stamp thoroughly with VersaMark ink and stamp. Re-ink and stamp again to ensure a good impression. (You'll note that the inked cardstock was temporarily adhered to a scrap piece of paper which was secured to the base of the cardstock).

Step 4:
Ink the Elegant Script stamp with Rich Cocoa Memento ink and stamp.*

Apply MBoss embossing powder, dump the excess powder back into the bag, and heat set. (Forgot to take photo. Oops!
Step 5:
Use a heart die to cut the stamped embossed cardstock and use Rich Cocoa Memento Ink to edge the heart.


Step 6:
Use a scalloped heart cutting die to cut Mixed Media cardstock. Apply Rich Cocoa Memento ink to the scalloped heart. Heat set. Use a Sponge Dauber to apply Rose Gold Delicata ink to the brown-inked heart to make add a touch of rosy shimmer.

Step 7:
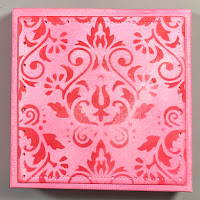
Use one of the Big and Little Chains Square dies to cut Mixed Media cardstock. Use an ink sweeper to apply Pink VersaColor ink to the square. Heat set. Tape the inked square die-cut to the back of the Slimline Baroque Stencil. Use a Sponge Dauber to apply Cardinal VersaColor ink to the inked square die-cut. Remove the stencil. Heat set.

Step 8:
These are the elements created for the top of the box.

Step 9:
Adhere the stenciled die-cut square to the top of the box then adhere the inked scalloped heart die-cut followed by the stamped heat embossed heart die-cut.


Step 10:
Use an Ink Sweeper to apply Cardinal VersaColor to a piece of Mixed Media cardstock. Heat set.

Step 11:
Secure the inked cardstock to the base of the stamping platform.Clean the Elegant Script Background Rubber Stamp that is still on the lid of the stamping platform. Ink the stamp with Acorn VersaFine Clair ink. Stamp onto the red cardstock. Heat set.

Step 12:
Trim the stamped red panel slightly smaller than the box. Edge with Acorn VersaFine ink and heat set. Adhere to the interior of the box.

Step 13:
Use QuicKutz Rose dies to cut Mixed Media cardstock. Flip the die-cuts over and use embossing styluses to add dimension to the die-cuts. Press the flower petals into the Cardinal VersaColor ink pad. Remove the petals and heat set. Sponge the flower petals with Rose Gold Delicata ink. Heat set.

Step 14:
Use a sponge dauber to apply the stem and the rose-hip with Hint of Pesto VersaMagic ink. Heat set. Use a Sponge Dauber to apply Golden Glitz Delicata ink to the rose stem.

Step 15:
Use On Point Glue and Tear It! Tape to assemble the rose.

Step 16:
Adhere the rose to finish the box.

Notes:
Topflight Stamps carries Darkroom Door and Studio Light products.
If you don’t have the right color pigment ink to use for heat embossing, you can stamp first with VersaMark, then re-ink your stamp with any dye-based ink. The embossing powder will stick to the ink with no problem and you will not contaminate your dye ink pad!
If you are using a new-to-you substrate and you’re not sure what ink will work best, apply a small amount of ink to an inconspicuous place.
When in doubt, heat emboss to avoid ink smears!
No comments:
Post a Comment