The scene was created with the Brick Wall Background Stamp, the Gothic Arch Small Stencil Set, the Bottles Red Rubber Cling Stamp Set, and bats and sentiments from the Twisted Tree Red Rubber Cling Stamp Set. The color was added with Della Blue, Graphite, Violet Chalk, Blue Lagoon, and Russet Orange Elements Inks by Lavinia Stamps.

Other Products Used:
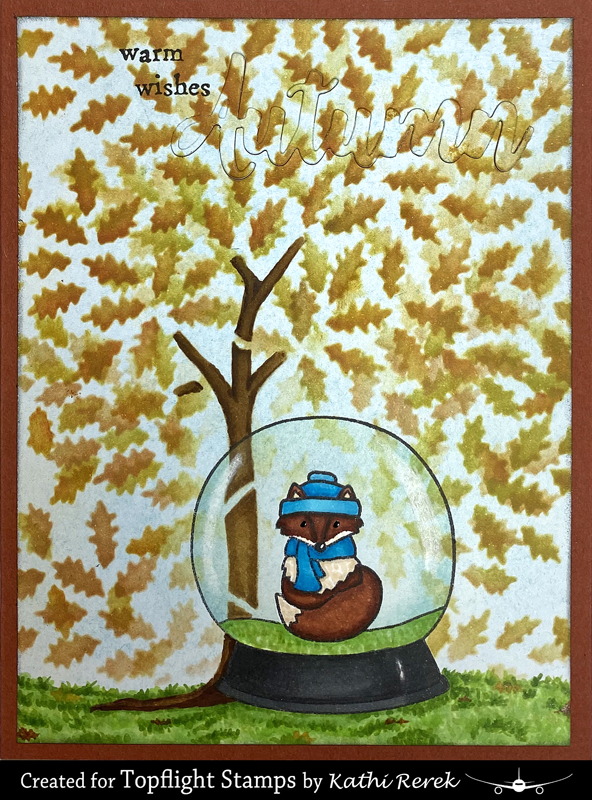
Here's the card!

Topflight Stamps Products Used:
Other Products Used:
140 Lb. Mixed Media Paper by Strathmore®
Raven Cardstock by Bazzill Basics Paper®
Old Paper and Black Soot Distress® Inks by Tim Holtz® for Ranger Ink
Old Paper and Black Soot Distress® Inks by Tim Holtz® for Ranger Ink
VersaMark™ Ink by Tsukineko®
White Detail Embossing Powder by Stampendous!®
Chinese White Pencil by Derwent
Chinese White Pencil by Derwent
Brown Ochre, French Grey, and Carbon Black Pastel Pencils by Derwent
Pouncy Tool (Looks like steel wool on a peg)
Removable Scotch® Tape by 3M
Removable Scotch® Tape by 3M
Repositionable Dotto HermaFix Adhesive by EK Tools
Cotton Buds (Q-Tips)
Isopropyl Alcohol
Repositionable Label Paper by Avery®
STAY-tion™ by Wendy Vecchi for Ranger Ink
Stamping Platform
STAY-tion™ by Wendy Vecchi for Ranger Ink
Stamping Platform
Instructions:
- Cut a piece of Mixed Media paper to 6" square.
- Use magnets to secure the paper to the base of the stamping platform.
- Use removeable adhesive (I used Dotto adhesive) to adhere the Gothic Arch Mask from the Gothic Arch Small Stencil Set by Darkroom Door to the center of a panel of mixed media cardstock.
- Position the Brick Wall Background Stamp facedown over the mask onto the image panel.
- Press the platform's lid onto the back of the stamp and lift.
- Ink the stamp with Morning Mist VersaFine Clair Ink and stamp. Repeat if necessary to get good coverage for the brick background.
- Remove the stamp from the platform and clean.
- Remove the Gothic Arch Mask from the image panel and clean both sides.*
- Place the Gothic Arch Stencil onto the image panel, covering the brick wall. As it's smaller than the panel, you can use tape to secure it at top and bottom.
- Position the small bottle from the Bottles Red Rubber Cling Stamp Set face-down towards the base of the Gothic Arch.
- Press the platform's lid onto the back of the stamp and lift.
- Ink the stamp with Nocturne VersaFine Clair Ink and stamp onto the image panel and onto label paper.
- Fussy-cut the label paper version and place it over its counterpart.
- Clean and dry the stamp.
- Position the stamp face-down on the image panel to the right of the masked bottle.
- Press the platform's lid onto the back of the stamp and lift.
- Ink the stamp with Nocturne VersaFine Clair Ink and stamp onto the image panel and onto label paper.
- Fussy-cut the label paper version.
- Remove the mask from the other bottle.
- Brush Della Blue and Graphite Elements Ink over the tape and masked bottles to add a night sky to the Gothic Arch.
- Place Repositionable Scotch Tape was horizontally across the base of both bottles in the open arch area.
- Place the masks over both bottles.
- Brush Della Blue, Graphite, Violet Chalk, and Blue Lagoon Elements Inks over the masked images to deepen the colors.
- Lift and retain the masks.
- Reposition the tape to reveal the uninked area below the bottles.
- Brush Old Paper Distress ink below the tape.
- The bottle outline mask was placed around the left bottle and Della Blue and Graphite Elements Inks were lightly brushed around the inside of the bottle to add color, depth, and dimension.
- Move the outline mask to the right bottle and repeat Step #27.
- Use a white pencil or a white gel pen to add highlights to both of the glass bottles.
- Use magnets to secure a piece of acetate over the image panel.*
- Position the smaller bats from the Twisted Tree Red Rubber Cling Stamp Set facedown on the bottle on the left.
- Press the lid of the stamping platform onto the back of the stamps and lift.
- Ink the stamps with Nocturne VersaFine Clair Ink and stamp on the acetate to check the placement of the bats in the bottle.
- If the placement is good, remove the acetate, re-ink the stamps, and stamp the bats into the bottles.
- If it's not okay, clean and dry the stamps. Clean the acetate, and try again.
- Remove, clean and dry the bat stamps.
- Repeat Steps #29 to Step #33.
- Remove and clean the small bats.
- Clean and dry the acetate and re-secure over the image panel.
- Place a big bat face-down on the lip of the left bottle.
- Position the other bats face-down around the bottles within the arch.
- Press the platform's lid onto the back of the stamps, lift, ink, and stamp onto the acetate to check placement.
- If okay, remove the acetate, re-ink the stamps, and stamp the bats onto the image panel.
- Remove the masks and stencil and heat set the image panel.
- Use magnets to secure the image panel to the STAY-tion.
- Place the Gothic Arch Mask over the arched window and secure with magnets.
- Brush Graphite Elements Ink over the bricks to color the wall.
- Use the Pouncy Tool to randomly add Russet Orange Elements Ink onto the brick to add some visual interest to the bricks.
- Use a black chalk pencil to outline the Gothic Arch Mask.
- Remove the mask and use a cotton bud to soften the chalk around the Gothic Arch.
- Use a Brown Ochre chalk pencil to create shadows under the bottles.
- Trim the image panel to 4.75" x 4.25" and edge with Black Soot Distress Ink.
- Cut a piece of black cardstock to 10" x 4.5", score at 5", and fold to form a card.
- Adhere the image panel to the black card.
- Use VersaMark ink to stamp the three sentiments from the Twisted Tree Red Rubber Cling Stamp Set onto black cardstock.
- Add White Detail Embossing Powder, shake of the excess, and the sentiments were heat set.
- Use flag dies to cut all three sentiments, then trim off the ends.
- Adhere the three sentiment strips to finish the card.
Notes:
- The instructions are long-winded, but in actuality, the card came together fairly quickly.
- Darkroom Door's new "arch" stencil sets because they include the mask as well as the stencil. What a time saver!
- Some clear stamps and/or cutting dies come with an extra piece of acetate. Save these pieces because they come in handy for positioning stamps as desired. They also can be used for shaker cards, applying ink, and for mixing paint.
- Use isopropyl alcohol to clean repositionable adhesive and other sticky substances from non-porous surfaces like acetate or metal. Do NOT use it to clean stamping blocks or the lid of your stamping platform.
Thanks for visiting today!