Tuesday, December 27, 2016

Uh-Oh! Curiosity and Cats!


Curious Cat is from I Brake for Stamps' collection of digital stampsCurious Cat was resized in PhotoElements, printed out onto Copic-friendly cardstock with my laser printer, and colored with my Copic markers. Several layers of Clear Gelly Roll Glaze pen (Sakura) were added to the glass to add dimension and shine.

Orange patterned paper from the Oh Baby collection (Basic Grey) was die-cut with a Rectangle Frame die (Die-namics) and with one of the two dies in the Patisserie Label die set (Memory Box), then edged with Spiced Marmalade and Rusty Hinge Distress inks.

Patterned paper from the Oh Baby collection and from the Remarkable 6x6 pad (My Mind's Eye) were layered and edged with the same Distress inks as above. Old Simply Sweet alphabet rub-ons (Doodlebug) were used to add the sentiment.

For what it's worth, Curious Cat is a very realistic stamp. Each of our cats has stuck his/her head into a glass, container, or bowl (usually in search of food molecules) and gotten stuck, which never fails to amuse us.

I  Brake for Stamps has a great collection of digital stamps plus a huge and varied collection of rubber stamps that you ought to check out right now. Click on my badge below to be whisked over to I Brake for Stamps to check out all of the goodies! Best of all, if you buy something, you can get a 10% discount off of your purchase if you use this code: SAVE10KATHI!


Thanks for visiting today!

Monday, December 19, 2016

Meowy Christmas!


Cat Present is from I Brake for Stamps' collection of digital stampsCat Present was resized in PhotoElements, printed out onto Copic-friendly cardstock with my laser printer, colored with my Copic markers, and die-cut with a rectangle die. The image panel was kept in the die while I added the a background around the Cat Present.

Patterned paper from the Figgy Pudding collection (Basic Grey) was die-cut with a stitched rectangle, the bow from the Blueprints 3 die set (Die-namics), and the pierced strip from the Blueprints 2 die sets. All patterned paper was edged with Aged Mahogony and Walnut Stain Distress ink (Ranger).

Red cardstock was die-cut with the Christmas die from the Happy, Birthday, Merry, Christmas Small Words die set (All Occasion). The rest of the letters for the sentiment were die-cut with the Small Alphabet Upper and Lower Case set (All Occasion). 

The card front was assembled and adhered to a red card.

I  Brake for Stamps has a great collection of digital stamps plus a huge and varied collection of rubber stamps that you ought to check out right now. Click on my badge below to be whisked over to I Brake for Stamps to check out all of the goodies! Best of all, if you buy something, you can get a 10% discount off of your purchase if you use this code: SAVE10KATHI!


Thanks for visiting today!

Wednesday, December 14, 2016

Stampotique Christmas Challenge!

This week's Stampotique Designer's Challenges (#263) is "Christmas". 

If you'd like the chance to win your choice of $30 worth of Stampotique stamps, you should play along with this challenge. Visit Stampotique Designers Challenge blog and be sure to read the rules so that you'll have the chance to win that great prize!!! Remember to check to see the deadline for all of this month's Stampotique Designers Challenges!

Here's my card with Stampotique's  Foxy (Kate Crane).


Foxy was stamped with London Fog Memento ink (Imagine Crafts) and colored with mostly Cool Grey Copic markers since I wanted him to look like an Arctic Fox. Clear Glaze pen (Sakura) was used to add a touch of dimension and shine to his nose. He was fussy-cut, then edged with a Cool Grey Pitt Artist marker (Faber Castell)

Both patterned papers are from a rapidly dwindling 6x6 paper pad. The grey/blue polka dot paper was torn, then edged with a white paint marker. A Clear Stardust pen (Sakura)was used to add glitter to the torn painted edge, which was then adhered to the blue patterned paper. Foxy was adhered to the layered cardfront.

White shimmery vellum was die-cut with a Snowflake Corner die (Memory Box) and added to the upper left corner. A leftover scrap of blue patterned cardstock was die-cut with a nameplate die (Spellbinders). Christmastime Remnant Rubs (Idea-ology) were used to add the sentiment. The layered cardfront was edged with White Shimmer Delicata ink (Imagine Crafts) to add another touch of sparkle to the card. The cardfront was mounted onto a white A2 card and I called it done!

Thanks for visiting today!

I shall enter this card into the following challenges:
• Scrapy Land Challenges: Anything Goes
Simon Says Stamp Monday Challenges: Snow

Tuesday, December 13, 2016

Merry Christmas -- For the Cat!


Krismaus Dance was resized in PhotoElements, printed out onto Copic-friendly cardstock with my laser printer, then colored with my Copic markers. The image panel was die-cut with a die from the Sunray Venus Layering Basics die set (Tonic Studios). 

Patterned paper from an old 6x6 pad was die-cut with one of the dies from the Fishtail Flags die set (Die-namics) then layered on top of another piece of patterned paper from the same pad. The image panel was adhered and a foil sticker sentiment was added. The card front was adhered to a red card.

I  Brake for Stamps has a great collection of digital stamps plus a huge and varied collection of rubber stamps that you ought to check out right now. Click on my badge below to be whisked over to I Brake for Stamps to check out all of the goodies! Best of all, if you buy something, you can get a 10% discount off of your purchase if you use this code: SAVE10KATHI!


Thanks for visiting today!

Saturday, December 10, 2016

Stampotique Word-Up Weekend!

Stampotique's Facebook Group has started "Word-Up Weekends" where we share projects created with Stampotique's many Words, Phrases, Letters, and Numbers.

Here's my entry for the week, featuring NY, NY (Janet Klein), the Taxi and the sentiment from Taxi! (Janet Klein), and  "eeeeep!" from The Crew with Word on the Side (Karen Hayselden).


NY, NY was stamped with Tuxedo Black Memento ink (Imagine Crafts), colored with Copic markers, fussy-cut, and edged with a black marker. The Taxi was stamped multiple times with Tuxedo Black Memento ink, colored with Copic markers, fussy-cut, and edged with a black marker. The images were set aside for a bit.

"Beep, Beep" from Taxi! and "eeeep!" from were stamped The Crew with Word on the Side with Frost Dazzle VersaMark ink (Imagine Crafts) onto black cardstock then heat embossed with White Detail embossing powder (Stampendous). Ancient white rub-ons were used to add the letter "B" in front of eeeeep!

The sentiment was computer generated, printed, die-cut with one of the banners from the Dimensional Banner die set (Die-namics). It was edged with Tea Dye Distress ink (Ranger). It was adhered to the top of the black card front.

NY, NY was adhered to grey cardstock, then to the black cardstock. A ring die-cut was colored with Copics and accented with Red Stardust Glitter pen (Sakura), then added to one of the buildings. The spires on top of the buildings were accented with Gold Pentel gel pen. The Red Stardust Glitter pen was used to add some glitter accents to the trees/bushes on top of the building on the left. A Clear Stardust Glitter pen was used to add some shimmer to the Taxis' windows and a Silver Stardust Glitter pen was used to add some glitter to the cabs' fenders and hub-caps.

Thanks for visiting today!

I shall enter this card into the following challenges:
Creative Corner Challenges: Christmas Time
Winter Wonderland Challenges: Frame It or Night Scenes 
Moving Along with the Times Challenges: Christmas Scenes
Addicted to Stamps and More Challenges: Holiday
Scrapy Land Challenges: Anything Goes

Tuesday, December 6, 2016

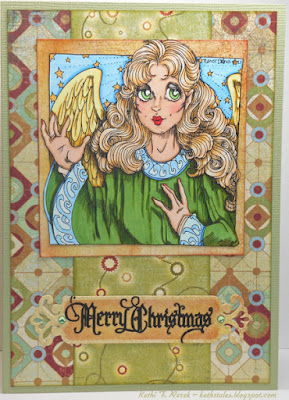
Merry Christmas from the Peace Angel


Peace Angel was resized in PhotoElements, printed out onto Copic-friendly cardstock with my laser printer, then colored with my Copic markers. The image was fussy-cut and edged with a black marker.

Ancient Christmas-themed patterned paper was edged with Distress ink, then layered.  A sentiment label was die-cut and a Christmastime Remnant Rub was added to it.

The card front was adhered to a card and two rhinestones were added to finish the card.

I  Brake for Stamps has a great collection of digital stamps plus a huge and varied collection of rubber stamps that you ought to check out right now. Click on my badge below to be whisked over to I Brake for Stamps to check out all of the goodies! Best of all, if you buy something, you can get a 10% discount off of your purchase if you use this code: SAVE10KATHI!


Thanks for visiting today!

Wednesday, November 30, 2016

Naughty or Nice? You decide!

This week's Stampotique Designer's Challenges (#262) is "Naughty or Nice". Here's a blurb about the challenge:
"Have you been naughty or nice this year? Will Santa visit you or are you on the naughty list? Let's see your best "Naughty OR Nice" project this week."
If you'd like the chance to win your choice of $30 worth of Stampotique stamps, you should play along with this challenge. Visit Stampotique Designers Challenge blog and be sure to read the rules so that you'll have the chance to win that great prize!!! Remember to check to see the deadline for all of this month's Stampotique Designers Challenges!

Here's my card featuring Stampotique's Flying Monkey (Janet Klein) and Towering Gifts (Daniel Torrente).


Flying Monkey was stamped with Tuxedo Black Memento ink (Imagine Crafts), colored with Copic markers, fussy-cut, edged with a Black Pitt Artist pen (Faber Castell), and set aside.

Towering Gifts was stamped several times with Tuxedo Black Memento inks. One version was colored with Copics, fussy-cut, and edged. I fussy-cut several of the gifts from the other Towering Gifts stampings, colored them, and edged them. The separate gifts were adhered on top of the full image using dimensional foam adhesive.

Then I got all fiddly. I thought I had a mesh fruit bag in my stash, but apparently I had used it. So I had to go with Plan B. A length of tulle was cut, folded over, and the edges were sewn together badly as I am a horrible seamstress. The upside is that I didn't bleed on the tulle. The Towering Gifts were inserted into the tulle bag, which was tied with red and white Baker's twine.

White cardstock was die-cut with the Puffy Clouds die (Die-namics). Red cardstock was die-cut with the Naughty or Nice die (Cottage Cutz) and Merry Christmas from the Merry, Happy, Christmas, Birthday set (All Occasions).

The clouds were detailed with Copic markers, then adhered to a card front. The sentiments, Flying Monkey, and the sack of Towering Gifts were adhered to the card front. An additional bit of Baker's twine was looped around Flying Monkey's paw and the top of the Towering Gifts sack. The card front was edged with Picket Fence Distress ink (Ranger), then adhered to a #10 card.

You get to decide if Flying Monkey is naughty or nice. Is he stealing the gifts or bringing them somewhere!

Thanks for visiting today!

I shall enter this card into the following challenges:
Fashionable Stamping Challenges: 'Tis the Season
All Sorts Challenges: Anything Christmas
Simon Says Stamp Wednesday Challenges: Anything Goes

Tuesday, November 29, 2016

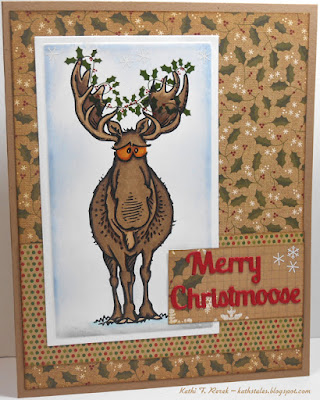
Another Bad Pun. Happy Christmoose!


I apologize for my bad pun but I really couldn't help myself. Really. The aptly named Moose is one of the fabulous digital stamps available at I Brake for Stamps.

Moose was resized in PhotoElements, printed out onto Copic-friendly cardstock with my laser printer, then colored with my Copic markers. I added holly vines and berries to Moose's antlers using very old Christmas-themed rub-ons (QuicKutz).

The image panel was die-cut with one of the dies from the  5x7 Card Creator die set (Spellbinders). The image panel was left in the die and Stormy Sky Distress  and Bundled Sage Distress ink (Ranger) were sponged over the die to create a bordered background around Moose. The die was lifted and the image panel was set aside.

Ancient Christmas-themed patterned paper was edged with Gathered Twigs Distress ink, then layered. Red cardstock was die-cut with the Merry die from the Happy, Birthday, Merry, Christmas Small Words die set (All Occasion). The rest of the letters for the sentiment were die-cut with the Small Alphabet Upper and Lower Case set (All Occasion). The Christmas rub-on set had some little white snowflakes and xxxes, so those were used to add to the sentiment panel and the upper part of the image panel.

The card front was assembled and adhered to a kraft card.

I  Brake for Stamps has a great collection of digital stamps plus a huge and varied collection of rubber stamps that you ought to check out right now. Click on my badge below to be whisked over to I Brake for Stamps to check out all of the goodies! Best of all, if you buy something, you can get a 10% discount off of your purchase if you use this code: SAVE10KATHI!


Thanks for visiting today!

Tuesday, November 22, 2016

Thank You Fairy Much!

Here's my card with Dancing with Dragonflies from the wonderful Natural Beauties Collection of rubber stamps by Carmen Medlin Designs available at I Brake for Stamps.


Dancing with Dragonflies was stamped with Tuxedo Black Memento ink (Imagine Crafts) onto white cardstock and was colored with Copic markers. Blue Stardust Glitter pen was used to add a glittery touch to the dragonfly in Dancing with Dragonflies' hair, her anklet, and the body of the dragonfly that she's holding.

Patterned paper was layered and Dancing with Dragonflies was adhered. A Thank You rub-on (Basic Grey) was added to a pink die-cut (Memory Box), which was then adhered. The card front was adhered to a pink card and I called it done.

I Brake for Stamps has a huge and varied collection of rubber stamps that you ought to check out right now. Click on my badge below to be whisked over to I Brake for Stamps to check out all of the goodies! Best of all, if you buy something, you can get a 10% discount off of your purchase if you use this code: SAVE10KATHI!


Thanks for visiting today!

Tuesday, November 15, 2016

Steampunk Thanks Card


Here's a thank you card that I created with Steampunk Peg, a Rick St. Dennis digital stamp exclusively available at I Brake for Stamps.

Steampunk Peg was resized in PhotoElements, then printed out onto Copic-friendly cardstock with my laser printer. Steampunk Peg was colored with Copic markers, then several layers of Clear Gelly Glaze pen (Sakura) were added to the skull and dagger, her earrings, and her brooch to add glossy dimension to those elements.

The image panel was matted with one of the patterned paper from the Steampunk Debutante 8x8 pad (Graphic 45), which was edged with Black Soot Distress ink (Ranger). The same pad supplied the other patterned papers which were also edged with Black Soot Distress ink then layered.

 Gold metallic cardstock was die-cut with my Steampunk Corner die (La-La Land), Thanks (Elizabeth Craft Designs), Mini Gears (Memory Box), and the Gears corner from the Set of Three Corners (All Occasion). The Gears Corner die-cut was adhered over the horizontal strip, then the image panel was adhered. The card front then was adhered to a grey card, and the Steampunk Corner, Mini Gears, and the sentiment were adhered to finish the card.

I Brake for Stamps has a great selection of Rick St. Dennis digital stamps, plus a ginormous collection of fabulous rubber stamps that you ought to check out right now. Click on my badge below to be whisked over to I Brake for Stamps to check out all of the goodies! Best of all, if you buy something, you can get a 10% discount off of your purchase if you use this code: SAVE10KATHI!


Thanks for visiting today!
Saturday, November 12, 2016

Stampotique Word-Up Weekend!

Stampotique's Facebook Group has started "Word-Up Weekends" where we share projects created with Stampotique's many Words, Phrases, Letters, and Numbers.

I've finally gotten a chance to play along with this card featuring Word Collage (Amy Wilson-Wellenstein) and the Fairy Queen from Peace and Love with Words on the Side.


Here it is! It's rather bright, but I'm trying very hard to get out of my usual blue, purple color palette.


The Word Collage was stamped with Onyx Black VersaFine ink (Imagine Crafts) on 140 lb. Mixed Media cardstock (Strathmore) and heat embossed with sparkly Galaxy Black embossing powder (Sparkle and Sprinkle). The cardstock was spritzed with water and several colors of Brusho Crystal Colours (Colourcraft) were sprinkled onto the water and misted with water to make the powders move and spread. This process was repeated until I was happy with the color coverage, then the piece was heat set. When it was totally dry, I scored lines around the edges to facilitate tearing, then tore the cardstock, and tattered the edges with a Distress Tool (Tonic Studios).

The Fairy Queen was stamped onto the excess Brusho-colored cardstock with Jet Black Archival ink (Ranger), onto Copic-friendly cardstock with Tuxedo Black Memento ink (Imagine Crafts), and onto white glitter paper (American Crafts) with Palette Noir Hybrid ink (Stewart Superior). The Fairy Queen's body was fussy-cut from the Brusho-colored cardstock, her head was fussy-cut from the Copic-friendly cardstock, and her wings were cut from the glitter paper.

Distress Markers (Ranger) were used to color the leaves and the color on the Fairy Queen's dress. Copic markers were used to color head, then the crown was enhanced with several layers of Clear Gelly Glaze pen (Sakura). A Black Spica Glitter pen (Copic) was used to go over the word "love" in the Fairy Queen's hair and to add a beauty mark to her face. A black Sharpie pen was used to trace the detail on her wings. All fussy-cut colored parts were edged with a Black Pitt Artist pen (Faber Castell).

A variety of red shades of Brusho Crystal Colours were sprinkled onto a damp scrap of 140 lb. Mixed Media cardstock, misted with more water, then heat set. An old Primitive Heart punch was used to punch the red cardstock, which was then edged with a Black Pitt Artist pen.

The word panel was matted with black metallic cardstock, then adhered to a sheet from the Vintage Double Dot 6x6 patterned paper pad (Bo-Bunny). The multiple parts of the Fairy Queen were adhered over the Word Collage matted panel, which was then adhered to an A2 card.

Thanks for visiting today!

Friday, November 11, 2016

Got Calm?

Here's my card with the monster from the Got Zen set from the Curiosities Set Five, which is one of the wonderful rubber stamps by Carmen Medlin Designs available at I Brake for Stamps.


The Got Zen monster was stamped with Tuxedo Black Memento ink (Imagine Crafts) onto white cardstock and was colored with Copic markers.  A huge cloud was drawn in under the Got Zen monster and a dotty sky background were added with Copic markers.

The image panel was matted with black cardstock and adhered onto a card panel cut from a piece of rainbow-patterned cardstock that I found in my stash. The patterned cardstock was edged with Black Soot Distress ink (Ranger).

A word sticker from the Big Chit-Chat stickers was used as a sentiment and black rhinestones were added to finish the card.

I Brake for Stamps has a huge and varied collection of rubber stamps that you ought to check out right now. Click on my badge below to be whisked over to I Brake for Stamps to check out all of the goodies! Best of all, if you buy something, you can get a 10% discount off of your purchase if you use this code: SAVE10KATHI!


Thanks for visiting today!

Thursday, November 10, 2016

I Choose a Positive (c)Attitude!

This week's Stampotique Designer's Challenges (#261) is "Human with an Animal Head". Here's a blurb about the challenge:
"The possibilities are endless. Use a human Stampotique body and add a Stampotique animal head. Everything is okay with this challenge as long as you do not digitally alter any of the stamps."
Here's a journal page with Toby (Daniel Torrente) and Nerd Cat (Kira Nichols).


Toby and Nerd Cat were stamped with Tuxedo Black Memento ink (Imagine Crafts). They were both decapitated, colored with Copic markers, fussy-cut, and edged with a Black Pitt Artist pen (Faber Castell) and set aside. 

A journal page was brayered with layers of Dioxazine Purple, Quinacridone Magenta, Cerulean Blue, Ultra Marine Blue, Medium Grey Value 6, and Translucent White Media Fluid Acrylic (MFA) paint (DecoArt, then heat set.

Titanium White Media Fluid Acrylic paint was sponged over certain words and designs from the Text and Texture Transform stencil (Stencil) girl. White Simply Sweet rub-ons (Doodlebug) were used to add the date to the bottom of the page). Big Chit-Chat stickers (Idea-ology) and a capital "C" sticker were added to the page. A strip of washi tape was added horizontally. The page was then coated with a layer of Media Matte Medium to seal the stickers, rub-ons and washi tape.

New Canvas Palette ink (Stewart Superior) was sponged over the Positive Times stencil (Green Pepper Press) and the Jigsaw Puzzle stencil (Stencil Girl), then heat-set.

Toby with Nerd Cat's head was adhered to the page with Media Matte Medium then the page was sealed with another layer of Media Matte Medium. Several layers of Clear Gelly Glaze pen (Sakura) were added to Nerd Cat's to add a touch of glossy dimension.

I think that Toby with Nerd Cat's head looks very hipster. I will also admit that the page itself was inspired by Tuesday's election results.

Thanks for visiting today!

Tuesday, November 8, 2016

VOTE: Revisited


Read My Lips Lucille, from the fabulous and funny Humorous Senior Collection of stamps (I Brake for Stamps)wants you to vote today. Lucille doesn't even care who you vote for, just as long as you vote. After all, if you don't vote, you can't complain.

It's your right and your privilege to vote, so go VOTE now!!!

Lucille was stamped with Tuxedo Black Memento ink (Imagine Crafts). First I colored Lucille's sweater and dress in E43, E42, and E41 Copic markers. I grabbed a knit-textured orphan sock, put some Colorless Blender on it, then pressed it onto the colored sections which created instant knit texture on both the cardigan and dress! I finished coloring Lucille, fussy-cut her, edged her with black marker, and used gold gel pen to add a touch of gold to the buckle of her bag and the clasps of her sweater. Startdust glitter pen (Sakura) was used to add glitter to her glasses, since Lucille does like her glitter!

Blue cardstock and patterned paper from an old 6x6 pad by Authentique was die-cut with two of the dies from the 5x7 Card Creator Nestabilities (Spellbinders) die set. Antique Linen Distress ink (Ranger) was used to cover the white edges of the patterned paper. The image panel was adhered to the matted blue cardstock.

A piece of star-patterned paper from the same pad was die-cut with the Mermaid font die (Die-Versions). The second part of the sentiment was created with blue Dymo tape and my Dymo Caption Maker). 

The tape sentiment was adhered to a 3.75" x 5.75" piece of patterned paper from the same 6x6 patterned paper pad. The matted image panel was adhered atop the Dymo tape sentiment and the die-cut letters were added to the top. The letters didn't stand out enough, so I used a fine tip Multi-Liner (Copic) to outline the die-cut letters. The edges of the panel were sponged with Fired Brick Distress ink then matted onto a piece of  4" x 6" navy cardstock.

You really ought to go check out  Humorous Senior Collection of stamps and all the other great stamps at I Brake For Stamps. Click on my badge below to be whisked over there to check out their fabulous images! Best of all, if you buy something, use this code: SAVE10KATHI  and you'll get 10% off your purchase.


Thanks for visiting today! BTW, if you thought you've seen this before, you have. :D

Wednesday, November 2, 2016

Twinkie is My Favorite Martian

This week's Stampotique Designer's Challenges (#260) is "Outer Space". Here's a blurb about the challenge:
Whether you're looking to the stars or flying across the sky in a space ship, show us your best outer space project for this challenge.
If you'd like the chance to win your choice of $30 worth of Stampotique stamps, you should play along with this challenge. Visit Stampotique Designers Challenge blog and be sure to read the rules so that you'll have the chance to win that great prize!!! Remember to check to see the deadline for all of this month's Stampotique Designers Challenges!

Here's my card with Stampotique's Twinkie (Daniel Torrente), who is now a Martian.


Twinkie was stamped with Tuxedo Black Memento ink (Imagine Crafts), colored with Copic markers, fussy-cut, and edged with a Black Pitt Artist pen (Faber Castell). Twinkie's shoes and outfit were painted with a wash of  Silver Media Fluid Acrylic (MFA) paint (DecoArt). His head was pierced and two jewelry finding thingies were inserted into his head to become antennae. Twinkie's eyes were coated with  Media Liquid Glass (DecoArt), then was set aside while I created the rest of the card.

140 lb. Mixed Media cardstock (Strathmore) was painted with Pthalo Blue and Dioxazine Purple MFA paints and heat set. The surface was then flicked with Titanium White MFA paint to add a plethora of stars. That layer was heat set.

A circular lid was traced with a chalk pencil, then Black Media Gesso (DecoArt) was thickly applied with a palette knife, then left to dry overnight. The next morning, I gave it a blast with my heat gun to make sure that the Black Media Gesso was completely dry. It did bubble slightly, which added to the texture! Primary Yellow, Diarylide Yellow, Quinacridone Burnt Orange, and Quinacridone Red MFA paints were dabbled onto the semi-circle to make it look like Mars. 

140 lb. Mixed Media cardstock was die-cut several times with an Earth die (QuicKutz), the circles were stacked to add dimension, then Earth was painted with Ultramarine, Blue Green Light, and Pthalo Green-Yellow MFA paint. 

140 lb. Mixed Media cardstock was punched with a Moon punch (Family Treasures) and painted with White Media Gesso and allowed to dry. Some details were added with both Grey and Black Pitt Artist pens.

A length of wax floss was tied around Twinkie's hand and Twinkie the Martian was adhered to the card front with dimensional foam adhesive squares. The Earth was adhered over the other end of the wax floss using dimensional adhesive. The moon was adhered to the upper left of the card front. My Dymo Tape Labeler (Esselte) was used to create the sentiment, which was then adhered to the upper right. The card front was edged with black marker and adhered to a black card.

Thanks for visiting today!


Tuesday, November 1, 2016

Day of the Dead Thanks!

Here's my card with Mr. Bones from the Mr. and Mrs. Bones collection, which is one of the wonderful rubber stamps by Carmen Medlin Designs available at I Brake for Stamps.


Mr. Bones was stamped with Tuxedo Black Memento ink (Imagine Crafts) onto white cardstock and was colored with Copic markers. The colors used to color Mr. Bones were selected to match one of the rose patterned papers from the Bramble Rose 6x6 pad (My Mind's Eye).

Mr. Bonessombrero was partially fussy-cut, then the image was placed into one of the dies from the Stitched Rectangle Stax die set (Die-namics) and die-cut. The next largest die from the coordinating Plain Rectangle Stax die set (Die-namics) was used to die-cut a matching piece of patterned paper from the same pad, which was then trimmed, so that just the rectangular portions of the image panel would be matted with it. The matting panel was edged with Pumice Stone Distress ink. (Ranger).

The patterned paper used for the mat layer was also die-cut with one of the smaller Stitched Rectangles dies and edged with Pumice Stone Distress ink.

Kraft cardstock was die-cut with the Thanks die from the Party die set (Little B) and with one of the stitched borders from one of the Blueprints die sets (Die-namics).

The rose patterned paper was trimmed to size and edged with Pumice Stone Distress ink. The matted image panel, the stitched border, and the small stitched rectangle die-cut were adhered to the card front. The die-cut word Thanks was added to to the small stitched rectangle then the card front was mounted onto a kraft card.

I Brake for Stamps has a huge and varied collection of rubber stamps that you ought to check out right now. Click on my badge below to be whisked over to I Brake for Stamps to check out all of the goodies! Best of all, if you buy something, you can get a 10% discount off of your purchase if you use this code: SAVE10KATHI!


Thanks for visiting today!
Monday, October 31, 2016

It's the Witching Hour! Happy Halloween!


This Halloween card features Chilling, a gorgeous and spooky stamp by Stampendous. I first created the background with by sponging Distress inks (Ranger) onto a piece of 140 lb. Mixed Media cardstock (Strathmore), then heat setting the ink. Chilling was stamped with Jet Black Archival ink (Ranger) over top of the sponged background, then touched up with Black Pitt Artist pens (Faber Castell).

Matte black cardstock was die-cut with a Wrought Iron Fence die (Spellbinders) and Onyxyite Treasure Gold (Paper Artsy) was gently smooshed onto the fence die-cut with my finger. Black shimmery cardstock was die-cut with the Graveyard Border die (Cottage Cutz) and some tiny cats were die-cut using one of my myriad cat dies (All Occasions, Impression Obsession, Poppy Stamps).

The image panel was matted with black cardstock and the Graveyard Border die-cut was adhered. The Wrought Iron Fence die-cut was adhered over both the image panel and the Graveyard Border die-cut, then the three black shimmery kitties were adhered. The image panel was edged with Onyxite Treasure Gold, then mounted onto a black card front. A sticker from the Occasions Small Talk pad (Idea-ology) was edged with Onyxite Treasure Gold to finish the card.

Happy Halloween!

Tuesday, October 25, 2016

Hocus Pocus

Here's a card with Miss Hagatha Crone, one of the fabulous Rick St. Dennis rubber stamps available at I Brake for Stamps.


Miss Hagatha Crone was stamped with Tuxedo Black Memento ink (Imagine Crafts), colored with Copic markers, fussy-cut, and edged with a black marker. I tried to make the apple look rotten. Black Spica Glitter pen was used on Miss Hagatha Crone's pupils and nails. Several layers of Clear Gelly Glaze pen (Sakura) were added to Miss Hagatha Crone's warts, teeth, nails, and the apple stem.

The fussy-cut image was placed atop a piece of patterned paper from the Halloween Haunts Kraft Resist paper pad (Idea-ology). The image was loosely outlined with a Sketch and Wash charcoal pencil, then put aside for safe keeping.

The Sketch and Wash charcoal pencil was used to fill in the outline of the image, then a water brush was used to smooth out and soften the charcoal tone. Fired Brick Distress ink and Black Soot Distress ink(Ranger) were sponged over the Kraft Resist patterned paper and also used to edge it. Picket Fence Distress ink was used over the skulls in the patterned paper.

Stickers from the Occasions Small Talk pad (Idea-ology) were used to add three sentiments to finish the card.

I Brake for Stamps has a large selection of exclusive Rick St. Dennis rubber stamps plus a huge and varied collection of rubber stamps that you ought to check out right now. Click on my badge below to be whisked over to I Brake for Stamps to check out all of the goodies! Best of all, if you buy something, you can get a 10% discount off of your purchase if you use this code: SAVE10KATHI!


Thanks for visiting today!

Wednesday, October 19, 2016

Shake It Off ATC, Version #1


This is my first version of this ATC design, featuring Stampotique's Betsy (Karen Hayselden), whichwas created for the Monochromatic ATC swap over at Stampotique's Facebook page. These swaps are a lot of fun, so you should join in if possible.

I will mention that I came thisclose to binning the ATC because I didn't like how it came out, so I went and made a second one using my trusty Copic markers. Then when I woke up, I looked at this ATC and decided that it didn't suck after all.

Ost Blue Brusho Crystal Color was applied to a piece of wet 140 lb. Mixed Media cardstock to create a variegated blue background Betsy was stamped with Danube Blue Memento ink (Imagine Craft) then colored with the same color of BrushoClear Gelly Glaze pen (Sakura) was used to add a touch of dimension to  Betsy's eye.

Ancient Making Memories rub-ons were used to add the sentiment.

Thanks for visiting today!

Shake It Off ATC, Version #2


This ATC, with Stampotique's Betsy (Karen Hayselden), was created for the Monochromatic ATC swap over at Stampotique's Facebook page. These swaps are a lot of fun, so you should join in if possible.

140 lb. Mixed Media cardstock (Strathmore) was sponged with Sky Blue Memento ink (Imagine Crafts) and  Betsy was stamped with Danube Blue Memento ink then colored with Copic markers. Clear Gelly Glaze pen (Sakura) was used to add a touch of dimension to  Betsy's eye.

My rapidly dwindling supply of Doodlebug rub-ons was used to add the sentiment.

I should add that this was my second version of this ATC idea. I came thisclose to binning the first one and will share that in my next post.

Thanks for visiting today!

Tuesday, October 18, 2016

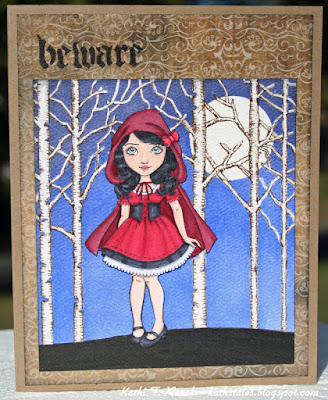
Here's my card with What Big Eyes from the wonderful Eyes of Fable Collection of rubber stamps by Carmen Medlin Designs available at I Brake for Stamps.


What Big Eye was stamped with Tuxedo Black Memento ink (Imagine Crafts) onto white cardstock was colored with Copic markers, fussy-cut, edged with a black marker, then set aside while a background was created for her.

Chipped Sapphire and Blueprint Sketch Distress ink (Ranger) were sponged over the Garden Birch Landscape stencil (Memory Box) onto textured white cardstock, which had a circle mask placed on it. When I was done stenciling, the birch trees were detailed with an Old Paper Distress marker. The circle mask was lifted, and a white acrylic paint marker was used to make the moon a bit whiter.

Black background was added to the base of the panel using a black marker.  Black Soot Distress ink was used to edge the panel.

Patterned paper from a very old Halloween themed stack (Recollections) was cut to size and sponged with Hickory Smoke Distress ink. Black Soot Distress ink was sponged over the word "Beware" on the Halloween Mini Layering stencil (Stampers Anonymous). The word wasn't dark enough, so it was darkened with a black marker.

The image panel was adhered to the card front, which was then mounted onto a kraft card.

I Brake for Stamps has a huge and varied collection of rubber stamps that you ought to check out right now. Click on my badge below to be whisked over to I Brake for Stamps to check out all of the goodies! Best of all, if you buy something, you can get a 10% discount off of your purchase if you use this code: SAVE10KATHI!


Thanks for visiting today!

Revised Beware!


After posting the card on Facebook, I realized that the birch trees should have been in front of the moon. Rather than embrace imperfection since:  (a) it already has enough flaws from coloring, etc. (b) I'm a Virgo, I decided to fix it and share my fix with you. Teachable moments and all that hooey.

I placed the Birch Landscape stencil back over the piece, lining it up as well as I could. I then traced the branches over the moon using the Old Paper Distress marker. Alas, the fine point of the marker was dry and the ink didn't work well over the acrylic paint on the moon, so I had to "Plan B" it and grabbed a Sepia Pitt Artist marker (Faber Castell), which of course, was darker than the Distress marker. I couldn't just darken the lines of a few branches and a tree, so I had to outline all the trees and branches to make them all the same-ish color. When I was done, I used the acrylic paint maker to touch up the white of the moon.

By the way, it's still not perfect. I just saw another mistake, but I'm going to let it go.

So there you have it.

To reiterate, the stamp is What Big Eyes from the wonderful Eyes of Fable Collection of rubber stamps by Carmen Medlin Designs available at I Brake for Stamps.

I Brake for Stamps has a huge and varied collection of rubber stamps that you ought to check out right now. Click on my badge below to be whisked over to I Brake for Stamps to check out all of the goodies! Best of all, if you buy something, you can get a 10% discount off of your purchase if you use this code: SAVE10KATHI!


Beware!

Here's my card with What Big Eyes from the wonderful Eyes of Fable Collection of rubber stamps by Carmen Medlin Designs available at I Brake for Stamps.


What Big Eye was stamped with Tuxedo Black Memento ink (Imagine Crafts) onto white cardstock was colored with Copic markers, fussy-cut, edged with a black marker, then set aside while a background was created for her.

Chipped Sapphire and Blueprint Sketch Distress ink (Ranger) were sponged over the Garden Birch Landscape stencil (Memory Box) onto textured white cardstock, which had a circle mask placed on it. When I was done stenciling, the birch trees were detailed with an Old Paper Distress marker. The circle mask was lifted, and a white acrylic paint marker was used to make the moon a bit whiter.

Black background was added to the base of the panel using a black marker.  Black Soot Distress ink was used to edge the panel.

Patterned paper from a very old Halloween themed stack (Recollections) was cut to size and sponged with Hickory Smoke Distress ink. Black Soot Distress ink was sponged over the word "Beware" on the Halloween Mini Layering stencil (Stampers Anonymous). The word wasn't dark enough, so it was darkened with a black marker.

The image panel was adhered to the card front, which was then mounted onto a kraft card.

I Brake for Stamps has a huge and varied collection of rubber stamps that you ought to check out right now. Click on my badge below to be whisked over to I Brake for Stamps to check out all of the goodies! Best of all, if you buy something, you can get a 10% discount off of your purchase if you use this code: SAVE10KATHI!


Thanks for visiting today!

Friday, October 14, 2016

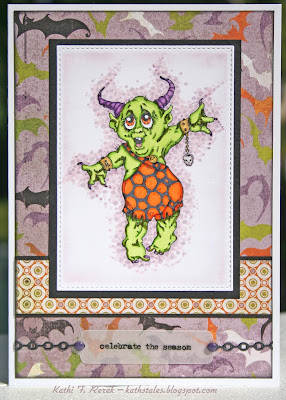
Celebrate the Season with Fwiver!

I clearly am in the Halloween spirit! Here's a card with Fwiver, one of the fabulous Rick St. Dennis rubber stamps available at I Brake for Stamps.


Fwiver was stamped with Tuxedo Black Memento ink (Imagine Crafts) and colored with Copic markers. The image panel was die-cut, left in the die, then Milled Lavender Distress ink (Ranger) was sponged onto the image panel. The image panel was matted with black cardstock, then several layers of Clear Gelly Glaze pen (Sakura) were added to Fwiver's horns, claws, the button on his outfit, and the skull charm to add glossy dimension to those elements.

Here's a close-up photo so you can see the dimension and shine.


Patterned paper from the Eerie collection (Basic Grey) was sponged with Black Soot Distress ink, then layered. Vellum was die-cut with a nameplate die (Spellbinders) and a sentiment from a Christmastime Remnant Rubs sheet (Idea-ology) was added. Black shimmery cardstock was die-cut with the Delicate Chain die (Memory Box) and used to attach the nameplate. Purple brads were used to further secure the sentiment.

I Brake for Stamps has a huge and varied collection of rubber stamps that you ought to check out right now. Click on my badge below to be whisked over to I Brake for Stamps to check out all of the goodies! Best of all, if you buy something, you can get a 10% discount off of your purchase if you use this code: SAVE10KATHI!


Thanks for visiting today!

I shall enter this card into the following challenges:

• The Male Room Challenges: Halloween
 Try It On Tuesdays Challenges: Scary and Spooky
• Dream In Darkness Challenges: Halloween
• Let's Craft and Create Challenges: Halloween

Thursday, October 13, 2016

Creepy, Kooky, Freaky, Spooky!

This week's Stampotique Designer's Challenges (#259) is "Halloween".

If you'd like the chance to win your choice of $30 worth of Stampotique stamps, you should play along with this challenge. Visit Stampotique Designers Challenge blog and be sure to read the rules so that you'll have the chance to win that great prize!!! Remember to check to see the deadline for all of this month's Stampotique Designers Challenges!

Here's my second card for this challenge, this time combining Jasper Fruhling, the skull from Halloween Cube, and the top hat from Hat Cube (all stamps by Daniel Torrente).


Jasper Fruhlingthe skull from Halloween Cubeand the top hat from Hat Cube were stamped with Tuxedo Black Memento ink (Imagine Crafts), colored with Copic markers, fussy-cut, and edged with black marker.

The patterned paper, from the Midnight Magic 6x6 pad (Recollections), was trimmed, edged with Black Soot Distress ink (Ranger), and a strip of road-patterned Washi tape was added to the base. The morphed skull creature was adhered in place and a sentiment from the Seasonal Chit Chat sticker book (Idea-ology) was added to complete the card.

Thank you for visiting today!

I shall enter this card into the following challenges:
The Male Room Challenges: Halloween
Try It On Tuesdays Challenges: Scary and Spooky
Dream In Darkness Challenges: Halloween
Let's Craft and Create Challenges: Halloween

Wednesday, October 12, 2016

Halloween Potion!

This week's Stampotique Designer's Challenges (#259) is "Halloween".

If you'd like the chance to win your choice of $30 worth of Stampotique stamps, you should play along with this challenge. Visit Stampotique Designers Challenge blog and be sure to read the rules so that you'll have the chance to win that great prize!!! Remember to check to see the deadline for all of this month's Stampotique Designers Challenges!


Spiderwitch was stamped with Tuxedo Black Memento ink (Imagine Crafts) twice, once onto Eclipse Tape (JudiKins) and once onto white cardstock. The Eclipse Tape version was fussy-cut and set aside while the other image was colored with Copic markers. The mask was adhered over its counterpart, and Wild Honey Distress ink (Ranger) was sponged over the Mini Shattered Layering stencil (Stamper's Anonymous). The words "Potion" and "Shake Well", from the Curiosities Remnant Rubs (Idea-ology) sheet, were applied. Spiderwitch's mask was lifted and the label was set aside.

My Apothecary Bottle Alterations die (Sizzix) was used to die-cut 180 lb. Mixed Media cardstock (Strathmore). The die-cut was painted with Pthalo Green-Blue and Pthalo Green-Yellow Media Fluid Acrylic (MFA) paints (DecoArt) and allowed to dry. Some shading was added to the bottle with Jet Black Archival ink (Ranger). When that was dry, a reflective accent was added with Titanium White MFA paint and allowed to dry. The bottle was blasted with heat gun to ensure that it was totally dry before adding a thick layer of Media Crackle Glaze (DecoArt). This was left to dry for several hours.

The Apothecary Bottle's crystal stopper was colored with Copic markers, painted with Iridescent Medium, and allowed to dry. When dry, it was coated with a layer of Clear Gelly Glaze pen (Sakura) to add some shiny dimension to the bottle.

The Spiderwitch label was adhered to the painted, crackled Apothecary Bottle.

Plain patterned paper was punched with a Spider Web Border punch (Martha Stewart/EK Success) and adhered to layered patterned papers from Graphic 45 (spider web) and My Mind's Eye. The sentiment, from a Seasonal Chit-Chat sticker booklet (Idea-ology) was adhered to the spider web border, and the Spiderwitch potion bottle was adhered to the card front.

Thanks for visiting today!