
It's Topflight Stamps 5th birthday! To celebrate I’ve teamed up with some great designers to showcase celebratory projects using the unique products available at Topflight Stamps. Please hop along with us to see all the beautiful talent from this group of amazing designers! You should have arrived here from the Topflight Stamps Blog. If not, no worries, catch the details below.
Here's my card!

Topflight Stamps Products Used:
PSA: You should pop over to Topflight Stamps right now because there's a birthday sale and there are loads and loads of new products!
Other Products Used:
140 lb. Mixed Media Paper by Strathmore®
Solar White Classic Crest® Cardstock by Neenah Papers
Brown Cardstock
Tuxedo Black Memento™ Ink by Tsukineko®
Copic® Markers:
Rabbits: E21, E30, E31, E33, E34, E35, E44, E47, E50, E51, R000, R00, R01, R21, R22, R32, BV20, BV23
Champagne Bottle: G46, Yw21, Y23, Y26, Y28, V17
Cork: E42, E51, E81, E84
Champagne Flutes: YR30, YR31, C1, BG11
Cut N'Dry Foam by Ranger Ink
Black Pitt Artist FIneliner SX, F, M Pens by Faber Castell
Black Chalk Pencil by General's®
Fishtail Flag Stax Die-Namics Die Set by My Favorite Things
STAY-tion™ by Wendy Vecchi for Ranger Ink
Stamping Platform
Repositionable Scotch Tape® by 3M
Ancient Press Type
There are my usual verbose instructions accompanied by step-out photos below, but before I get to them, I wanted to give you more information and to tell you that Dina Kowal's Blog is the next stop on the hop!
GIVEAWAY DETAILS
Of course, it wouldn’t be a birthday celebration without prizes! Topflight Stamps is giving one lucky winner a $50 Gift Certificate to the store. But wait! There's more! Each stop on the hop has an additional $25 Gift Certificate up for grabs for some lucky commenter. For a chance to win, make sure to visit every stop on the hop and leave a comment by April 3rd. Winners will be announced on the Topflight Stamps blog on April 7th. Good Luck!
Of course, it wouldn’t be a birthday celebration without prizes! Topflight Stamps is giving one lucky winner a $50 Gift Certificate to the store. But wait! There's more! Each stop on the hop has an additional $25 Gift Certificate up for grabs for some lucky commenter. For a chance to win, make sure to visit every stop on the hop and leave a comment by April 3rd. Winners will be announced on the Topflight Stamps blog on April 7th. Good Luck!
Instructions:
1. Place all three bunnies from the Bunnies Unmounted Red Rubber Stamp Set face-down on the stamping platform. Press the lid of the platform onto the back of the stamps and lift.
2. Use repositionable Scotch Tape to cover the carrot and the pencil on the corresponding bunny stamps. Ink the stamps with black ink. Remove the tape, and stamp onto white cardstock.

3. Stamp the carrot bunny and the looking-upward bunny a second time onto white cardstock. Fussy-cut their hands/paws.
4. Use black ink to stamp the champagne bottle, wine flute (2x), and the cork from the Cheers, Lovely Polymer Stamp Set onto white cardstock.
5. Fussy-cut the stamped images.

6. Use Copic markers to color the stamped, fussy-cut images, then edge with a dark pen or marker. Add the press type letters T, F, S to the label of the champagne bottle. Set aside the bunnies, champagne, flutes, and cork. Don't worry. They won't be bored or lonely. They can drink champagne and do the bunny hop while waiting for their background.

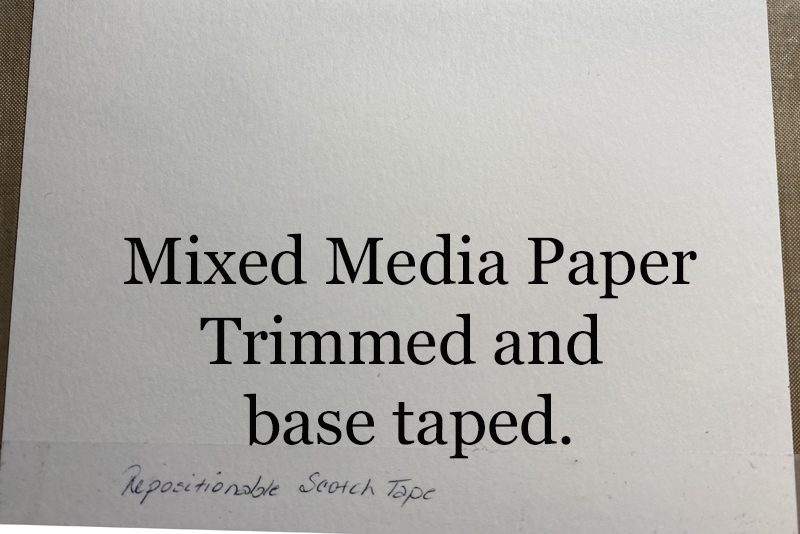
7. Cut a piece of mixed media cardstock to 6.75" x 4.75". Adhere Repositionable Scotch Tape along the bottom as shown below.
8. Add drops of Mermaid and BoraBora Fresco Finish Chalk Acrylic Paints onto a piece of Cut N'Dry Foam.

9. Smoosh the foam side down to mix the paint, apply paint to the mixed media paper, and heat set.

10. Use masking tape to secure the painted background paper to the STAY-tion.
11. Place the flower and diamond section of the Scrapcosy PS108 Small Backgrounds Stencil over the painted paper. Secure with magnets.
12. Sponge Warm Breeze VersaFine Clair™ Ink over the stencil onto the painted background.

13. Lift stencil and heat set the ink.
14. Using the diamond and flower shapes as a guide, move the stencil to the right, secure with magnets, and sponge Warm Breeze VersaFine Clair™ Ink over the stencil.
15. Lift the stencil and heat set the ink.
16. To stencil the remainder of the panel, move the stencil down, line up the flowers and diamonds, and repeat steps #12 through #15.
16. Completed stenciling. It's not perfect, but life's like that.

9.Remove the Scotch Tape. Place another piece of tape to cover the stenciled and painted top part of the background. Put a piece of scrap paper to complete cover to the top, then paint the bottom part with Toffee Fresco Finish Chalk Acrylic Paint. Heat set.

10. Remove the tape.
11. Use a black pen to add horizontal lines to create a quasi wooden floor look. I forgot to add the vertical lines to separate the individual boards. I also forgot to take a photo of the step. Alas.
12. Adhere the champagne flutes to the bunnies' hands. Glue their hands to the glasses. Oops. Another missing photo.
13. Position the champagne bottle to look as though the bunny is carrying it. Adhere the bunny to her bottle. Or vice versa. Forget to take a photo.
14. Figure out the bunny placement by placing the bunnies onto the background without adhering them. Don't take a photo.
15. Use chalk pencil to add shadows to where the bunnies and bottle will be. Yeah. No photo.
16. Adhere the bunnies in place without taking another photo.
17. Use magnets to secure the image panel to the base of the stamping platform.
18. Position the cork stamp from the Cheers, Lovely Polymer Stamp Set, face-down on the background where desired. Press the platform's lid onto the back of the stamp, lift the lid, ink the stamp with Purple Velvet Prism Ink, and stamp.
19. Remove the panel from the platform and heat set the ink.
20. Adhere the cork over its counterpart.
21. Here's the completed image panel.

11.Sponge a piece of mixed media paper with Purple Velvet Prism Ink. Mist with water and heat set. Oops. Missed photo op!
12. Use a stamping platform and Purple Velvet Prism Ink to stamp the Background Clocks Solo 155 Unmounted Red Rubber Stamp. Repeat inking and stamping to ensure a good impression.

12. Use Fishtail Flag dies to cut the stamped purple paper.
13. Forget to take a photo.
14. Use magnets to secure the smaller flag to the base of the stamping platform. Position the "Cheers, lovely" sentiment from the set face-down where desired on the flag. Press the platform's lid on the back of the stamp and lift.
15. Use Repositionable Scotch Tape to cover the comma and the "lovely" from the Cheers, Lovely Polymer Stamp Set on the stamp. Ink the stamp, remove the tape, and stamp. Repeat Step# 13.
16. Use the stamping platform and Purple Velvet Prism Ink to stamp "Celebrate" from the Classic Sentiments Clear Stamp Set onto the larger flag. Repeat Step# 13.
17. Edge both flags with Purple Velvet Prism Ink, heat set, and secure them to the card front as shown.
18. Adhere the cardfront to a brown 7" x 5" card.
Thanks for visiting! Bunny-hop along to your next stop, which is Dina Kowal's Blog!
~~~~~~~~~
Here's the blog hop roster. Follow along and if you get lost, you can always start again at the Topflight Stamps Blog. Remember to leave a comment at each blog to increase your chance of winning a prize!
Lastly, be sure to visit Topflight Stampsto take advantage of the great sale!
Great job. I really like the card , thank you for the detailed explanation.
ReplyDeleteAdorable card, thanks for all the details!
ReplyDeleteOhmygosh. Your card is amazing!!!
ReplyDeleteThe bunnies and amount of work, truly inspired. Thanks!
ReplyDeleteGreat instructions, those bunnies are the best! 🤗😍
ReplyDeleteAlways appreciate your detailed instructions and creativity!
ReplyDeleteOh my those bunnies are so cute and definitely celebrating. 💕
ReplyDeleteLove the card! Happy Birthday!
ReplyDeleteI have that bunny set too, but haven't used it yet - they have so many possibilities! Love this.
ReplyDeleteyour card is just darling - thanks for sharing how you made it
ReplyDeleteThose Bunnies just make you smile
ReplyDeleteCute Bunnies. And love that background.
ReplyDeleteSuch an adorable card! You did so awesome with the masking and coloring. thanks for the inspiration.
ReplyDeleteVery cute card. Love how you combined sets to give the bunnies some champagne!
ReplyDeleteA funny card.
ReplyDeleteSuper cute bunnies!!! Love how you designed the card :):) Fun to be hopping with you too Kathi!!!
ReplyDeleteYour card is so adorable and sweet!!
ReplyDeleteAdorable! Love those bunnies.
ReplyDeleteSuch a fun an cute card! I love all the gorgeous details and these bunnies are so fun!
ReplyDeleteAdorable card! And thanks for the detailed instructions.
ReplyDeleteThese bunnies are just too fun! I love your delightful card!
ReplyDeleteGreat card. I love your instructions and the humor added! Lol! I just became a new follower. Amanda Rhodes nclights7@gmail.com
ReplyDeleteYour bunnies are having so much fun partying.... CARRY ON!!!!
ReplyDeleteWhat a cute card. Your tutorial was very good.
ReplyDeleteI always love unique critters and the Katzelkraft Bunnies are all that and more. Your coloring and background are perfect. Great how to!
ReplyDeleteI LOVE your "verbose" instructions. Its exactly what I need. These bunnies are adorable!
ReplyDeleteHi Kathi. I love your card. Thank your for all of the detail listed. Your are great at incorporating so many stamps from different companies. The way you made the bunnies hold the bottle is perfect. I will use your idea to combine some of my stamped images. I love the accent of the purple clock banners too. I am looking forward to your next card.
ReplyDeleteGreat card! Those bunnies are so cute!
ReplyDeleteThis is such a FUN card. Happy 5th birthday, and keep the inspiration coming!
ReplyDeleteCute and fun bunnies and I like the background.
ReplyDeleteSuch a fun card! And your step by step instructions were so helpful!
ReplyDeletesuper cute celebrating bunnies Kathi! =)
ReplyDeletesuch creative ways to use the stamps.. love them
ReplyDeleteThis card is so cute... Love how you made the bunnies have a little party!
ReplyDeleteSo cute! Thank you for sharing!
ReplyDeleteDarling birthday scene with these bunnies, glad to see a few brands that are new to me.
ReplyDelete