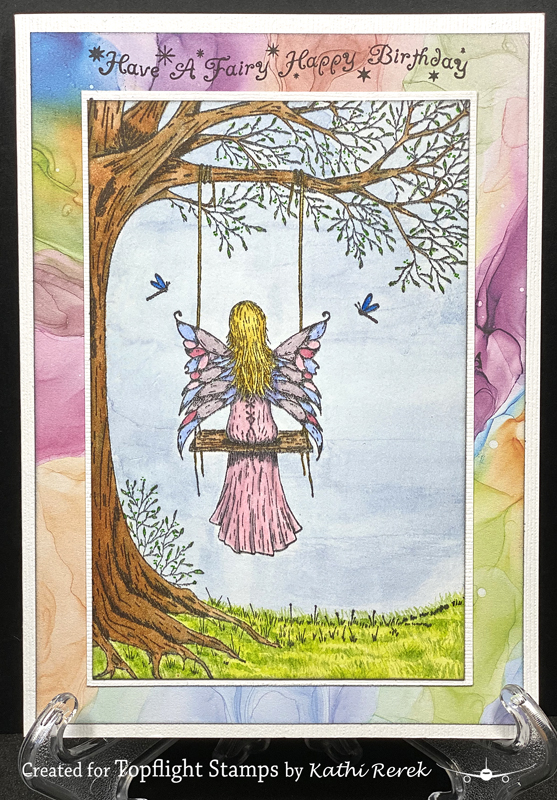
Here's a birthday card created for Topflight Stamps that was inspired by the advent of spring.
Topflight Stamps Products Used:
Della Blue, Lime Punch, Pine, Graphite, Russet Orange, and Henna Elements Ink by Lavinia Stamps
Other Products Used:
140 lb. Mixed Media Paper by Strathmore®
Avalanche Cardstock by Bazzill Basics Paper®
Black Soot Distress® Ink by Tim Holtz® for Ranger Ink
Golden Locks,Honey Comb, Graystone, Blush, Rosie Cheeks, Blue Jeans, Lavender, Misty Morning, and Fern Zig® Photo Twin Markers by Kuretake
Cornflour Blue, Ochre, May Green, and Pale Green Zig® Clean Color Real Brush Markers by Kuretake
Black Sparkle Stardust® Glitter Gel Pen by Sakura® of America
Stamping Platform
Craft Mat
Flat, Round, and Grainer Paint Brushes
Instructions:
- Create an A6 card from white cardstock. Set aside.
- Use a stamping platform and Nocturne VersaFine Clair Ink to stamp Fairy Rose Unmounted Rubber Stamp onto mixed media paper. Heat set.
- Smoosh the Della Blue Elements Ink pad onto a craft mat, mist it with water, and use a flat paintbrush to add the sky. Heat set the image panel. Clean the craft mat.
- Repeat the "smoosh, spritz, and brush" step with Lime Punch Elements Ink to create the spring grass. Heat set the image panel. Clean the craft mat.
- Repeat the "smoosh, spritz, and brush" step with Pine Elements Ink to add shade and shadows. Then use a spiky brush, aka a grainer, to add the look of blades of grass. Heat set the image panel. Clean the craft mat.
- Repeat the "smoosh, spritz, and brush" step with the Graphite Elements Ink. Use a round brush to apply the ink to the shadows and knots of the tree. Heat set the image panel. Clean the craft mat.
- Since I didn't have a good tree brown, I made my own by smooshing Russet Orange, and Henna Elements Ink onto my craft mat, misting them, and combining them.
- Brush the brown ink onto the tree trunk, the branches, and the wooden swing seat. Heat set the image panel. Clean the craft mat.
- Use Zig Photo-Twin and Clean Color Markers to color the fairy, the leaves, and the dragonflies.
- Use the black glitter pen to outline the dragonflies' bodies.
- Trim the image panel and edge with Black Soot Distress ink.
- Mat with white cardstock cut a bit larger.
- Trim a piece of patterned paper from the beautiful Ink Drops - Candy 6x6 Patterned Paper Pad by Craft Consortium to 4.25" wide and edge with Black Soot Distress ink.
- Use magnets to secure the patterned paper to the base of a stamping platform.
- Position the Fairy Happy Birthday Clear Polymer Sentiment Stamp face-down on the top of the patterned paper panel.
- Press the platform's lid onto the back of the stamp, lift the lid, ink the stamp with Onyx Black VersaFine Ink, and stamp. Repeat if necessary to get a good impression.
- Remove the panel from the stamping platform and heat set the sentiment.
- Adhere the matted image panel to the patterned paper as shown to finish the card front.
- Adhere the card front to the reserved A6 card.
Thanks for visiting today!
No comments:
Post a Comment