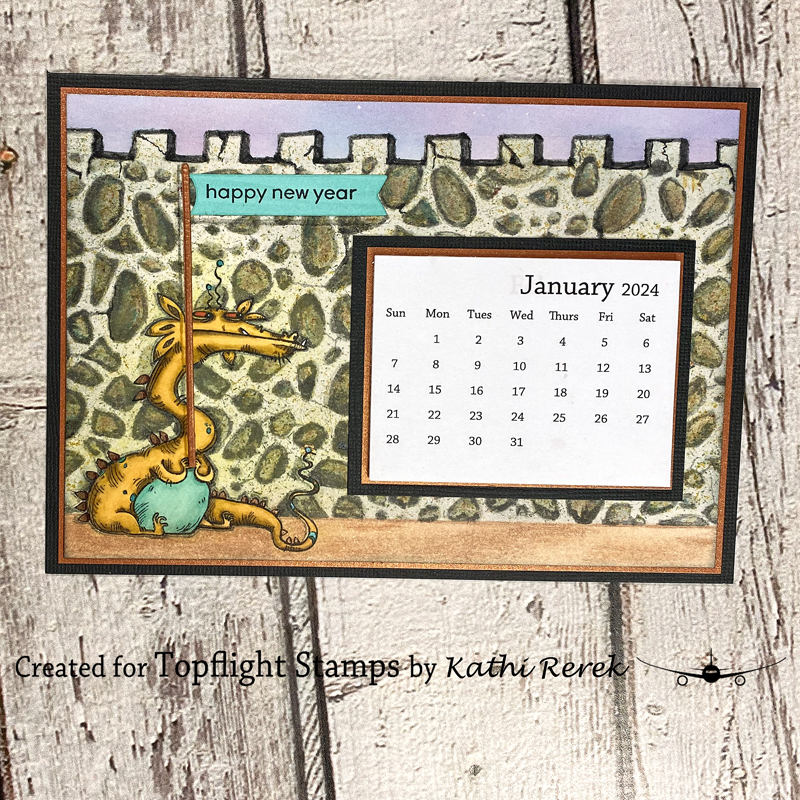
It's Tuesday, my day to share a project created for Topflight Stamps. I've made another calendar card since a New Year's resolution was to actually use all the mini calendars that I purchased AND mail them. This card features the cranky, yet adorable Dragon Unmounted Red Rubber Stamp by Katzelkraft posing in front of a castle wall made with the Stones Stencil by Lavinia Stamps.
Here it is!
Topflight Stamps Products Used:
Della Blue, Confetti, Russet Orange, Paprika, Sahara, Bermuda, and Graphite Elements Inks by Lavinia Stamps
Nocturne VersaFine Clair Ink by Imagine Crafts/TsukinekoOther Products Used:
Bristol Paper by Strathmore
Raven Cardstock by Bazzill Basics
Copper Metallic Cardstock by Recollections
London Fog and Desert Sand Memento Ink by Imagine Crafts/Tsukineko
Lost Shadow and Black Soot Distress Inks by Tim Holtz for Ranger Ink
Castle Stencil by Pebbles
Copic Markers: Y21, Y23, Y26, Y28, BG11, BG13, BG90, E08, E19, E95, E97
Pouncy Tool
Pale Grey, Light Grey, Cool Grey 1, Cool Grey 3, Cool Grey 6, Shadow Pink, and Aquamarine Tint Zig Clean Color Real Brush Markers by Kuretake
Van Dyke Brown and Burnt Sienna Chalk Pencils by General's
Pearlescent Chalk by Pebbles
Shiny Series Dot and Mica Dot Watercolors by Iuile
Thin Strip Die by Spellbinders
Flag Dies: Source Unknown
White Gelly Roll Gel Pen by Sakura of America
Low-tack Tape
Mini Calendar
Removeable Sticker Paper by Avery
STAY-tion by Wendy Vecchi for Ranger Ink
Stamping Platform
Instructions:
- Cut a piece of Raven cardstock to 10" x 7". Score at 5" and fold to form a 5" x 7" card. Set aside.
- Use Tuxedo Black Memento Ink to stamp the Dragon Unmounted Red Rubber Stamp twice — once onto Bristol Paper and once onto masking paper.
- Color the Dragon on the Bristol Paper with Copic markers.
- Fussy-cut the masking paper Dragon and placed him his counterpart on the image panel as a mask.
- Place a piece of low-tack tape horizontally over the bottom of the Dragon.
- Use magnets to secure the image panel onto the STAY-tion.
- Place the castle stencil onto the image panel towards the top and secure it with magnets.
- Brush Della Blue then Confetti Elements Inks over the ramparts of the castle to create a sky.
- Invert the stencil so that the sky is covered and the rampart/crenellations are visible.
- Brush Lost Shadow Distress Ink onto the image panel between the castle stencil and the tape to start a stone castle wall.
- Secure the Stones Stencil by Lavinia Stamps onto the image panel.
- Brush London Fog Memento Ink over the stencil onto the image panel.
- Use steel wool or a "pouncy tool" (looks like copper wool attached to a stamp block) to randomly pounce/apply Russet Orange, Paprika, Sahara, Bermuda, and Graphite Elements Inks onto the stones to make them more look stonier.
- Use watercolor markers to outline the stones on the wall and add dimension and cracky details to the castle's crenellation/ramparts.
- Remove the low tack tape.
- With the mask still covering the Dragon, brush Desert Sand Memento Ink along the bottom of the image panel.
- Use chalk pencils to add shadows and detail to the ground.
- Use pearlescent yellow palette chalk to add a glow around the dragon.
- Remove the Dragon's mask.
- Use glittery watercolors to add details to the Dragon's scales, eyes, and the ornaments on his head and tail.
- Use a white gelly roll gel pen to add highlights to the dragon's eyes.
- Color a scrap of white cardstock with BG11 and BG13.
- Position the "Happy New Year" sentiment from the Classic Sentiments Clear Stamp Set facedown onto the Copic colored white cardstock.
- Press the lid of the platform onto the back of the stamp and lift.
- Ink the stamp with Nocturne VersaFine Clair Ink and stamp.
- Re-ink and stamp again if necessary to attain a good impression.
- Use a flag die was used to cut the sentiment.
- Edge the die-cut with the BG13 marker.
- Use the thin strip die to cut metallic copper cardstock.
- Adhere the thin piece of copper cardstock over the Dragon on the image panel as shown.
- Adhere the flag to the copper cardstock "flagpole" as shown.
- Use Copic markers and grey watercolor markers to add shadows and shading to the image panel.
- Trim the image panel to 4.625" x 6.625" and edge with Black Soot Distress Ink.
- Cut a piece of metallic copper cardstock to 4.75" x 6.75" and use to mat the image panel.
- Adhere the matted image panel to the reserved black card.
- Cut a piece of metallic cardstock .25" larger than the mini calendar.
- Cut a piece of black cardstock .5" larger than the calendar.
- Adhere the copper cardstock to the black cardstock.
- Use double-sided tape to adhere the calendar to the matted cardstock.
- Use double-sided tape to adhere the matted calendar to finish the calendar card.
Thanks for visiting today!
No comments:
Post a Comment