Wednesday, May 31, 2023

Shimmery Fairy Card Tutorial

Today I'm sharing a tutorial created for Imagine Crafts that will show how to create a fairy card with magical shimmer using Memento Inks and Sheer Shimmer Sparkle Spray!

Here it is!


Imagine Crafts Products:
Ink Sweepers
Sponge Daubers
Tear It! Tape
Craft Mat

Other Products Used:
140 lb. Watercolor Paper by Canson
Solar White Classic Crest Cardstock by Neenah Papers
Trinity Clear Polymer Stamp by Lavinia Stamps*
Music Notes Small Clear Polymer Stamp Set by Lavinia Stamps*
Sheet Music Texture Red Rubber Cling Stamp by Darkroom Door*
Misti Stamping Platform by Petunia
Heat Gun by EK Success

*Available at Topflight Stamps

Instructions:


Step 1: 

Smoosh Paris Dusk Memento Dew Drop Ink Pad onto the craft mat. Mist with water and use a paint brush to apply diluted ink to the right edge of a 5.25” x 4” panel of watercolor paper.


Repeat with Blue Danube and then with Bahama Blue Memento Dew Drop Ink Pads until the entire panel is inked. Heat set the panel.


Step 2:

Ink the Sheet Music Texture Red Rubber Cling Stamp with the Blue Danube Dew Drop Ink Pad and randomly stamp onto the panel.


Step 3:

Spray the panel with Sheer Shimmer Sparkle Spray. Heat Set and admire the sparkle!


Step 4:

Using a stamping platform, position the Trinity Fairy Clear Stamp onto the image panel. Ink with Nocturne VersaFine Clair Ink and stamp. You might need to re-ink and stamp to achieve a clear impression.


Remove the panel from the stamping platform and heat set.


Step 5:

Place the image panel back onto the stamping platform. Position one of the notes from the Music Notes Small Clear Step Set facedown above the fairy’s horn. Ink the stamp with Nocturne VersaFine Clair Ink and stamp. 


Remove the note stamp from the stamping platform. Place another note stamp from the same set, slightly to the right of the previously stamped note. Ink and stamp with Nocturne VersaFine Clair Ink and stamp. 


Remove the second note stamp from the stamping platform. Place the four notes stamp to the right of the other notes. Ink the stamp with Nocturne VersaFine Clair Ink and stamp. 


Heat Set the notes.


Step 6:

Smoosh the Rose Bud Memento Dewdrop Ink pad onto the craft mat. Mist with Sheer Shimmer Sparkle Spray.


Use a paint brush to apply the shimmery pink ink to the fairy’s wings. Heat set.


Step 7:

Trim the image panel to 3 5/8” x 4 7/8”.


Use a Sponge Dauber and Paris Dusk Memento Ink to edge the top part of the image panel. Use the Sponge Dauber and Blue Danube Memento Ink to edge the bottom part of the image panel.


Step 8:

Create an A2 card from white cardstock. Insert a piece of scrap paper into the card. 


Use Sponge Daubers to ink the periphery of the white card with Paris Dusk and Blue Danube Memento Inks.


Step 9:

Cut a piece of black cardstock to 3 3/4” x 5”.


Use Tear It! Tape to mat the image panel with the black cardstock panel, then use the tape to adhere the matted panel to the inked card.


Thanks for visiting today!


Tuesday, May 30, 2023

Adventure!

It's Tuesday which is my day to share a project created for Topflight Stamps. This week is an "Anything Goes" week and I've decided to go quasi-Steampunk with a slimline card featuring the "I Saw a Ship" Clear Photopolymer Stamp Set by Pink Ink Designs. This is a really cool stamp set with a gorgeous hot air balloon and a basket, sailing ship, house, or cake that you can suspend beneath it. The set also includes two sentiments and three banners. 

Here's my card.


Topflight Stamps Products Used:

Other Products Used:
Solar White Classic Crest Cardstock by Neenah Papers
Grey Cardstock by Bazzill Basics Paper
Tuxedo Black, Summer Sky, and London Fog Memento Ink by Imagine Crafts
Copic Markers: C00, C0, C2, C4. E23, E25, E27, YR12, YR16, YR18, YR20, YR21,  YR31, RV00, RV52, RV55, RV69, RV91, RV93, RV95, YG01,, YG21, YG23, YG25, YG45, YG63, G07, G16, G28, V01, Y00, Y06,Y11, Y21, Y26
Banner Die Set: Source Unknown
Repositionable Label Paper
Stamping Platform

Instructions:
  1. Cut a piece of grey cardstock to 8" x 9", score at 4", and fold to form a slimline card.* Set aside.
  2. Cut a piece of Neenah cardstock to 4" wide and secure to the base of a stamping platform.
  3. Position the ship stamp from the "I Saw a Ship" Clear Photopolymer Stamp Set with Copic-friendly ink towards the bottom the panel .
  4. Ink the stamp with Tuxedo Black Memento ink and stamp twice, once onto the image panel and once onto repositionable label paper. 
  5. Fussy-cut the label paper version and place it over its counterpart on the image panel as a mask.
  6. Position the hot air balloon stamp from the set facedown above the ship, ink the stamp with Tuxedo Memento ink, and stamp twice -- once onto the image panel and once onto repositionable label paper.**
  7. Fussy-cut the label paper version and place it over its counterpart as a mask.
  8. Brush Summer Sky Memento ink horizontally over the masked images to create a cloudy sky.
  9. Lift the masks and retain.
  10. Color the image with Copic markers. 
  11. Trim the image panel to 3.75" wide.
  12. Edge the image panel with Summer Sky Memento ink.
  13. Position the Cityscape Reflections Rubber Cling Stamp so that the bottom edge (with the city's reflection) is along the barrier near the hinge of the stamping platform.
  14. Place the image panel a bit more than .5" from the hinge edge of the platform and a bit more than .25" from the bottom edge of the platform. Secure with magnets.
  15. Ink the stamp with London Fog Memento Ink and stamp.
  16. Color the image with C0 and C00 Copic markers.
  17. Use a banner die to cut white cardstock. 
  18. Brush the die-cut with Summer Sky Memento ink. 
  19. Use magnets to secure the die-cut to the base of the stamping platform.
  20. Position the word"Adventure" facedown in the center of the die-cut.
  21. Ink the stamp with London Fog Memento Ink and stamp.
  22. Fold the die-cut.
  23. Adhere the image panel to the reserved grey slimline card.
  24. Adhere the folded banner at the top of the card.
Notes:
  • Slimline cards can be a variety of sizes. I like to use #10 envelopes for my cards, so that 4" x 9" cards fit really well.
  • My hot air balloon is not centered properly over the ship. Perfection is overrated.
I shall enter this card into the following challenge(s):
Sisterhood of Snarky Stampers: S is for Steampunk -- sadly my card is not snarky.


Tuesday, May 23, 2023

Happy Bird Day!

It's Tuesday, my day to share a project created for Topflight Stamps. This week my teammates and I are showcasing the wonderful products by Craft Emotions. You might not know this, but I'm a bird watcher and a bird brain, so when I saw the fabulous new Birds 1 and Birds 2 Clear Polymer Stamp Set by Carla Creaties for Craft Emotions, I just had to get them.

I envisioned two of the birds from the Birds 2  as celebrating a bird day by dancing a do-si-do country-style. Here's the card.


Topflight Stamps Products Used:
Birds 1 Clear Polymer Stamp Set by Carla Creaties for Craft Emotions
Birds 2 Clear Polymer Stamp Set by Carla Creaties for Craft Emotions
Card Passe Partout Rectangle Essentials Die Set by Studio Light
Paprika and Emperor Red Elements Inks by Lavinia Stamps
Nocturne VersaFine Clair Ink by Imagine Crafts
Checkered Stencil by Darkroom Door
Black Blending Brushes by Time for Tea Designs
Blenders by Lavinia Stamps

Other Products Used:
Solar White Classic Crest Cardstock by Neenah Papers
Kraft Cardstock by Bazzill Basics
Tuxedo Black and Desert Sand Memento Inks by Imagine Crafts
Salvaged Patina Distress Ink by Tim Holtz for Ranger Ink
Copic Markers: R12, R14, R24, R39, R56, B24, B29, B39, B60, YR12, YR14, YR16, YR18, Y15, Y26, Y32, Y35, E42, E43
Circles Nestabilities Die Set by Spellbinders Paper Arts
STAY-tion by Wendy Vecchi for Ranger Ink
Repositionable Label Paper by Avery
Stamping Platform

Instructions:
  1. Using a stamping platform and Tuxedo Black Memento Ink, stamp the front facing bird from the Birds 2 Clear Polymer Stamp Set onto a white cardstock panel and onto label paper.
  2. Fussy-cut the label paper version and place it over its counterpart as a mask.
  3. Position the backward facing bird from the Birds 2 Clear Polymer Stamp Set face down so that his left wing tip appears to be touching/holding his partner's wing tip. 
  4. Press the platform's lid onto the back of the stamp and lift.
  5. Ink the bird stamp with Tuxedo Black Memento ink and stamp it onto the image panel and onto label paper.
  6. Fussy-cut the label paper version of this bird to mask its counterpart on the image panel.
  7. Place the image panel onto the STAY-tion and secure it with magnets.
  8. Place a piece of plastic horizontally over the top of the image and brush Desert Sand Memento ink  under the birds to ground them. *
  9. Flip the plastic and brush Salvaged Patina Distress ink over the top part of the image panel to create a background. *
  10. Set aside the image panel to work on the rest of the card.
  11. Brush white cardstock with Paprika Elements Ink and heat set.
  12. Use second largest rectangle die from the Card Passe Partout Rectangle Essentials Die Set to cut the inked cardstock.
  13. Use a scalloped rectangle die from the set to cut center of the rectangle.
  14. Use a stitched rectangle die from the set to cut a frame in the center of the scalloped rectangle die-cut. Reserve the rectangle for later use.
  15. Use Paprika Elements Ink to edge the scalloped edges and the interior window of the die-cut.
  16. Trim the image panel so that its smaller than the scalloped rectangle frame.
  17. Adhere the image panel behind aperture of the frame. 
  18. Cut Kraft cardstock a rectangle die from the set and use to mat the framed image panel.*
  19. Place the large rectangle die onto the STAY-tion. 
  20. Secure the Checkered Stencil over the large rectangle die-cut with magnets.
  21. Sponge Emperor Red Elements Ink over the stencil onto the rectangle die-cut. 
  22. Use the same ink to edge the stenciled die-cut. Heat set the rectangle.
  23. Kraft cardstock was cut, scored, and folded to form a card. 
  24. Adhere the stenciled die-cut to the card.
  25. Adhere the matted image panel to the center of the card.
  26. Nocturne VersaFine Clair Ink by Imagine Crafts was used to stamp the "Happy Bird Day" sentiment from the Birds 1 Clear Polymer Stamp Set by Carla Creaties onto the interior rectangle from the Paprika-sponged frame (Step 14) and heat set.
  27. Use a small Circles Nestabilities die to cut the sentiment circle.
  28. Edge the circle die-cut with Emperor Red Elements Ink.
  29. Use a slightly larger Scalloped Circles Nestabilities die to cut a piece of kraft cardstock.
  30. Mat the sentiment circle die-cut with the matted kraft scalloped circle die-cut.
  31. Cut the top off of the matted circle die, sponge the top of the semi-circle with Emperor Red Elements Ink, then adhere the sentiment die-cut as shown to finish the card. 
Notes:
  • Memento ink and Distress Inks were used because they are Copic friendly. I had initially planned on creating a wood dance floor and a rustic painted plank wall behind the dancers, but nixed that idea.
  • Do not be like me. Try to keep the horizontal line between the floor and the wall level when you adhere the frame. I realized it was askew, but it was firmly adhered and I didn't want to risk ripping the image panel. 
Thanks for visiting today!

Monday, May 22, 2023

Love is in the Air

Greetings! It's true! Love is in the air. I know of several new engagements and I'm so excited for the happy couples!

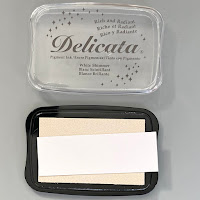
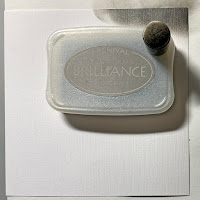
I've combined the metallic look of Brilliance ink, the shimmer of Delicata Ink, pastel colors, and Steampunk imagery to create a Steampunk Love card.

Here it is!


Imagine Crafts Products Used:

Other Products Used:

Instructions:


Step 1:

Use a stamping platform and Starlite Black Brilliance ink to stamp the Steampunk Heart twice - once onto a 6” x 8” piece of Mixed Media paper and a second time onto Repositionable Label paper.  Heat set the Mixed Media paper panel.


Smoosh London Fog Memento ink onto craft mat. Spritz the ink with Sheer Shimmer Sparkle Craft Spray.


Use a paint brush to pick up the diluted ink to color the center of the heart.


Step 2:

Fussy-cut the label paper heart and place it atop its counterpart on the image panel.


Step 3:

Use a Sponge Dauber to sponge Summer Sky Memento Ink horizontally across the image panel. Don’t worry about leaving white areas.


Use a Sponge Dauber to sponge Angel Pink Memento Ink onto the white areas of the image panel. You’ve now created a slightly stormy sky!


Step 4: 

Use a stamping platform to position the wing stamps facedown on the masked steampunk heart. 


Ink with Starlite Black Brilliance Ink and stamp. Repeat if necessary to attain a clean image. Wipe remaining ink off of the stamp. Heat set the image panel.


Step 5:

Use a brayer to apply White Shimmer Delicata Ink to the wing stamps. Stamp.


Step 6:

Smoosh a 1” wide strip of white cardstock onto the Starlite Black Brilliance Pad. Smoosh a second 2” wide strip of white cardstock onto the White Shimmer Delicata Ink Pad.


Heat set both panels.


Step 7: 

Apply Tear-It! Tape to the backs of both panels.


Use the “love” Shadow die to cut the White Shimmer Delicata inked cardstock. 


Use the “love” die to cut the Starlite Black Brilliance inked cardstock. 


Adhere the Starlite Black “love” die-cut to atop the White Shimmer Delicata “love” shadow die. Set aside.


Step 8: 

Position the stamped image panel so that it’s horizontal on the stamping platform with the top of the panel on the left side.


Step 9:

Different interlocking cogs will be stamped along the edges of the image panel. Position cog stamps from both Cogs Clear Stamp Set 2 and Cogs Clear Stamp Set 3 facedown on the left and right of what is now the top of the image panel as shown on the top photo. Ink the stamps with Starlite Black Brilliance Ink, stamp, and heat set. Remove and clean the cog stamps.


Position two different cog stamps from the same sets facedown towards the center top edge of the image panel as shown on the center photo. Ink the stamps with Starlite Black Brilliance Ink, stamp, and heat set. Remove and clean the cog stamps.


Position a large cog stamp facedown in the center of the cog as shown on the bottom panel. Ink the stamp with Starlite Black Brilliance ink, stamp, and set. Remove and clean the cog stamp.


Step 10:

Flip the image panel so that the clean edge is at the top of the platform. Repeat Step 9 to complete a second cog border.


Trim the image panel to 5.5” square and edge with Starlite Black Brilliance Ink. Heat set the entire panel.


Step 11:

Use White Shimmer Delicata Ink to sponge a piece of 5.75” square white cardstock. Heat set.


Step 12:

Cut a piece of 12x12 Avalanche cardstock to 6” x 12”, score, and fold to form a 6” square card. 


Place a piece of scrap paper into the card. Use a Sponge Dauber to apply Starlite Brilliance Ink to the outer .25” edges of the card. Heat set.


Step 13:

Use Tear It! Tape to adhere the shimmery white 5.75” square to the card. 


Adhere the image panel.


Adhere the sentiment to finish the card.


Note: Lavinia Stamps can be purchased at Topflight Stamps!