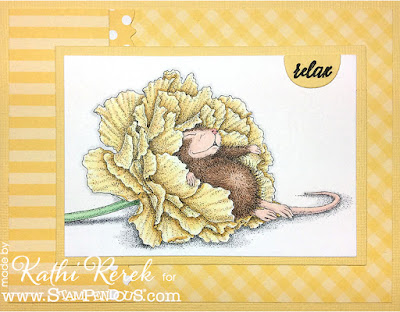
It's late May which has brought warmer more pleasant weather. People are working on their gardens and relaxing outdoors, just like this little fella. Doesn't he look peaceful?
I've used the new Dream Flower House-Mouse Designs® Rubber Stamp by Stampendous with one of the sentiments from the House-Mouse Designs® Mini Clear Stamp Set.
Stampendous!® Products Used:
Other Products Used:
Copic® Markers:
Copic® Markers:
Mouse Fur: E31, E33, E35, E44
Mouse Skin: BV000, BV000, E51, E50, R000 with R22 for his nose
Flower: Y0000, Y000, Yw1, Y23, Y26
Stem: YG41, YG45
Spring Dots and Stripes 6x6 Patterned Paper by Echo Park Paper Company
Spring Dots and Stripes Gingham 6x6 Patterned Paper by Echo Park Paper Company
*If you haven't checked out the POP Mini Stamp sets, you should. They're a great bang for your buck as you get a plethora of mini image stamps and sentiments with each set.
Instructions:
- Cut a piece of yellow 8.5" x 11" cardstock in half. Score one piece and fold to form an A2 card.
- Cut yellow gingham paper to 5.25" x 4" and adhere to the card.
- Cut striped gingham paper to 2" x 4" and adhere on the right as shown.
- Use one of the borders from the Spring Borders Die Set to cut a strip of yellow polka dot paper. Trim to ~.5" wide by 4" and adhere as shown.
- Use Memento ink to stamp the image and color with Copic markers.
- Trim image panel.
- Trim yellow cardstock left from Step #1 .5" larger than the image panel. Use this to mat the image panel.
- Stamp the sentiment.
- Use the flap cutting die from the Dome Jar Shaker Set to cut the sentiment.
- Adhere the sentiment to finish the card.
Thanks for visiting today!

No comments:
Post a Comment