Showing posts with label AALLand Create. Show all posts

Tuesday, October 17, 2023

Something Wicked

It's Tuesday, my day to share a project created for Topflight Stamps. This week my teammates and I are making mixed media projects.  I've created my Halloween card with a 5" x 7" Gel Press, a 2" Speedball BrayeHaystackYellow Submarine, and Autumn Fire Fresco Finish Chalk Acrylic Paints by PaperArtsyNocturne VersaFine Clair Ink by Imagine Crafts/Tsukineko, the Time Flies Stencil by Visible Image, and sentiments from the Raven Clear Stamp Set #49 by Olga Heldwein for AALL and Create.

Here it is!


Topflight Stamps Products Used:

Other Products Used:
Elegant Witch Mat Pad by Martha Stewart for EK Success (from 2011)
Raven and Carrot Cake Cardstock by Bazzill Basics
Low-Tack Tape
Pouncy Tool
STAY-tion by Wendy Vecchi for Ranger Ink
Misti Stamping Platform by My Pretty Petunia

Instructions:
  1. Cut a piece of Carrot Cake cardstock to 7" x 10". Score at 5" and fold to form a 7" x 5" card. Set aside.
  2. Add drops of Haystack Chalk Acrylic Paint to a 5" x 7" Gel Press, then spread the paint to a thin layer with the 2" Speedball Brayer
  3. Place a piece of print patterned cardstock was placed facedown onto the gel press, smooth the back of the cardstpcl to transfer the paint, then remove the cardstock from the press.
  4. Repeat this process with Yellow Submarine, and Autumn Fire Fresco Finish Chalk Acrylic Paints until happy with the blending and coverage. 
  5. Heat set the print, though it was mostly dry as Fresco Finish Chalk Acrylic Paints air dry super quickly. 
  6. Place the print onto the STAY-tion secured with magnets.
  7. Use low-tack tape to adhere the Time Flies Stencil to the print. Be sure to cover the "Time Flies" words and the small ravens on the stencil with the tape. Add magnets to further secure the stencil to the print.
  8. Spong Nocturne VersaFine Clair Ink over the stencil onto the print. 
  9. Remove and clean the stencil.
  10. Heat set the panel.
  11. Use magnets to secure the stenciled, painted panel to the base of a stamping platform.
  12. Place the sentiments from the Raven Clear Stamp Set #49 facedown onto the print.
  13. Press the lid of the platform onto the back of the stamps, lift, ink the stamps with Nocturne VersaFine Clair Ink, and stamp.
  14. Re-ink and stamp again if necessary for a good impression.*
  15. Heat set the panel.
  16. Use a pouncy tool or a steel wool pad to add Nocturne VersaFine Clair Ink speckles to the image panel to up the grunge factor. Heat set.
  17. Trim the image panel slightly.
  18. Use a Distressing Tool or the blade of a pair of scissors to distress the edge of the painted panel.
  19. Trim a piece of Raven cardstock .25" larger than the image panel.
  20. Mat the image panel with the Raven cardstock.
  21. Adhere the matted image panel to the reserved Carrot Cake card.
Notes:
  • Usually VersaFine Clair is fabulous for stamping fine line images and tiny sentiments like these. I think that the unevenness of the painted background created a less-than-perfect result, though in the past I've had fabulous results. Therefore, it was probably user error. With the user being me. Alas. Alack. Perfection is overrated.
Thanks for visiting today!


Sunday, April 9, 2023

Happy Easter!

Happy Easter! Here's a card created for Topflight Stamps with the wonderfully dapper bunny from the In The Wild Clear Stamp Set by Bipasha BK #529 by AALL and Create!

Here's the card!


Topflight Stamps Products Used:
Classic Sentiments Clear Stamp Set by Heffy Doodle

Other Products Used:
140 Lb. Mixed Media Paper by Strathmore
Classic Green and Raven Cardstock by Bazzill Basics
Light Grfey, Gfrey Tint, Warm Grey 3, Grey Brown, Orange, Bright Yellow, Yellow, Deep Red, Carmine Red, Red, May Green, and Green Zig Clean Color Brush Watercolor Markers by Kuretake
Blush Zig Photo Twin Marker by Kuretake
Black UniPosca Paint Pen by Mitsubinshi Pencil
White Gelly Roll Gel Pen by Sakura of America
Paintbrushes
Stamping Platform

Instructions:
  1. Create an A6 card from Classic Green cardstock. Set aside.
  2. Use the largest scallop die in Card Passe Partout Rectangle Essentials Die Set  to cut Mixed Media paper.
  3. Use a stamping platform and Nocturne VersaFine Clair Inks by Imagine Crafts  to stamp the bunny from the In The Wild Clear Stamp SetVersaFine Clair Ink is the perfect ink for stamping a highly detailed image like this bunny.
  4. * Re-ink and stamp again if necessary. Heat set the panel.
  5. Smoosh Della Blue Elements Ink onto my craft mat and lightly mist with water. 
  6. Dip a paintbrush into clean water and apply water around a small area of the stamped image. 
  7. Dip another paintbrush into the diluted blue ink and paint from the outline outwards. 
  8. Repeat Steps #5 and #6 until the background is painted to your liking.
  9. Thoroughly heat set the image panel.
  10. Use watercolor markers to color the image. 
  11. Use a black paint pen to darken the splotches and splatters.
  12. Use a white gel pen to add highlights to the eyes and the nose. 
  13. Heat set the image panel.
  14. Use the stamping platform to position and stamp the sentiment from the Classic Sentiments Clear Stamp Set using Nocturne VersaFine Clair Ink.
  15. Cut Raven cardstock with the largest rectangle die from the Card Passe Partout Rectangle Essentials Die Set .
  16. Mat the image panel with the black diecut.
  17. Adhere the matted image to the reserved green card.
Thanks for visiting today!
Friday, March 17, 2023

Thanks card

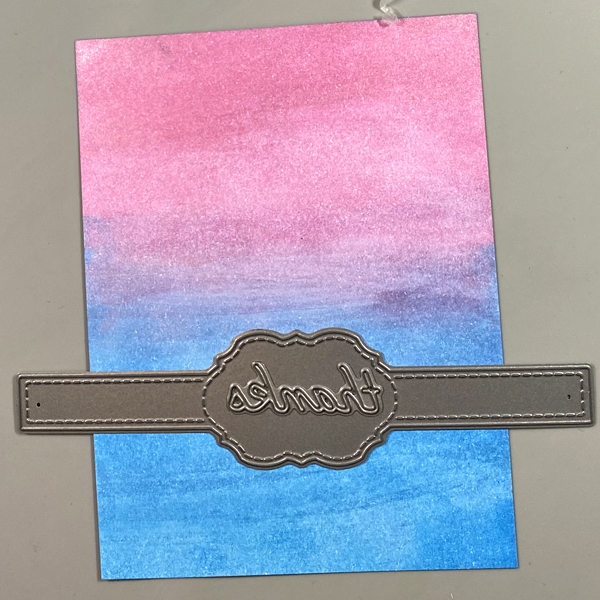
I've been seeing a lot of spring colors lately and was inspired to create a shimmery thank you card for Imagine Crafts using several colors of Brilliance Inks and two colors of Memento Inks.

Here's the card!


Imagine Crafts Products Used:

Pearlescent Sky Blue, Pearlescent Orchid, Moonlight White, Pearlescent Purple,

Pearlescent Ice Blue, Pearlescent Thyme Brilliance Inks

Grape Jelly and Cottage Ivy Memento Inks

Sponge Dauber

Ink Sweeper

Tear It! Tape


Other Products Used:

Mixed Media Paper by Strathmore

Solar White Classic Crest Cardstock by Neenah

Mosaic #54 Stencil by AALL and Create

Wildflowers 1 Thinlits Flower Dies by Tim Holtz for Sizzix

Belly Band Die by Frantic Stamper

"Thanks” die: Source Unknown

Removable Scotch Tape by 3M

91% Isopropyl Alchohol

Heat Tool

Big Shot by Sizzix


Instructions: 


Step 1: 

Cut a piece of Mixed Media paper to 4” x 5.25”. Use an Sponge Dauber to apply Sky Blue Pearlescent Brilliance Ink to half of the panel. Use another Sponge Dauber to apply Orchid Pearlescent Brilliance ink to the other side. Blend the two colors of ink in the center. 


Repeat this step with a second piece of paper. Set this piece aside to be used later.


Step 2:

Spray Isopropyl Alcohol onto ink blended paper panel and let sit for a minute. The alcohol will lighten, blend, and add white speckles to the paper. Heat set. 


Step 3:

Use Removable Scotch Tape to tape the background panel to the back of the Mosaic Stencil then use an Ink Sweeper to apply Moonlight White Brilliance ink over the stencil onto the panel.


Step 4:

Remove the tape and the stencil from the back of the panel. Heat set the panel.


Step 5: 

Use three flower dies from the Wildflowers 1 Thinlits Die Set to cut Mixed Media Paper.


Step 6: 

Use Sponge Daubers to apply Pearlescent Purple, Pearlescent Ice Blue, and Pearlescent Lavender to the flowers. Use Fantastix Brush applicators to detail the flowers with Mediterranean Blue Brilliance, Pearlescent Sky Blue Brilliance, Grape Jelly Memento inks. Color the flower stems and leaves with Pearlescent Thyme Brilliance and Cottage Ivy Memento inks.


Step 7:

Use the Belly Band and “thanks” dies to cut the extra panel of paper created in Step 1.


Step 8:

Adhere the flower die-cuts to the stenciled panel. Adhere the Belly Band die-cut over the flower stems. Adhere the “thanks” die-cut to the center ornament of the Belly Band.


Step 9:

Cut a piece of white cardstock in half. Score and fold to form an A2 card. Put a piece of scrap paper inside the card, then use a Sponge Dauber to apply Purple Brilliance ink around the edges of the front of the card. Heat set.


Step 10:
Use Tear It! Tape to adhere the image panel to the card.


Thanks for visiting today!