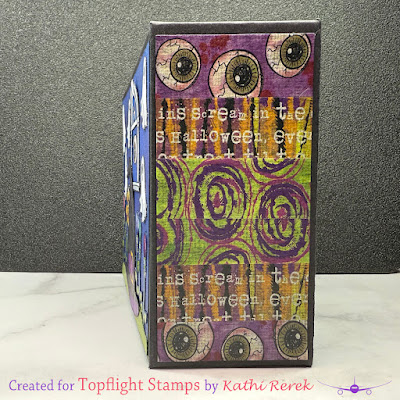
As promised, I'm back with the sequel to Tuesday's tutorial created for Topflight Stamps which showed how I created the front cover, inside front cover, and inside back cover of a Halloween Memory Dex Album which was made with a Black AALL and Create Memory Dex Album Cover. Today's tutorial will share how I created the back cover and spine of my album.
Here's the back cover!
Here's the spine!
Topflight Stamps Products Used:
Undecorated Black Square Album Cover by AALL and CreateBoosentials Clear Stamp Set 1203 by AALL and Create
Be Witchingly Clear Stamp Set 950 by AALL and Create
Tuxedo Black Memento Ink by Imagine Crafts/Tsukineko
Other Products Used:
Solar White Classic Crest Cardstock by Neenah Papers
Solar White Classic Crest Cardstock by Neenah Papers
Olo Markers: V2.7, V2.6, V2.4 (Hat)
Copic Markers:
Hat: N7, N6, Y28, Y26, y23, Y21,Y06
Ghosts: B60, B21, <B21, BV000, BV0000, C0, C00
Eyeball: R02, R00, YG95, YG91, YG23
Window Frame: C4, C3, C2, C1, C0, C00
Window Panes (top part of window): B39, B29, B18
Outside of Ephemera: B29
Small Curved Tip Scissors by Fiskar's
Finger-tip Detail Craft Knife by Fiskar'sBlack Pigma Marker by Sakura
Step 4:
Step 6:
Low-tack Tape
Curved Border Die: Source Unknown
Craft Mat
Low-tack Tape
Repositionable Sticker Paper
Stamping Platform
Step 2:
Step 3:
Instructions:
Step 1:
Use Tuxedo Black Memento Ink to stamp the witch hat from the Hocus Pocus Clear Stamp Set 570 , the potion bottle, and both ghosts from the Boosentials Clear Stamp Set 1203 onto white cardstock. Stamp the ghost pair two more times so you end up with six ghosts.
Fussy-cut all the images.
Use Tuxedo Black Memento Ink to stamp the eyeball from the Be Witchingly Clear Stamp Set 950 twice — once onto white cardstock and once onto repositionable sticker paper. Fussy-cut the sticker paper version.
Use Tuxedo Black Memento Ink to stamp the window from the Boosentials Clear Stamp Set 1203 onto white cardstock.
Step 5:
Use the finger-tip craft knife and scissors to fussy-cut the window as shown.
Use Copic markers to color the witch hat, all six ghosts, the eyeball panel, and the window. Use a black marker to edge them all. Sorry that there's no photo.
Step 7:
Use the B29 Copic marker to edge the flowers selected from the Ephemera Die-cuts 21 Pumps and Skulls set. No photo again. Oopsie.
Use the B29 Copic marker to edge the flowers selected from the Ephemera Die-cuts 21 Pumps and Skulls set. No photo again. Oopsie.
Step 8:
Adhere the repositionable sticker eyeball over its counterpart as a mask.
Sponge Blue Belle VersaFine Clair Ink over the masked eyeball onto the small panel and onto a 4.825" x 4.25" piece of white cardstock.
Sponge Medieval Blue then Purple Delight VersaFine Clair Inks over the larger panel, blending as you go to create the background panel for the back cover. Heat set when done.
Step 9:
Use a wavy border die to cut white cardstock. Another missed photo op!
Sponge Shady Lane VersaFine Clair Ink onto the wavy die-cut. Sponge Avocado VersaFine Clair Ink over the die-cut and blend. Heat set.
Step 11:
Adhere the wavy green die-cut to the base of the blue background panel.
Remove the mask from the eyeball panel. Adhere the colored window over the eyeball panel so that the eyeball is in the bottom part of the window.
Adhere all the elements to the background panel.
Step 12:
Adhere the assembled background panel to the back cover of the album. Yep. No photo.
Cut a piece of black cardstock to 2" x 4.25". Layer the Boo Washi Tape 65 over the black cardstock, wrapping it around the back. Use red-liner tape and glue to adhere this piece to the spine.
Thanks for visiting today!


No comments:
Post a Comment