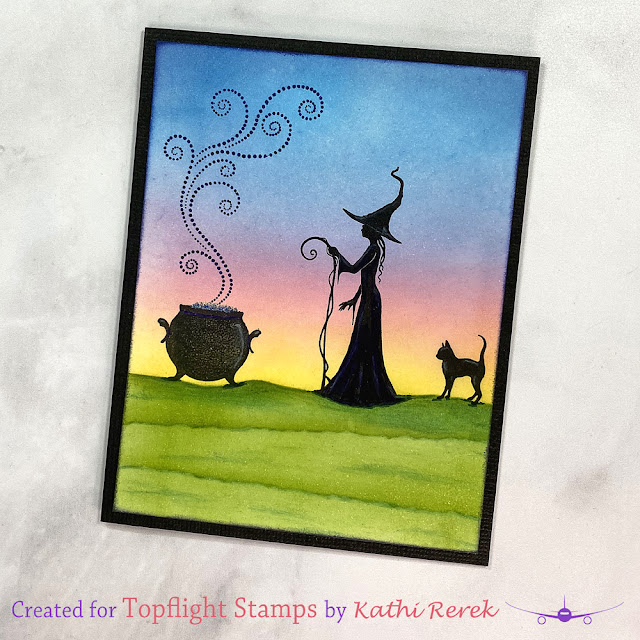
Greetings! Today's my day to share a project created for Topflight Stamps. Can you believe it's October already? I've got a witchy card for you using several of Lavinia Stamps' 2024 Halloween stamps.
Here it is!
Topflight Stamps Products Used:
Sundance, Confetti, Della Blue, Blue Lagoon, Dark Denim, Pine, and Olive Elements Inks by Lavinia Stamps
Other Products Used:
Solar White Classic Crest Cardstock by Neenah Papers
Raven Black Textured Cardstock by Bazzill Basics
Violet, Sapphire, Grey Le Plume II Dual Tipped Markers by Marvy Uchida
White, Grass Green, Olive Green Chalk Pencils by Generals
Marine Blue and Purple Stardust Glitter Gel Pens by Sakura
91% Isopropyl Alcohol
Low-tack tape
STAY-tion by Wendy Vecchi
Stamping Platform
Instructions:
- Create an A2 card from Raven cardstock. Set aside.
- Cut a panel of white cardstock to 4" x 5.25" and place onto the STAY-tion.
- Place the flattest mask from the Hills Acetate Mask Set horizontally across the image panel and secure it to the cardstock and the STAY-tion with magnets.
- Sponge or brush Sundance Elements Ink over the top of the mask onto the image panel.
- Working upwards from the yellow inked area, brush or sponge Confetti, Della Blue, Blue Lagoon, and Dark Denim Elements Inks horizontally onto the image panel overlapping the previous color and blending the inks to create a sunset sky.
- Use one of the misters from the Fine Spray Misters to mist the inked panel with 91% Isopropyl Alcohol. The alcohol will blend the colors slightly, add white specks, and visual interest.
- Remove the mask from the Hills Acetate Mask Set from the image panel, trace it onto scrap cardstock, and fussy-cut the cardstock along the trace lines.
- Place the top part of the traced cardstock to cover the yellow part of the sky. Secure with magnets.
- Brush or sponge Pine and Olive Elements Inks below the hand-made mask to create a grassy area.
- Remove and reserve the handmade mask.
- Place the image panel onto a stamping platform and secure with magnets.
- Place the largest witch from the Coven of the Moon Clear Polymer Stamp Set facedown on the image panel as shown.
- Position the Mini Jinx Clear Polymer Stamp facedown on the image panel to the right of the witch.
- Position the Bubbling Cauldron Clear Polymer Stamp Set facedown to the left of the witch.
- Press the platform's lid onto the back of all three stamps and lift.
- Ink all three stamps with Nocturne VersaFine Clair Ink and stamp. Re-ink and stamp again if necessary to attain good impressions.
- Remov the image panel from the stamping platform and heat set
- Place the image panel back onto the stamping platform and secure with magnets.
- Position the Magical Mist Clear Polymer Stamp facedown on the image panel over the stamped Bubbling Cauldron.
- Press the platform's lid onto the back of the stamp and lift.
- Ink the stamp with Medieval Blue VersaFine Clair Ink by Imagine Crafts and stamp.
- Remove the image panel from the platform and heat set.
- Use Le Plume II markers and chalk pencils to detail the images and the grassy area.
- Use a clear Gelly Roll Bold Line Stardust Clear Glittering Ink Pen as well as Marine Blue and Purple Stardust Glitter pensto add some glitter to the contents of the cauldron.
- Use Medieval Blue VersaFine Clair Ink to edge the image panel. Heat set.
- Adhere the image panel to the reserved black card.
Thanks for visiting today!

Absolutely Beautiful, love the background!!!
ReplyDelete