Tuesday, January 25, 2022

Penguin Birthday Card

It's Tuesday so it's my day to share a card created for Topflight Stamps. This week my teammates and I are creating projects using Jane's Doodles Clear Stamps. As a penguin lover, I had to have the Sweater Weather Clear Stamp Set. I decided to use the Sweater Weather Clear Stamp Set and the Snowflakes Background Stamp by Darkroom Door to create a birthday shaker card.


Topflight Stamps Products Used:

Other Products Used:
Solar White Classic Crest® Cardstock by Neenah Papers
Blue Cardstock
Tuxedo Black Memento™ Ink by Tsukineko®
Copic® Markers:
   Penguin Bodies: C00, C0, C6 C8, B000, B60
   Penguin Beaks: Y00, Y35, Y38
   Penguin Sweaters, Cap, and Skates: B02, B04, B06, B16; G02, G14, BG45, BG49; Y11, Y13, Y23, Y26
   PomPom: B60, C0, C00, <B21, RV000, BV000
 VersaMark™ Ink by Tsukineko®
Frost Sheer Shimmer™ Stix Dauber Top by Imagine®
Banner Die: Source Unknown
Elongated Oval Nestabilities® Die Set by Spellbinders®
Clear Stardust® Glitter Gel Pen by Sakura® of America
Shaker Contents by Doodles Paper Playground, Kat Scrappiness, and Gina Marie Designs
Acetate
Dimensional Foam Squares by Scrapbook Adhesives® by 3L
Repositionable Label Paper by Avery®
STAY-tion™ by Wendy Vecchi for Ranger Ink
Stamping Platform

Instructions:

I wanted to create a scene with the penguins holding hands while skating at a skating rink.
  1. Use magnets to secure white cardstock to the base of a stamping platform.
  2. Position the tall penguin facedown on the image panel centered horizontally.
  3. Press the back of the platform onto the stamp and lift.
  4. Ink the stamp with Tuxedo Black Memento ink and stamp onto the image panel and onto a piece of Repositionable Label Paper.
  5. Fussy-cut the Label Paper penguin and adhere over its counterpart on the image panel.
  6. Remove and clean the stamp.
  7. Place two other penguins facedown on the right and left of the masked penguin on the image panel so that their hands are overlapped.
  8. Press the back of the platform onto the stamps and lift.
  9. Ink the stamps with Tuxedo Black Memento ink and stamp onto the image panel and onto a piece of Repositionable Label Paper.
  10. Fussy-cut the Label Paper penguins and adhere over their counterpart on the image panel.
  11. Remove the image panel from the stamping platform. 
  12. Cut a wavy border onto copy paper.
  13. Use magnets to secure the image panel to the STAY-tion.
  14. Position the wavy border towards the top part of the image panel and secure with magnets.
  15. Brush Periwinkle Prism Ink overtop to create a sky.
  16. Use a C3 Copic marker o trace the outside of an elongated oval die to create the skating rink.
  17. Lift the masks and retaine for later use.
  18. Color the images were colored with Copic markers. 
  19. Use Cool Grey Copic markers to add detail and dimension to the snow and ice
  20. Dab Frost Shimmer dauber onto a craft mat or a piece of acetate. 
  21. Use a paint brush to apply the Frost Shimmer tot he ice rink.
  22. Use a Clear Stardust Glitter pen to add highlights to the snow and the ice rink.
  23. Set aside the image panel.
  24. Cut a piece of blue cardstock to 4.25" x 6.25" wide and pat with an embossing buddy.
  25. Use magnets to secure the blue cardstock to the base of a stamping platform.
  26. Position the Snowflakes Background Cling Rubber Stamp facedown on the blue cardstock.
  27. Press the back of the platform onto the stamp and lift.
  28. Ink the stamp with VersaMark ink and stamp. Repeat if necessary to get a good impression.
  29. Apply White Detail Embossing Powder, then remove the excess.
  30. Apply Winter Wonderland Sparkly Embossing powder, then remove the excess.
  31. Heat set the embossing powder.
  32. Trim the background panel to 5.75" x 3.75".
  33. Center the large rounded rectangle die from the Dome Jar WindowRama Die Set on the background panel, then use to cut the background to create the window/aperture for the shaker.
  34. Use the VersaMark pad or a VersaMarker to edge the die-cut's window aperture.
  35. Apply White Detail Embossing Powder, remove the excess, and heat set.
  36. Use the VersaMark pad or a VersaMarker to edge the die-cut.
  37. Apply White Detail Embossing Powder, remove the excess, and heat set.
  38. Apply Frost Shimmer Dauber to a piece of white cardstock banner and heat set. 
  39. Use a banner die to cut the white cardstock.
  40. Use magnets to secure the banner die-cut to the base of the stamping platform.
  41. Place the sentiment face down on the banner die-cut.
  42. Press the back of the platform onto the stamp and lift.
  43. Ink the stamp with Paradise VersaFine Clair Ink and heat set. 
  44. Fold the banner. 
  45. Add dimensional foam squares to the center of the banner die-cut's back and adhere to the image panel.
  46. Use glue to adhere each end of the banner to the image panel.
  47. Acetate was adhered to the back of the background panel to cover the aperture. 
  48. Apply 3D Adhesive Foam Roll around the perimeter of the window to create a well for the shaker contents.
  49. Add the shaker contents.
  50. Adhered the image panel to the background panel to seal the aperture.
  51. Adhere the shaker card front to an A4 blue card.
Notes: 
  • One day in the future, I will figure out how to prevent my shaker contents from getting stuck on the edges. So far I've tried the Embossing Buddy and a powder brush, which at least smelled nice. Neither worked. 
  • Also one day in the future, I will figure out how much to add to the shaker well so that I don't overfill and obliterate the image. That day was not today.

Sunday, January 23, 2022

Two More Cards for the Polaroid Pops Challenges!

I've been having so much fun participating in AALL and Create's Polaroid Pops Challenges that I just had to create two more cards for Topflight Stamps  hat I'm going to share with you. I wanted to let you know that Topflight Stamps is well stocked with AALL and Create's products, including Janet Klein's wonderful stamps, plus there are loads of new products. So hop on over to check out all the new goodies!

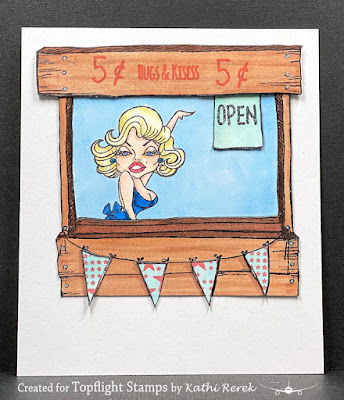
Here's my take on the Famous Face Challenge for Day 9, created with the Marilyn Clear Stamp Set 475The Stand Clear Stamp Set 343, a sentiment from the Love Birds Clear Stamp Set 155 by Olga Heldwein, and the Reverse Stars Clear Stamp 484 by Bipasha BK

#PolaroidPopsChallengesDay9, Famous Faces


Here's my take on the What's Cooking? Challenge for Day 22. This one was created with Nana's Kitchen Clear Stamp Set 410 and the Sugar Cookie Clear Stamp Set 421All stamps are by AALL and Create.

#PolaroidPopsChallengesDay22, What's Cooking?


Topflight Stamps Products Used:

Other Products Used:
Solar White Classic Crest® Cardstock by Neenah Papers
Tuxedo Black and Desert Sand Memento™ Ink by Tsukineko®
Copic® Markers:
   Marilyn's Skin: BV0000, BV000, E50,E21, E11, E00, E000
   Marilyn's Cheeks, Shoulder, Cleavage: R20
   Marilyn's Lips: R35, R46
   Marilyn's Eyes: B66
   Marilyn's Hair: Y0000, Y000, Y11, Y13, Y21, W0, W1, W2, W3
   Marilyn's Dress: B23, B37, B39
   Background: B21
   The Stand/Kissing Booth: E21, E23, E27, E29, E47, W0, W1
   Flags and Sign: BG13
   Stove: G00, G02, B00, B60, BV20, N4, N6, T3, T5, R24
   Coffee Pot and Percolator: C0, C1, C2, C3, C5
   Floor: E21, E23, W1
   Chef's Skin: BV0000, BV000, E50,E21, E11, E00, E000
   Chef's Cheeks: R20
   Chef's Lips: R32, R35
   Chef's Eyes: G00, G02
   Chef's Hair: E44, E47, 
   Chef's Toque: B60, C00, C0, C1, C2, C4
   Chef's Coat: RV52, RV63, RV91
   Chef's Tights: B00, BV20
   Flower: R52, R63
   Bowl: B00, B02, BV20, G00, G02 
Silver Jimnie Gel Rollerball by Zebra
Blue Stardust® Glitter Gel Pen by Sakura® of America
White Gelly Roll Gel Pen by Sakura® of America
Repositionable Label Paper by Avery®
Post-It Notes® by 3M
STAY-tion™ by Wendy Vecchi for Ranger Ink
Stamping Platform

Instructions:
I made The Stand into a kissing booth with Marilyn as the star kisser. I bet she'd make a load of money! 
  1. Use Tuxedo Black Memento ink to stamp the stand four times onto white cardstock.
  2. Trim one stand to 3" in height, then use a craft knife to cut out the interior of the stand. 
  3. Use a scissor to trim around the exterior of the stand and set aside
  4. Trim the top part of one of the stands and set aside.
  5. Use Tuxedo Black Memento ink to stamp Marilyn into the aperture of one of the stands and trim around the opening, keeping in mind that this piece will be the bottom layer.
  6. Use Tuxedo Black Memento ink to stamp the "open" sign. Fussy-cut.
  7. Use Copic markers to color all of the wood elements, Marilyn, the sign, and the flags. 
  8. Use the Stardust marker to add glitter to Marilyn's earrings.
  9. Use a dark marker to edge all of the elements.
  10. Use magnets to secure the top part of the stand to the base of the stamping platform.
  11. Place the 5¢ stamp facedown onto the top part of the stand.
  12. Press the platform's lid onto the back of the stamp and lift.
  13. Ink the stamp with Tulip Red VersaFine ink and stamp.
  14. Clean and dry the stamp.
  15. Position the 5¢ stamp facedown onto the other side of the top part of the stand.
  16. Press the platform's lid onto the back of the stamp and lift.
  17. Ink the stamp with Tulip Red VersaFine ink and stamp.
  18. Remove the stamp and clean it.
  19. Position the "Hugs and Kisses" sentiment stamp from the Love Birds Stamp Set facedown in the center of the top panel of the stand.
  20. Press the platform's lid onto the back of the stamp and lift.
  21. Ink the stamp with Tulip Red VersaFine ink and stamp.
  22. Use magnets to secure the flags piece to the base of the stamping platform.
  23. Position the Reverse Stars Clear Stamp facedown onto the flags. 
  24. Press the platform's lid onto the back of the stamp and lift.
  25. Ink the stamp with Tulip Red VersaFine ink and stamp.
  26. Adhere the Marilyn panel behind one of the stamped and colored Stand/Kissing Booths.
  27. Adhere the "Open" sign to the Marilny panel as shown.
  28. Adhere the stamped upper panel in place.
  29. Fussy-cut each flag, edge with a dark marker, and adhere to the Stand/Kissing Booth.
  30. Adhere the assembled Kissing Booth to a 3.5" x 4" white card.
~~~

I decided to go retro with my take on the What's Cooking Challenge. 
  1. Use magnets to secure a panel of white cardstock to the base of the stamping platform.
  2. Place the clear stamp guide from the set onto the white cardstock and position the the cook pot and the percolator from the Nana's Kitchen Clear Stamp Set facedown onto the stove's burners.
  3. Press the platform's lid onto the back of the stamps and lift the lid.
  4. Remove the stamp guide.
  5. Ink both stamps with Tuxedo Black Memento ink and stamp them onto the white cardstock and onto a piece of repositionable label paper.
  6. Fussy-cut the label paper version of both pots and place them over their counterparts.
  7. Remove the stamps.
  8. Position the stove stamp from the Nana's Kitchen Clear Stamp Set facedown so that the pots will be sitting on the burners.
  9. Press the platform's lid onto the back of the stamp and lift the lid.
  10. Ink the stamp with Tuxedo Black Memento ink and stamp onto the image panel and onto a piece of repositionable label paper. 
  11. Remove the stamp.
  12. Fussy-cut the Label Paper version of the stove and mask the image. 
  13. Use magnets to secure the image panel with the masked images onto the STAY-tion.
  14. Place a ruler horizontally over the base of the images and brush Jersey Cream Prism Ink overtop to create a colored background. 
  15. Reposition the ruler to cover the top portion.
  16. Brush or sponge Desert Sand Memento ink over the base of the image panel.*
  17. Trim the image panel to 3" square.
  18. Remove the masks and use Copic markers to color the images and the wood floor.
  19. Use Tuxedo Black Memento ink to stamp the cute chef from the Sugar Cookie Clear Stamp Set onto white cardstock.
  20. Fussy-cut, color with Copic markers, and edge with a dark marker or pen.
  21. Adhere the Chef to the image panel.
  22. Adhere the image panel to a 3.5" x 4" piece of white cardstock.
Notes:
  • Memento ink was used to sponge the bottom part of the image because I wanted to use Copic markers to create a wood floor. Copic markers do not play nicely with Prism ink. Alas.
Thanks for visiting today!

Thursday, January 20, 2022

Take Care!

Here's a Get Well card created with Stampendous!' new Cast Signing House-Mouse Designs® Rubber Stamp. 


Stampendous!® Products Used:
Mini Pop Stamp*
Spring Borders Die Set*

*These are still available online. Use Google to find them!

Other Products Used:
Tuxedo Black Memento™ Ink by Tsukineko®
Onyx Black VersaFine™ Ink by Tsukineko®
Copic® Markers:
   Bunny: E70, E71, E74, RV91, RV93, RV95, R000, R00
   Pillow: <B41, B41
   Flowers: Y11, YR20, YR31
   Leaves and Stemps: G43
   Shag Carpet: B60, BV20, G000,G00, G02
   Pencil Cup: B60, BV20, G0000, G00, G02, YR20, YR31, YR11, <B41
   Pencil Wood: E21, W1, W2, YR30
   Pencil Leads: G00, G02, BV00, BV02, YR20, YR31, Y11, RV91, RV93, <B41, B41
   Casts: C0, C1, B60
   Mouse Faces, Paws, Tails: BV000, E51, E50, RV91, R01, R00, R20, R2, R22
   Fur: E34, E44, E55, E56, E57; E21, E23, E25, E37, E44, R01; W3, W5, W6, W7
Green Cardstock
Stella Rose and Mabel 6x6 Patterned Paper Pads by My Mind's Eye™
Oval Word Window Frame Die-Namics Dies ® by My Favorite Things®

Instructions:
  1. Cut a piece of 12x12 green cardstock in half.
  2. Score one piece of green cardstock at 6" and fold to form a 6" square card.
  3. Reserve the other half of green cardstock.
  4. Use Tuxedo Black Memento Ink to stamp the image.
  5. Use Copic markers to color the image and background.
  6. Trim the image panel, trim the reserved green cardstock slightly larger than the image panel, and use to mat the image panel.
  7. Cut green floral patterned paper to 5.75" square and use a G marker to color the white edges.
  8. Use the scalloped die from the Spring Borders Die Set to cut patterned paper. 
  9. Edge the die-cut with green marker.
  10. Cut a strip of green cardstock.
  11. Adhere the scalloped die-cut to the strip of green cardstock.
  12. Cut the matted strip in half.
  13. Use Onyx Black VersaFine ink to stamp the sentiment.
  14. Use Word Window Frame Dies to cut the sentiment panel and green cardstock.
  15. Adhere the image panel as shown.
  16. Adhere each half of the border strip so that they're flush with the edges.
  17. Adhere the sentiment die-cuts to the center of the strip.
  18. Adhere the card front to the reserved card.
Thanks for visiting today!

Tuesday, January 18, 2022

Strange Bird Time Warp Polaroid

It's Tuesday which means it's time to share a project created for Topflight Stamps. I had so much fun participating in the AALL and Create's Polaroid Pops Challenge last week that I decided to make another Polaroid card, this time for the Day 4 - Birds theme. Since we have until the end of March to complete all the challenges, I'm going to keep playing and sharing my results with you. 

Just so that you know, Topflight Stamps is well stocked with AALL and Create's products, including Janet Klein's wonderful stamps!

This week's Polaroid was created with one of the fabulous birds from the Strange Birds Clear Stamp Set 464. The bird is perched on the tree from the Salvadore Clear Stamp Set 488The sentiment is a combination of a sentiment from the Strange Birds set and the sentiment from the Time Warp Clear Stamp Set 472.

Here it is -- #polaroidpopschallengeday4


Topflight Stamp Products Used: 

Other Products Used:
Solar White Classic Crest® Cardstock by Neenah Papers
Tuxedo Black Memento™ Ink by Tsukineko®
Tumbled Glass, Blueprint Sketch, Kitch Flamingo, Picked Raspberry, and Twisted Citron Distress® Inks by Tim Holtz® for Ranger Ink
Copic® Markers: 
   Bird: B23, B24, RV52, RV63, RV91
   Bird's Beak and Foot: Y35, Y38
   Tree: E44, E47, E49 
   Clock, Y21, Y23, Y26,Y28
   Grass: YG23, YG25, YG45
Speech Bubble Die: Source Unknown
Repositionable Labels by Avery®
Stamping Platform
STAY-tion™ by Wendy Vecchi for Ranger Ink
Removable Scotch Tape® by 3M

Instructions:
  1. Use magnets to secure a panel of white cardstock to the base of the stamping platform.
  2. Choose one of the five adorable birds from the Strange Birds Clear Stamp Set 464 and place it facedown onto the cardstock.
  3. Press the platform's lid onto the back of the stamp, then lift the lid.
  4. Ink the stamp with Tuxedo Black Memento Ink and stamp the bird onto white cardstock and onto removable label paper.
  5. Fussy-cut the label paper bird image and adhere it over its counterpart on the image panel to mask it.
  6. Remove and clean the stamp.
  7. Position the tree and the clock stamp from the Salvadore Clear Stamp Set 488 facedown on the image panel so that the bird appears to perch on the branch to the right of the clock. 
  8. Press the platform's lid onto the back of the stamp, then lift the lid.
  9. Ink the stamp with Tuxedo Black Memento Ink and stamp the tree/clock onto the image panel and onto removable label paper.
  10. Fussy-cut the label paper tree/clock image and adhere it over its counterpart on the image panel to mask it.
  11. Remove the image panel from the stamping platform and place it onto the STAY-tion.
  12. Position the Profusion Stencil 84 over the image panel and secure with magnets.
  13. Place a ruler horizontally across bottom of the image panel secured with magnets.*  
  14. Brush Tumbled Glass, Blueprint Sketch, Kitch Flamingo, and Picked Raspberry Distress inks* over the stencil onto the image panel until you're happy with the blending and coverage.
  15. Remove and clean the stencil.
  16. Shift the ruler to cover the top part of the image and re-secure it with magnets. 
  17. Brush Twisted Citron over the ruler onto the base of the image panel.
  18. Remove the image panel from the STAY-tion.
  19. Remove the masks from the images and color them using Copic markers.
  20. Add some grassy details and shadows to the base of the image using Copic markers.
  21. Trim the image panel to 3" square and adhere to a white 3.5" x 4" white "Polaroid" card.
  22. Secure white cardstock to the stamping platform with magnets.
  23. Position the sentiment with "Time Warp" facedown on the cardstock.
  24. Press the platform's lid onto the back of the stamp, then lift the lid.
  25. Use Repositionable Scotch Tape or a Post-It Note to cover all the words except "Warp". 
  26. Ink the stamp, remove the tape, and stamp the word.
  27. Clean the stamp.
  28. Position the sentiment so that the word "Time" is to the left of "Warp".
  29. Press the platform's lid onto the back of the stamp, then lift the lid.
  30. Use Repositionable Scotch Tape or a Post-It Note to cover all the words except "Time". 
  31. Ink the stamp, remove the tape, and stamp the word.
  32. Clean the stamp.
  33. Position the "Strange Bird" sentiment facedown so that the the words "Strange Bird" are lined up atop the the "Time Warp" sentiment.
  34. Press the platform's lid onto the back of the stamp, then lift the lid.
  35. Use Repositionable Scotch Tape or a Post-It Note to cover "I'm sort of a".
  36. Ink the stamp, remove the tape, and stamp Strange Bird.
  37. Remove the paper from the platform and thoroughly clean the sentiment stamps to rid them of any residue.
  38. Use a speech bubble die to cut the sentiment, then trim if necessary.
  39. Adhere the speech bubble die-cut to card.
Notes:
  • I chose to use the tree/clock stamp as a perch for my bird because I feel like I'm living in a time warp due to the pandemic and my usual odd sense of time.
  • I used Distress inks so that I could touch up the grass with Copic markers. Not all dye inks work well with Copics. Alas.
  • I use a clear ruler so that I can position it more accurately. Plus since it's plastic, it's easy to clean. I kind of destroyed the rulers that came with my STAY-tions because I used my beloved Purell® to clean them. Oops.
Thanks for visiting today!

Thursday, January 13, 2022

Happy Birthday!

Here's a birthday card created with Stampendous!® new Slim Gnome Birthday Cling Rubber Stamp.


Stampendous!® Products Used:

Other Products Used:
Green and Yellow Cardstock by Bazzill Basics Paper®
Tuxedo Black Memento™ Ink by Tsukineko®
Copic® Markers:
   Skin: BV0000, E50, De21, E11, E000, R01, R000, R20 
   Beards (left to right): C0, C1, C2; W2, YR31, Y000; W0, W1, W3; C0, C1, C2; W1, W3, W4
   Clothes: (left to right): B00, B02, B04; YR16, YR27, V05, V06, V95, E23, E353, E37; B32, B34, YG45; C4, C6; V04, V05, V06, V93, C6, C8; RV52, RV63, RV93, RV95,V5, V6; YR16, YR27, BG43, BG95, BG99, B34, YG45; B12,B14,B16, B34, YG45, E23, E37
   Cat: C1, C2, C3, C4, C5, C5, C8, RV52, RV63, RV95; V05, V06, V93
   Balloons: G0000, G00, B01, B00, Y0000, Y00, R0000, R00, V0000, V00, <B41, B41, <R81, R81, YR0000, YR00, YR20, YR30, Y0000, Y00
   Letters: Y11
   Confetti: B02, B24, G05, YR, YG11
Pink, Indigo, Light Blue Chalk Pencils by General's®
Mono Zero Eraser by Tombow
Q Tip

Instructions:
  1. Cut a piece of 12" x 12" Green cardstock to 8.75" x 8"
  2. Score at 4" and fold to form a top-fold Slimline card. Set aside.
  3. Use Tuxedo Black Memento ink to stamp the image onto white cardstock.
  4. Color the image and the grass with Copic markers.
  5. Use chalk pencils to add the background and blend the colors with a Q-Tip
  6. Use the Mono Zero Eraser to clean chalk off of the images.
  7. Use Tuxedo Black Memento ink to stamp the "Y" balloon part of the image.
  8. Color with Copic markers, fussy-cut, and edge with a dark marker.
  9. Trim the image to 8.25" 3.5" and mat with yellow cardstock cut .25" larger.
  10. Adhere the matted image panel to reserved card front.
  11. Adhere the fussy-cut balloon atop its counterpart as shown.

Thank you for visiting today!

Tuesday, January 11, 2022

Love is in the Air

It's Tuesday which means it's time to share a project created for Topflight Stamps. This week my TFS teammates and I are getting ready for Valentine's Day. I combined this challenge with AALL and Create's Polaroid Pop Challenge, which is to create polaroid cards showcasing Janet Klein's wonderful stamps. There's a theme for each day of January and we have until the end of March to complete all the challenges. Since there was not a "love/Valentine's Day" category, I decided to go with Day 2's Thing with Wings Theme. 

I used the girl from the Cat Lover Clear Stamp Set 256 and added the wings from the Wish Clear Stamp Set 360 to make her a fairy. I had her standing in a field of hearts from the Lil Love Clear Stamp Set 481 and then added cascading hearts from the Love Birds Clear Stamp Set 155 by Olga Heldwein to the sky.

Here's the polaroid. #polaroidpopschallengeday2


Topflight Stamps Products Used:

Other Products Used:
Solar White Classic Crest® Cardstock by Neenah Papers
Tuxedo Black Memento™ Ink by Tsukineko®
Copic® Markers:
   Skin: BV000, E50, E21, E11, E000
   Hair: N5, N6, N7
   Dress: BV13, BV17
   Tights: BV31, BV34
   Hearts: RV52, Rv63, RV91, RV93, RV99
Clear Starlight® Glitter Gel Pen by Sakura® of America
Stamping Platform
STAY-tion™ by Wendy Vecchi for Ranger Ink
Removable Label Paper by Avery®

Instructions:
  1. Use Tuxedo Black Memento Ink to stamp the girl from the Cat Lover Clear Stamp Set 256 and the pile of hearts from the Lil Love Clear Stamp Set 481 onto white cardstock and onto removable label paper.
  2. Fussy-cut the images and place over their counterparts on the image panel to mask the images. 
  3. Stamp the pile of hearts three or four more times and fussy-cut all of them.
  4. Stamp the second pile of hearts to the left of the first pile then adhere a fussy-cut mask overtop.
  5. Continue stamping and masking until there's a row of stamped and masked heart piles on the image panel.
  6. Lightly brush Periwinkle Prism Ink the the masked images until you're happy with the coverage. 
  7. Lightly brush Pink Jellybean Prism Ink over the Periwinkle sky. 
  8. Use Pink Jellybean Prism Ink to randomly stamp the cascading hearts from the Love Birds Clear Stamp Set 155 around the the girl. 
  9. Realize that there isn't a love or Valentine's Day theme in the Polaroid Pops Challenges, so improvise and stamp the wings from the Wish Clear Stamp Set 360 on either side of the girl.
  10. Lift the masks and reserve for later use. 
  11. Use Copic markers to color the girl and the hearts.*
  12. Use Clear Stardust Glitter Gel pen to add glitter to the wings.
  13. Trim the image panel to 3" square and adhere to a 3.5" x 4" piece of white cardstock.
Notes:
  • The stamping platform was used to stamp all the images.
  • When stamping multiples of the same image, clean and dry the stamp after each impression.
  • The STAY-tion was used to secure the image panel in place during the addition of the brushed background.
  • Since the wings were stamped onto a Prism inked background, I could not color them with Copic markers. So I used a Stardust Glitter Gel pen to add sparkle to them.
Thanks for visiting today!


Thursday, January 6, 2022

Happy Birthday!

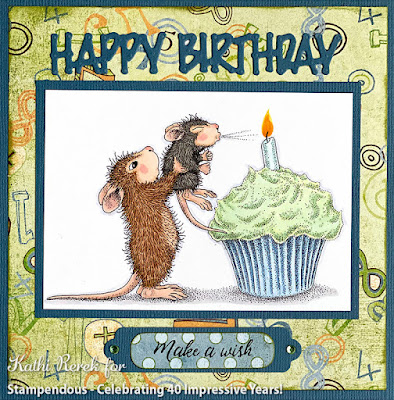
It's always good to have a supply of birthday cards on hand. Here's one featuring Stampendous!' new House-Mouse Designs® Birthday Cupcake Rubber Stamp.


Stampendous!® Products Used:

Other Products Used:
Mini POP Clear House-Mouse Designs® Stamps by Stampendous!® *
Truck Load Die Set by Stampendous!® *
Blue Cardstock
Copic® Markers:
   Mouse Faces, Ears, Paws, Tails: BV0000, E51, E50, RV1, R00, R000, R20, R21
   Mouse Fur Left: E35 E33, E31, R000
   Mouse Fur Right: W3, W5, W6
   Cupcake Wrapper: <B41, B41, B45
   Cupcake Frosting: G0000, G000, G12, G20
   Candle: BG000, BG10, BG11,
   Flame: Y13, Y15, Y38, YR16
   Ground: N0, N1
   Outline: B60
Brigham, Nathan Patterned Papers from the Oh Baby! Boy Collection by Basic Grey®
Nameplates Die Set by Spellbinders®
Clear Jewels by Katzelkraft

* The mini  stamps and  Truck Load Die Set are available for purchase online. 

Instructions:
  1. Cut cardstock to 5.5" x 11". Score at 5.5" and fold to form a 5.5" square card.
  2. Use Tuxedo Black Memento ink to stamp the image.
  3. Color with Copic markers.
  4. Trim the image panel to 3" x 4.25".
  5. Trim blue cardstock to 3.25" x 4.5" and use to mat the image panel.
  6. Cut Brigham (numbers) pattern paper to 5.25" square.
  7. Use the word dies from the Truck Load Die Sets to cut blue cardstock.
  8. Stamp the sentiment, from the Mini set, onto polka dot cardstock. 
  9. Use the oval nameplate die to cut the sentiment.
  10. Use the nameplate die to cut blue cardstock.
  11. Mat the sentiment die-cut onto the blue nameplate die-cut.
  12. Cut Brigham (numbers) pattern paper to 5.25" square.
  13. Adhere the word die-cuts to the patterned paper as shown.
  14. Adhere the patterned paper the blue card.
  15. Adhere the image panel and sentiment.
  16. Add jewels to the sentiment die-cut to finish the card.
Thanks for visiting today!

Tuesday, January 4, 2022

New Year = Cocktails?

Happy New Year! It's the first Tuesday of 2022, which means that it's my day to share a project created for Topflight Stamps. I've made a New Year's card with the wonderful cocktail stamp and a sentiment from the Nicci Battilana Eclectica ENB06 Rubber Cling Mounted Stamp Set by PaperArtsy on a background created with the Nicci Battilana Stencil PS291 by PaperArtsy and SundanceLime Punch, and Pine Elements Inks by Lavinia Stamps.

Here's the card.


Topflight Stamps Products Used:

Other Products Used:
Solar White Classic Crest® Cardstock by Neenah Papers
Classic Green Cardstock by Bazzill Basics Paper®
Tuxedo Black Memento™ Ink by Tsukineko®
Copic® Markers: YG21, YG25, BG53, BG57, B23, B26, R24 R39, E40, E41, E42, E43
Burst Layering Stencil by Tim Holtz® for Stampers Anonymous
Removable Label Paper by Avery®
STAY-tion™ by Wendy Vecchi for Ranger Ink
Stamping Platform

Instructions:
  1. Cut a piece of 12" x 12" Classic Green cardstock to 12" x 5". 
  2. Score the cardstock at 6" and fold to form a 6" x 5" card. Set aside.
  3. Use Tuxedo Black Memento ink to stamp the cocktail from the Nicci Battilana Eclectica ENB06 Rubber Cling Mounted Stamp Set twice onto a piece of 6" x 6" white cardstock and onto label paper.
  4. Use Copic markers to color the cocktails.
  5. Fussy-cut the label paper versions and place them over their counterparts on the image panel.
  6. Place a strip of label paper horizontally over the bottom of the cocktail glasses to ground the images.
  7. Use magnets to secure the image panel to the STAY-tion.
  8. Brush Sundance Elements Ink over the masked images to create a yellow background. 
  9. Lightly mist the image panel with water to create some white splotches and dots. 
  10. Use magnets to secure the cocktail portion of the Nicci Battilana Stencil PS291 over the image panel.
  11. Brush Lime Punch Elements Ink was brushed over the cocktails. 
  12. Lift the horizontal mask, cover the top of the image, and brush Lime Punch Elements Ink over the base of the image panel.
  13. Use magnets to secure the Burst Layering Stencil over the base of the image panel and brush Lime Punch Elements Ink over the base to create a tone on tone pattern.
  14. Trim the image panel to 6" x 4.75", which left a scrap of plain Sundance Yellow inked cardstock. 
  15. Stamp the sentiment onto the scrap, then cut between the sentences.
  16. Use  Lime Punch and Pine Elements Inks to edge the image panel and the sentiments
  17. Adhere the image panel and sentiments to the green card as shown.
All my wishes for a happy, healthy, serene, and prosperous New Year. Let's hope that 2022 doesn't require daily cocktails!