Friday, June 15, 2012

June's Bombshell Sketch challenge!

As you know, I create monthly sketches over at Bombshell Stamps. Please feel free to grab your Bombshell stamps and have a go at the sketch. If you do create a project, please share it with us over at Bombshell's Forum and at Bombshell's Blog. Sharing your project at both web sites will give you two chances to win your choice of a free set of Bombshell Stamps! I think that's worth playing for!!! (Yes. I watch Survivor.)


Here's June's sketch:


Here's my take on the sketch:


My leopard is actually a panther from the Panther Tattoo set by Bombshell Stamps.

I googled "panther" to check coloration and markings and discovered that lions, tigers, leopards, and jaguars are members of the genus panthera.

The panther stamp is actually a solid stamp, which I don't use often as I prefer open line images. I decided to make my panther into a leopard by trying something different. I stamped the panther using Butterscotch Adirondack ink by Ranger. I then colored over the ink using YR20, YR24, and YR27 Copic markers and added his spots using a C10 Copic marker.

My leopard was then painted with a layer of Winsor & Newton masking fluid, which was allowed to dry. I airbrushed E55 over the leopard, then layed the Wood Grain stencil from Crafter's Workshop over the piece and airbrushed with E57. When I was done, the mask was peeled off and I scratched the paper to add claw marks to the "wood".

A black Glaze gel pen was used to add both dimension and shine to the leopard's claws, nose, and eyes. An Inkssentials white gel pen was added to whiten his teeth.

An embossing stylus was used on the outline of the image and on certain lines to mark the edges. The cardstock was flipped over, put onto a piece of craft foam, and I went to work with the embossing stylus. This added extra dimension to the piece and made the leopard literally pop from the background.

Here's a close up that shows the embossed leopard:


The leopard print paper, used in the strips and behind the computer generated sentiment, was created by airbrushing white paper with the same YR24 and YR27 that I used on the leopard. The orange paper was then stamped repeatedly with Onyx VersaFine ink using the leopard-print stamp from the Bombshell Patterns set.

Black cardstock was embossed using a leopard-print embossing folder by Cuttlebug, that I was lucky to find marked down at Michael's.

Thanks for visiting today!

I shall enter this card in the following challenges:
• Crafty Cats Weekly Challenge: Embossing
• Craft Your Passion #114: Anything Goes
• Simon Says Stamp & Show: Anything Goes
• Outlawz Twisted Thursdays: Anything Goes/Animal

Monday, June 11, 2012

Sketch Challenge! Meet Ms. Priss!

Miss Priss, (CO-128-J) from Third Coast's p. 29 of the Early Spring 2008 catalog, reminds me of my familiar Duchess (see my profile photo). She's beautiful, sassy, and very mischievous.

This card was prompted by Duchess' recent activity with her partner-in-crime, Flash, our handsome Tuxedo cat. Apparently we had a mouse in da house. Then we had the thrill of the chase, followed by torture, followed by mouse-a-cide, which left a corpus mouse-us on the stairs. Thankfully, this time the hubby was home to find and discard the corpus disgustus, though he didn't leave a chalk outline.

Way back when, I had a series of cards featuring Odd Bird Planet's Priscilla, who reminded me of Duchess because she was pretty and poofy. Priscilla had a bunch of adventures, which amused the heck out of me. If you want to read Priscilla's adventures and see the cards, type "Priscilla" into the "search" function below on the right.

Therefore, I will be starting a new series featuring Ms. Priss, who is one of the Fanci-Cats from Third Coast Rubber Stamps.

Whereas I did not use a mouse (this time), this card speaks to a similar adventure.

I used the sketch from Sketch Saturday's Week #211 sketch! I did flip it!

Here's the sketch!


Here's my card!


Ms. Priss was colored with Copic markers in shades of warm gray and RV11.

The birdcage is an Odd Bird Planet stamp and was colored with Copic markers. The birdcage and Ms. Priss were masked with Winsor & Newton liquid mask. The feather, from an old Stampin' Up set, was repeatedly stamped in the cage and around Ms. Priss. They were colored (guess what colorant?) and also masked. Then I airbrushed the background and peeled up the mask. I added Glaze pen to the cage. I resisted adding little red drops around the cage. I figured that would be overkill. (pun intended).

The patterned papers are all from a My Mind's Eye Lost & Found 6x6 pad. Both Pumice Stone & Old Paper Distress inks were sponged on all edges as I can't abide white edges.

Matte Accents was used to adhere patterned paper to the clear buttons. Then I listened to Jodi's voice in my head and threaded the buttons with pink thread.

I haven't decided on a sentiment yet, so that will come later when it's actually sent to someone!

Thanks for visiting today.

I shall be entering this card in the following challenge(s):
• Sketch Saturday #211
• Craft Your Passion #114: Anything Goes
• Simon Says Stamp: Anything Goes
• Oozak Challenge Blog: Two Papers & an Embellie

Friday, June 8, 2012

Karma Factory

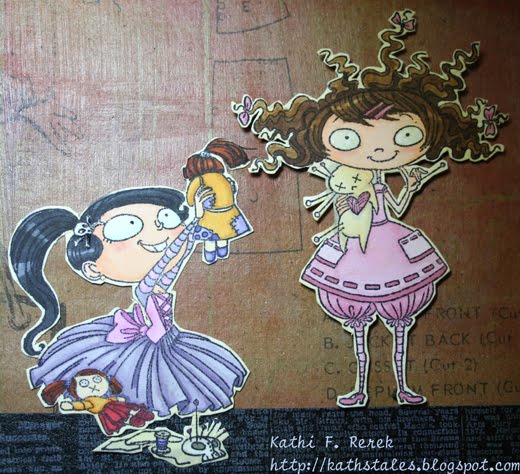
Do you believe that "what goes around, comes around"? Do you sometimes wish that Karma had a bit of a push? I know I do, so I created a wall hanging that features Drucilla and Wednesday by Kraftin' Kimmie Stamps.

It's not quite done yet because I need to actually sew a voodoo doll pin cushion that will hang from the center hook. When I'm done, I'll come back and post an update, but 'til then, these photos will have to do.

I realize that this creation is a bit "out there" and rather laden with schadenfreude, but that reflects some stuff that's been happening for the last bit. On the positive side of things, it amuses me and merriment is always a good thing. It's a balance I guess.

Anyways, without further ado, here are the photos.

This is a photo of the whole thing. The light in my room is poor, so I will try to take better photos when the whole shebang is done.


Without the dangling bits.


Drucilla and Wednesday, my factory workers, hard at work making voodoo dolls.


Dress form:


The base of the piece is an 10" x 8" canvas. I cut a piece of Kraft Resist paper down to size, then sponged several colors of Distress ink over it and adhered it to the canvas using gel medium. The yardstick papers are from forever ago and were layered on the sides. The entire thing was treated to several coats of gel medium. Old tape was added to the bottom.

I die cut canvas inkjet paper (2x) and brown cardstock-covered cardboard using the Alterations Dress Form die. Woodgrain details were added with Copic markers and then heat embossed with three layers of clear ep. The canvas dress part of the dress form was adhered to the dress form, then Distress ink was added to it.

Frilly lace was put into a plastic bag, then Copic V22 reinker was squeezed into it. The bag was squished, then the lace came out to dry. It was layered onto the dress form, a ribbon, sequin, gem, and pearls were added to finish the dress form.

Drucilla and Wednesday were colored with Copic markers. Their eyeballs, teeth, skull barette, were highlighted with Glaze pen. The pin heads have glitter pen on them. They were "fussy cut", which while challenging, was curiously relaxing. Go figure. Wednesday was adhered to the canvas, then Drucilla was adhered with dimensional adhesives.

The title was added using Abigail QuicKutz die cuts. I haven't used my fonts in ages, so I felt downright thrifty. hahahahahahahahahaha

Three little hooks were screwed into the bottom of the canvas. I strung a needle threader and a plastic bobbin (I couldn't find my metal ones) onto wire and hung that from one of the hooks. A bunch of butttons were threaded onto another wire, which hangs from another hook. The as-yet-not-made-Voodoo-Doll pin cushion will hang from the middle hook.

I'm debating adding some quotes about Karma, but haven't decided yet.

I shall enter this in the following challenges:
• Kraftin' Kimmie Blog #131: ABC/Anything but a Card

Thursday, June 7, 2012

Imagine, Wonder, Time -- Steampunk!!!

Way back when, before I started papercrafting, I was an avid reader. I discovered fantasy and science fiction way back in college (when dinosaurs roamed the "Magic Mountain" in rural Ohio). After graduation, I re-read Jules Verne, then discovered William Gibson, who has been associated with both the cyber-punk and steampunk subsets of science fiction.

You're probably asking yourself, "Why in heck is she blathering on about all this?" The answer is that when I start making cards using steampunk images, I like to put them in fantasy type scenes.

Like this:


The landscape is composed of layered striped patterned paper adhered to a matching pattern from the same My Mind's Eye Stella & Rose Hazel 6x6 pad. This was placed into my often-used Timeworks Cuttlebug folder for a ride through my Big Kick. When it came out, I sponged both Weathered Wood and Peacock Feathers Distress ink over the high spots of the embossing, then edged it using Black Soot Distress ink.

The Clockworks-Dark (FA-519-I) stamp from page 14 of the new catalog was stamped onto pale yellow paper using Wild Honey Distress Ink. This was die cut using a Pinked Circle Nestabilities, then kept in the die so I could use a great new tool, Ranger’s Inkssentials Craft Nibs & Nib Holder, to add more Distress Ink into the edgy bits. This piece was then cut in half and slid under the top most "hill".

Clouds were cut from checkered vellum using Memory Box' Clouds and strewn about the sky.

The Victorian Boots (FA-516-I) stamp from page 10. was stamped using Onyx Black VersaFine ink, heat set, then colored with Copic markers. The buttons were highlighted with Glaze pen to give them some dimension and shine. Small Grungeboard wings were painted with a silver Adirondack Paint Dabber, which also added some texture. They were layered and then the boot was added using a double layer of dimensional foam.

I knew that I hoarded stuff for a reason! I found the perfect words for this scene in my stash. They're Tim Holtz/Junkitz clear epoxy stickers. They were so old that I had to peel the cellophane wrapper off of them!

Thanks for visiting today!

I shall be entering this card in the following challenge(s):
• Simon Says Stamp & Show "Texture" challenge


Wednesday, June 6, 2012

Rock & Roll Fairy!

When I first saw this stamp, Rockstar Eyes (Alex) from SCACD, I knew it would only be a matter of time til she joined my collection of fairy stamps.

So, when I finally broke down and purchased her, I colored her immediately using Copic markers. As I was finishing the coloring, I realized that one of my colors was getting streaky, so I refilled the marker, then cleaned out the refilling needle thingy with Blender Fluid. A tiny drop of fluid fell onto her cheek and left an unsightly blotch. Irritated, I put it aside for another day. I came back to it a week or so later and said to myself, "Self, why not try to fix her cheek?" So I started adding layers of color and guess what? It worked!!! Yes, her complexion is darker than I initially wanted and her blush a bit more pronounced, but I figured she's a semi-Goth chickie, so what the heck and added more blush, eye makeup, and dark lipstick! Woot!

So here's my card, which will likely be used as either a thank you or a birthday card.


In addition to that stamp, I also used an old Odd Bird Planet stamp for the sentiment, old Memory Box patterned paper, plus some newer Viola Memory Box patterned paper. I die cut the Memory Box/Poppystamps flourish twice and positioned them behind her to act as sort of wing extensions.

The ribbon started life as sheer ribbon with black flourishes, but I used B66 to color it a bit, so it would blend in better.

So there you have it.

Thanks for visiting today!

Monday, June 4, 2012

Skull Appreciation Day Blog Hop!

I've joined Smeared & Smudged's Skull Appreciation Day Blog Hop because I appreciate my skull. It holds my brain, eyeballs, mouth, nose, ears, and a bunch of other useful stuff. I also think skulls are really cool looking. I'm not trying to be "hip". I just like 'em.

Anyways, I was going to try to get two projects done, but the second one is in the junk heap at the moment.

I should mention that Smeared & Smudged is a really wonderful place for those who don't go for cute or whimsical and prefer their art a bit edgier. I should also mention that it's the home for Smeared Ink which has some pretty nifty stamps.

I should also mention that there are lots of prizes to be had, so you should definitely hop!

You should have gotten here from

Ms. Ruin's blog.


So, here's the first project in three views.

Front View:


Top & Front View:


Back View:


My project is a recycled Curad Bandaid Tin. First I sprayed the tin (and my hand) with silver spray paint. While I let it dry and destinkify, I went to work on the stampy parts.

The tin features the Alter Skull from the Bombshell's Alter Skull set. I colored it with Copic markers and then cut it out, the used my VersaMarker to ink up the skull portion, and heat emboss three layers of clear embossing powder. I need to buy that stuff in bulk. Hmmm. Is that's even possible? Anyone know?

Then I lost what I laughingly refer to as my mind (See where the helpful skull thing should have helped?) and used my Stamp-a-ma-jig and the Three Roses stamp from the Dead Necessities set to stamp and mask and stamp and mask and stamp and mask until I darn near passed out.

If that wasn't bad enough (should it be "were"?), I then colored all of those freaking roses and leaves with my Copics, using the same color combo I used for the Alter Skull That took a while. Then I decided it needed something else and I needed to eat up more time so I sprayed it with Pearl Pearls Embossing Mist. It took awhile to dry, but it got all shimmery, which is cool. I love shimmery things. I must've been a Magpie in a past life. I like Magpies. They're very handsome in their formal attire.

I also used the Head Stone Skeleton stamp (flying skull) from the Dead Necessities set, stamped it, colored it, and heat embossed it with three layers of clear embossing powder. I stacked onto three layers of cardstock and attached it over the ribbon "handle" that had been attached to the top of the tin using red liner tape. Love that stuff though that red liner is irritating as all get out.

I wrapped the dried shimmery stamped colored rose paper around the tin, adhered the Alter skull, and added some glittery skulls tape that I got for cheap at Michael's on November 1st.

Thanks for visiting. I might be back with my second project, but if I were you, I wouldn't hold my breath.

You're supposed to go to the Bombshell Stamps Blog next!


Here's the Blog Hop List in case you've gotten lost or want to go around again.

Terra

Tori

Black Dragon

Monique

Helen

Lady Brayton

Fiona

Christine

Jane

Judy

Alison

Susan

Andrea

Smudger Challenge

Laura

Lisa

Kristy

Steph

Glittery Katie

Lisa

Kapree

Ms. Ruin

Kathi

Bombshell Stamps Blog

Dianne

Donna

Nydia

Lady Coral

Suzi

Julia

Patti

Miko

Renee

Wendy

Christina

Hazel

Skye

Wenchkin

Betsy

Scrapbook Stamp Society


I shall enter this in the following challenge:
• Simon Says Stamp Challenge: "Anything Goes"

Saturday, June 2, 2012

Be Amazing

Pinwheel Pixie (MG-008-N) is one of the great new Steampunk stamps featured in Third Coast's Spring 2012 release. He can be found on page 44 of the new catalog supplement. Don't forget that all the new release stamps are on sale until June 10th!!!

Here's my card!


Pinwheel Pixie can be either a boy or a girl, depending on the sex of the recipient or your mood. Since I had chosen the papers I wanted to use, I decided to make him a boy. He was colored with Copic markers. I added darker dots to his blanket using a Stampin' Up piecing guide. The background was colored with Copic markers, then textured using Copic blending solution on a cheap terrycloth washcloth. Basically, you wet the cloth with the solution, then press the terrycloth to the area you want texturized. Different fabrics yield different results.

Anyway, I digress. After I was happy with the look, I added Glossy Accents to the watch parts and the goggle lenses and left it overnight to dry. Yes, it's true. I finally learned my lesson about Glossy Accents and patience.

The stamped piece was layered onto two different leather-look specialty papers from the late, lamented FiberMark. I also used one of them for the "watchband". I'm inordinately pleased with the "watchband" because Ms. Sewing-Impaired America (me) actually hand-sewed the stitches and:
(a) I didn't bleed all over the project.
(b) Whereas it's not perfect, it doesn't look like moose snot. (In case you were wondering, I don't actually know what moose snot looks like, but I'm sure it's disgusting.)
(c) Since I didn't have the right color thread (see my title), I colored white thread with BG02, which made me feel mad-clever. (The mad part of that is probably true).

You might ask how I achieved my lofty result. However, I'll save you from that and simply tell you. A while back, someone on Splitcoast said you could use EK Success' Piercing Bug thingies with either a Martha Stewart Score Board or a Score Pal. So, I duly went to AC Moore, used a 40% coupon, and bought them. I filed them away and forgot about them. Then while reorganizing, I found them and gave them a go on the Leather-Look paper. Voila. It worked. Woo-hoo!!! Three cheers. Huzzah! Huzzah! Huzzah!

The watch is a very old Heidi Swapp Chipboard Clock face. I colored the innard ring with Copics, though the color is a bit off. I pierced a hole in the center and added a watch gear, spinner (from Retro Cafe), and a rhinestone brad. I also used a buckle from an old broken watch, which is the only kind of watch I have. Thank heavens for cell phones. I use mine as a watch and an alarm clock.

Oops. Digressed again. Sigh. It ain't easy being me.

So, the patterned papers are by My Mind's Eye 6x6 pads. The plaid is from the Fine & Dandy Boy pad and the geary-circles (yellow) is from Lost & Found 2. I layered them together, put the layered piece inside a Timeworks Cuttlebug folder, which then took a ride through my Big Kick. When the ride was over, the piece got treated to a spongebath of Frayed Burlap Distress ink.

Since I had two gold accents, I decided that a third was needed. I found a thin gold sheet, die cut it, and added Wordworth Rub-ons to it. I thought "be Amazing" worked well as a sentiment for this card and/or for baby cards.

Thanks for visiting today!

I shall be entering this card in some challenges somewhere.
• Simon Says Stamp & Show: One for the Boys
• Simon Says Stamp Challenge: "Anything Goes"
• Craft Your Passion Challenge #112: For Babies
• Fairy Tale Challenge Blog: For Boys or Men
• Joyful Stamper: Inspire Me Fridays #61: "Anything Goes"