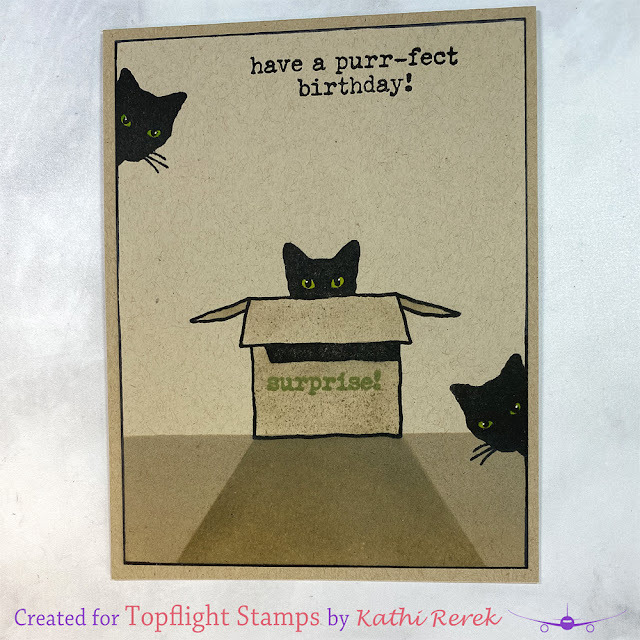
It's Tuesday, my day to share a project created for Topflight Stamps. This week is an "Anything Goes" theme for me and my teammates and I decided to make a CAS birthday card with the super-cute, super-versatile Purr-fect Birthday Clear Polymer Stamp Set by Visible Image.
Here it is!
Topflight Stamps Products Used:
Nocturne, Sand Dune, Portabello, Avocado, and Grass Green VersaFine Clair Inks by Imagine Crafts/Tsukineko
Other Products Used:
Desert Storm Classic Crest Cardstock by Neenah Papers
Kraft Cardstock by Bazzill Basics
Rough Stippling Tool, formerly known as the pouncy tool
Yellow Green and May Green Zig Clean Color Real Brush Markers by Kuretake
White Gelly Roll Gel Pen by Sakura of America
Post-It Notes by 3M
Low-Tack Tape
STAY-tion by Wendy Vecchi for Ranger Ink
Stamping Platform
Instructions:
- Create an A2 card from Kraft Cardstock by Bazzill Basics.
- Cut a piece of Desert Storm cardstock to 4" x 5.25" and place it on the base of a stamping platform and secure with magnets.
- Place a piece of low-tack tape horizontally across the cardstock panel about 1.5" from the bottom.
- Position the right facing cat stamp from the Purr-fect Birthday Clear Polymer Stamp Set facedown on the top left border and the cat-in-the-box stamp from the same stamp set on the tape in the center of the image panel.
- Press the platform's lid onto the back of the stamps. Lift the lid.
- Ink both stamps with Nocturne VersaFine Clair Ink and stamp the images. Re-ink and stamp again if necessary to attain a good impression.
- Remove the panel from the stamping platform and place it onto the STAY-tion.
- Re-position the low-tack tape so that it covers the stamped box.
- Use Premier Blending Tool to sponge Sand Dune VersaFine Clair Ink over the tape onto the bottom of the image panel.
- Place Post-It Notes on a diagonal from the bottom edges of the box to the bottom of the image panel.
- Use a second Premier Blending Tool to sponge Portabello VersaFine Clair Ink over the tape and Post-It Notes to create a shadow.
- Remove the tape and Post-It Notes and heat set the image panel.
- Place the image panel back onto the stamping platform and secure with magnets.
- Position the left-facing cat stamp from the Purr-fect Birthday stamp set facedown on the right border of the image panel as shown.
- Press the platform's lid onto the back of the stamps. Lift the lid.
- Ink the stamp with Nocturne VersaFine Clair Ink b and stamp. Re-ink and stamp again if necessary to attain a good impression.
- Position the "Surprise!" stamp facedown on the box on the image panel.
- Press the platform's lid onto the back of the stamps. Lift the lid.
- Ink the stamp with Avocado VersaFine Clair Ink and stamp.
- Lightly ink the stamp with Grass Green VersaFine Clair Ink and stamp to deepen the color a bit.
- Position the "purr-fect birthday" stamp facedown on the image panel as shown.
- Press the platform's lid onto the back of the stamps. Lift the lid.
- Ink the sentiment stamp with Nocturne VersaFine Clair Ink and stamp.
- Remove the panel from the stamping platform and thoroughtly heat set it.
- Use watercolor markers to color the cat's eyes.
- Use the white Gelly Roll pen to add highlights to the cats' eyes.
- Use a black marker to edge the image pane.
- Adhere the image panel to the reserved A2 Kraft card.
Thanks for visiting today!

No comments:
Post a Comment